
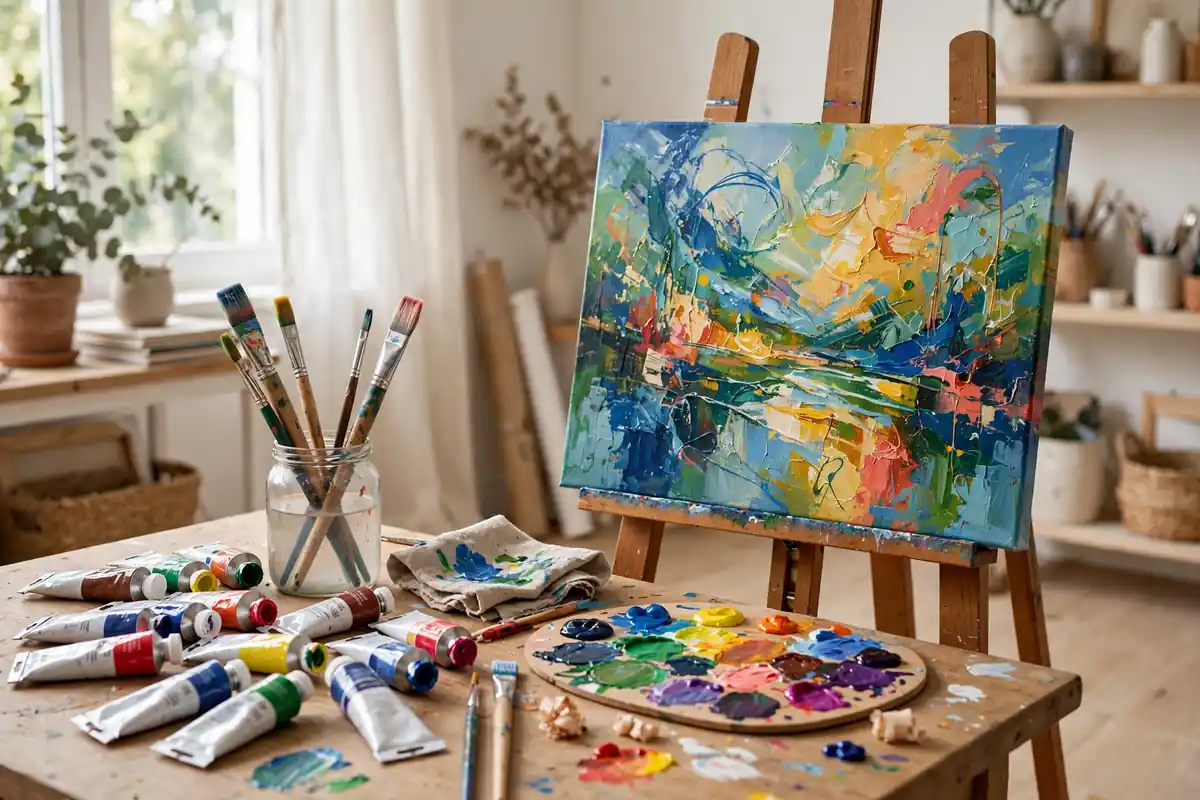
Acrylic paint is the most forgiving medium a beginner can pick up — and that is exactly why so many artists start here. It dries in minutes, cleans up with water, costs far less than oils, and lets you paint on almost anything: canvas, paper, wood, even old furniture. Yet walk into any craft store and you will face a wall of tubes, mediums, and brushes with no idea where to begin.
This guide cuts through the noise. You will learn the essential acrylic painting techniques every beginner needs, the small supply list that actually matters, and a step-by-step first painting that puts it all together. Whether you want to paint bold abstracts, realistic landscapes, or colorful gifts for friends, these are the skills everything else builds on.
Why Acrylics Are Perfect for Beginners
Before the techniques, it helps to understand what makes acrylics special. Acrylic paint is pigment suspended in a plastic polymer emulsion. When the water evaporates, the polymer forms a tough, flexible, waterproof film. That chemistry gives you superpowers other mediums do not:
- Speed: Thin layers dry in 5–15 minutes, so you can build a painting in a single session instead of waiting days between layers.
- Forgiveness: Made a mistake? Let it dry and paint right over it. Unlike watercolor, acrylics are fully opaque when you need them to be.
- Versatility: Thin them with water for watercolor-like washes, or use them thick straight from the tube for bold, textured strokes.
- Safety and cleanup: No solvents, no fumes — just soap and water. You can paint at the kitchen table.
The main trade-off is the fast drying time itself: paint can dry on your palette before you use it. A simple stay-wet palette (a sponge and special paper in a lidded tray) or even a light mist from a spray bottle solves this. Compared with oil painting techniques that beginners learn, acrylics trade the long blending window for speed and simplicity — a trade most new painters are happy to make.
Your Starter Kit: What to Buy (and What to Skip)
You need less than you think. Here is the honest starter list:
- Paints: A basic set of 8–12 colors, or just the primaries plus white: titanium white (get the large tube — you will use more white than anything), cadmium or naphthol red, cadmium yellow, ultramarine blue, and burnt umber. Heavy-body paints hold brushstrokes; student-grade soft-body paints are fine for learning washes.
- Brushes: A small set of synthetic flats and rounds (synthetic bristles handle acrylics better than natural hair). Sizes 4, 8, and 12 cover most needs, plus a 1-inch flat for backgrounds.
- Surfaces: Canvas boards or a pad of canvas paper are cheap and perfect for practice. Stretched canvases are nicer for finished pieces you want to hang.
- Palette: A disposable paper palette, a stay-wet palette, or even a white ceramic plate.
- Water jar and rags: One jar for rinsing, plus old t-shirts or paper towels.
- Spray bottle: A fine mist keeps paint workable and is essential for blending.
Skip the dozens of specialty mediums for now. You can explore gels, retarders, and texture pastes later — just as pottery beginners master clay before glazes, master the paint itself first.
10 Acrylic Painting Techniques Every Beginner Should Practice
1. Dry brush
Load a brush with thick, undiluted paint and wipe most of it off on a rag. Drag it lightly across the canvas so the paint catches only the texture. Dry brush creates broken, scratchy marks perfect for tree bark, grass, weathered wood, and sparkling highlights on water.
2. Wash (watercolor effect)
Thin acrylic with plenty of water and it behaves like watercolor — transparent and fluid. Washes are ideal for toning a canvas with a background color, painting skies, or building up subtle underpainting. Work on a horizontal surface so the wash does not run.
3. Stippling
Tap the tip of a stiff brush (or even an old toothbrush) against the canvas to create dots of color. Stippling builds texture gradually — foliage, sand, stone — and is very forgiving because there are no brushstrokes to get wrong. Flicking paint from a toothbrush with your thumb creates realistic starry skies and splatter effects.
4. Dabbing (sponging)
Use a natural sea sponge or crumpled paper towel to dab paint onto the surface. This creates organic, mottled textures that are almost impossible to achieve with a brush — perfect for clouds, foliage masses, and rocky terrain. Layer different colors for depth.
5. Palette knife painting
Spread paint with a palette knife instead of a brush for bold, thick, sculptural marks. Palette knife work looks impressively professional even for beginners because the tool does the expressive work for you. Try an entire small painting with just a knife — mountains, especially, look fantastic this way.
6. Glazing
Apply a thin, transparent layer of paint over a dry layer to shift its color or add luminous depth. Mix paint with glazing medium (or just water, for practice) and brush it thinly. Glazing is how you get glowing sunsets and rich shadows — it is one of the acrylic painting techniques that separates flat-looking beginner work from luminous finished pieces.
7. Wet-on-wet blending
Because acrylics dry fast, you must work quickly: lay two colors side by side and blend where they meet with a clean, slightly damp brush before either dries. Mist the canvas with your spray bottle to extend working time. This technique is essential for smooth skies and soft gradients.
8. Scumbling
Drag a thin, broken layer of light opaque paint over a dry darker layer using a dry brush. Scumbling creates atmospheric effects — mist, haze, glowing light — and is one of the fastest ways to add realism to landscapes.
9. Impasto
Apply paint thickly, straight from the tube, so it stands up in ridges that catch the light. Impasto gives paintings physical presence and energy. It uses a lot of paint, so practice on small studies — but few techniques are as satisfying, and thick abstract textures like the ones trending in American galleries rely heavily on it.
While acrylics provide a vibrant and versatile introduction to the world of painting, many artists eventually find themselves drawn to the delicate subtleties and unique characteristics of watercolor. This fluid medium offers its own set of challenges and rewards, allowing for breathtaking washes and intricate layering techniques that can elevate an artist’s skill set. For those who are eager to expand their artistic repertoire, exploring watercolor techniques for beginners can be an enlightening next step. Understanding how to manipulate water and pigment opens new avenues for expression and creativity, ultimately enriching the artistic journey and providing a fresh perspective on the fundamentals learned with acrylics.
10. Underpainting
Block in your whole composition in one or two muted colors before adding detail. Underpainting (often in burnt umber or a grey “grisaille”) establishes values — lights and darks — so your final colors sit on a solid foundation. Almost every professional painting you admire started this way, even if you cannot see it in the finished work.
Color Mixing Without the Mud
Beginner acrylic paintings often suffer from dull, chalky color. Three habits fix this:
- Mix fewer pigments: Every pigment you add greys the mixture down. Two or three pigments per mix is plenty.
- Keep white separate: Adding white to lighten a color also cools and chalks it. For clean tints, mix the color with a lighter version of itself first, then add white sparingly.
- Mix darks from complements: Instead of reaching for black (which deadens everything), mix ultramarine blue with burnt umber for rich, lively darks.
A limited palette also teaches you color relationships faster than owning fifty tubes. Many painters discover that studying basic color theory from graphic design improves their painting dramatically — the color wheel works the same on screen and canvas.
6 Beginner Mistakes (and Quick Fixes)
- Paint drying on the brush: Acrylics dry fast — rinse brushes frequently and never leave one sitting paint-side-up. Dried acrylic ruins brushes permanently.
- Over-blending into mud: Fiddling with a blend too long mixes everything into grey. Fix: make three confident strokes, then stop.
- Using black straight from the tube: It flattens paintings. Fix: mix your darks as described above.
- Painting too thin everywhere: Timid, watery layers look washed out. Fix: commit to opaque passages in your focal areas and save thin washes for backgrounds.
- No value plan: Jumping in without knowing where lights and darks go produces flat work. Fix: do a 5-minute pencil thumbnail first.
- Ignoring drying shifts: Acrylics dry slightly darker than they look wet. Fix: mix colors a touch lighter than your target.
Patience matters here as much as in any traditional craft — the slow, deliberate craftsmanship of handmade work applies to painting too. Rushing is the root of most beginner problems.
Step-by-Step: Your First Acrylic Landscape
This sunset-over-hills painting uses seven of the ten techniques and takes about an hour.
Step 1: Tone the canvas (5 minutes)
Mix burnt umber with water into a thin wash and cover the whole canvas. This warm underpainting unifies the final colors and eliminates the intimidation of a white canvas.
Step 2: Block in the sky (15 minutes)
While the tone is dry, mist the sky area lightly. Paint horizontal bands: deep orange at the horizon, pink above, purple-blue at the top. Blend where the bands meet with a clean damp brush before they dry — classic wet-on-wet blending. Dab a few clouds with a sponge.
Step 3: Distant and middle hills (15 minutes)
Paint the far hills in a muted purple-grey (glazing will come later). Once dry, glaze a thin transparent purple over them to push them back atmospherically. Paint nearer hills darker and warmer, using dry brush along the ridges for texture.
Step 4: Foreground and details (20 minutes)
Block in the foreground in dark green-brown. Stipple lighter greens and yellows over it for grass texture. Add a winding path with a flat brush, scumble a light haze where the path meets the hills, and finish with palette-knife highlights on the hilltops catching the sunset. Sign it — you have just completed a real acrylic painting.
Step 5: Varnish later (optional)
Let the painting cure for a few days, then apply a coat of acrylic varnish. Varnish evens out the sheen, deepens colors, and protects the work for decades.
What to Paint Next: Building a Practice Habit
After your first landscape, keep momentum with small, low-pressure studies: paint the same apple five different ways, copy a golden-hour photograph as a color study, or try painting your pet from a photo. Small canvas boards remove the fear of “wasting” a big canvas.
Compare traditional and digital approaches as you learn — starting digital art teaches composition and color in a medium where mistakes cost nothing, and those lessons transfer straight back to your acrylics. When you want to study how professionals handle paint texture and edges, visiting an art exhibition and standing inches from real canvases is worth a hundred tutorials.
Finished paintings deserve to be seen. Acrylics on stretched canvas need no frame — hanging your own work as bedroom wall art is incredibly satisfying, and a cluster of your progress pieces makes a personal focal point in a living room makeover. Many beginners are shocked at how quickly their walls fill up.
Conclusion: The Best Paint Is the One You Actually Use
Acrylic painting techniques are tools, not rules. Dry brush, washes, stippling, glazing, impasto — each one is simply a different way of moving paint around, and you now know ten of them. The painters who improve fastest are not the ones with the most expensive supplies; they are the ones who finish paintings, learn from each one, and start the next.
So squeeze out more paint than you think you need, keep that spray bottle handy, and paint something today. Your tenth painting will surprise you — but only if you paint the first nine.


