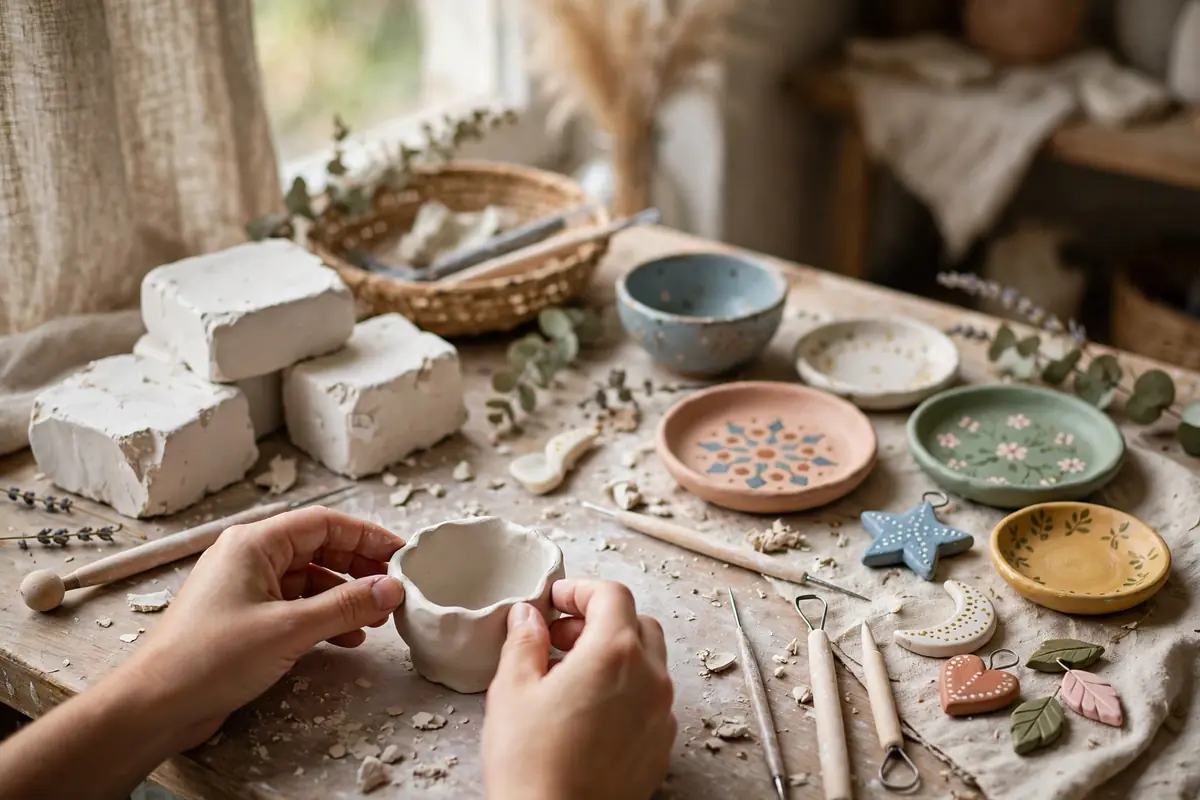
Air dry clay is the perfect craft for people who love pottery but do not own a kiln. It looks like real ceramic clay, shapes just as easily, and hardens on its own in the open air. No firing, no special oven, and no studio membership required. That is why air dry clay for beginners has become one of the most popular crafts in the United States, loved by families, gift makers, and home decorators alike.
This guide covers air dry clay for beginners from choosing the right clay to painting and sealing your finished pieces. You will learn how to make a pinch pot, a coil bowl, and a slab dish, how to avoid the cracks that frustrate beginners, and how to turn simple shapes into gifts and home decor you will actually use.
What Is Air Dry Clay and How Does It Work?
Air dry clay is a soft modeling material that hardens as water evaporates from it. Unlike polymer clay, which needs baking, or ceramic clay, which needs a kiln firing above 1,800 degrees Fahrenheit, air dry clay simply dries at room temperature over 24 to 72 hours. The result is lightweight, paintable, and surprisingly sturdy, though it is not waterproof unless sealed.
Several types are sold in American craft stores. Traditional air dry clay feels most like pottery clay and is best for bowls, dishes, and sculptural pieces. Paper-based air dry clay is lighter, softer, and easier for children, but it dries with a slightly rougher texture. Porcelain-style air dry clay dries smoother and whiter, making it ideal for jewelry and delicate ornaments. For your first project, choose a standard white or terracotta traditional clay, which is forgiving and paints beautifully.
Air dry clay connects naturally with other hands-on crafts. If you enjoy pottery for beginners, you will recognize the same hand-building techniques, and if you love texture, mixed media art for beginners offers ways to combine clay with paint, fabric, and found objects.
Air Dry Clay Supplies for Beginners
- A 2-pound block of white or terracotta air dry clay
- A smooth work surface, such as a silicone mat or a sheet of wax paper
- A rolling pin, a butter knife, and a few wooden modeling tools
- A small bowl of water and a sponge for smoothing
- Cookie cutters, texture stamps, leaves, or lace for patterns
- Acrylic paint, brushes, and a clear acrylic sealer for finishing
Keep a spray bottle nearby. Air dry clay dries as you work, especially in warm or dry American climates, and a light mist keeps it workable. But do not over-wet it. Too much water makes the clay sticky and weak, and it increases cracking as it dries. Damp hands and a damp sponge are usually enough.
Store unused clay properly. Wrap it tightly in plastic wrap, seal it in a zip-top bag with the air pressed out, and store it in a cool place. Clay left exposed overnight becomes a hard, unusable brick, so always rewrap it between sessions, even if you plan to return in an hour.
Three Basic Hand-Building Techniques
Pinch Pots
Roll a ball of clay about the size of a tennis ball. Push your thumb into the center, then pinch the walls gently between thumb and fingers, rotating as you go, until the walls are even and about a quarter inch thick. Pinch pots are the oldest pottery technique in the world, and they make charming small bowls, planters, and candle holders.
Coil Building
Roll clay into long, even snakes about as thick as your little finger. Coil them in a spiral, stacking each ring on the last, then smooth the inside and outside with a wet sponge for a seamless bowl, or leave the coils visible for a rustic look. Coil building lets you make taller pieces, such as vases and pencil cups, without a wheel.
Slab Building
Roll clay flat to about a quarter inch thick, then cut shapes with a knife or cookie cutter. Drape a slab over an upside-down bowl to form a dish, or cut and join slabs into boxes and trays. Slab building is the best technique for ornaments, coasters, and trinket dishes, because it gives you flat, even pieces that dry without warping.
Whichever technique you choose, score and slip your joins. Score means scratching crosshatch marks on both surfaces to be joined, and slip is a paste of clay and water brushed over the scratches. Press the pieces together firmly. Joins made without scoring and slipping are the most common reason handles and decorations fall off after drying.
How to Make Your First Air Dry Clay Bowl
Step 1: Shape the Bowl
Start with a pinch pot, then gently press it into a small bowl lined with plastic wrap to even out the shape. Smooth the rim with a wet finger, and add texture if you like by pressing a leaf, lace, or stamp into the outside while the clay is still soft.
Step 2: Dry It Slowly
Remove the bowl from its mold and set it on a wire rack or parchment paper. Turn it every few hours so air reaches all sides. Cover it loosely with plastic wrap for the first day if your home is very dry, because slow, even drying prevents cracks. Most small pieces dry in 24 to 48 hours, while thick pieces can take up to 72 hours.
Step 3: Sand, Paint, and Seal
Once completely dry, sand rough edges gently with fine sandpaper. Paint with acrylic paint in thin layers, letting each layer dry before adding the next. Finish with two or three coats of clear acrylic sealer, including the inside of the bowl if it will hold dry items. Sealed air dry clay is water-resistant, but it is still not food-safe or dishwasher-safe, so use your bowls for keys, jewelry, and dry snacks in a liner, not for soup or wet food.
Color inspiration helps enormously at the painting stage. Study color theory for beginners before choosing a palette, and look at botanical illustration for beginners if you want to paint realistic leaves and flowers onto your pieces.
Air Dry Clay Project Ideas for Your Home
Beyond bowls, air dry clay offers endless projects. Trinket dishes by the front door catch keys and coins. Leaf-pressed dishes make beautiful gifts. Clay ornaments, stamped with names or dates, become family Christmas traditions. Bead garlands, plant markers for the garden, incense holders, and ring dishes are all beginner-friendly.
For home decor, try a set of matching coasters, a textured vase cover for a glass jar, or a decorative wall hanging. Coordinate finished pieces with bedroom wall art ideas or living room makeover ideas to give your home a handmade, cohesive look. Small clay pieces also pair beautifully with macrame for beginners hangings and sewing for beginners projects in a craft room display.
How to Prevent Cracks in Air Dry Clay
Cracking is the number one beginner frustration, but it is almost always preventable. First, keep wall thickness even. A piece with thick and thin sections dries unevenly, and the thin parts pull away from the thick parts. Aim for a consistent quarter inch throughout.
Second, dry slowly. Direct sunlight, radiators, and hair dryers cause the outside to dry and shrink while the inside is still wet, which cracks the surface. Room temperature drying with good air circulation is best. Third, support your piece while it dries so it does not sag or flatten on one side. Finally, if small cracks do appear, fill them with a little slip made from the same clay, smooth with a wet finger, and let the piece dry again.
Air Dry Clay Frequently Asked Questions
Is air dry clay safe for children?
Yes, most air dry clays are non-toxic and excellent for children, though young children should be supervised, and finished pieces should not be used for food.
Can you waterproof air dry clay?
You can make it water-resistant with several coats of varnish or resin sealer, but it will never be fully waterproof like fired ceramic. Keep sealed pieces away from prolonged soaking.
How long does air dry clay take to dry?
Small, thin pieces dry in about 24 hours. Larger or thicker pieces take 48 to 72 hours. A piece is dry when it feels cool no longer, sounds hollow when tapped, and is uniformly light in color.
Can you bake air dry clay to speed drying?
Some brands tolerate a very low oven, but most manufacturers advise against it, because ovens cause cracking and can release fumes. Patience and air drying give the best results.
Conclusion: Your First Clay Piece Is Waiting
Air dry clay for beginners is proof that you do not need a studio to make pottery. You need a block of clay, a table, and an afternoon. Shape a pinch pot, dry it slowly, paint it in colors you love, and seal it. That simple sequence produces something useful, beautiful, and entirely yours.
From there, keep experimenting. Try coil vases, slab ornaments, and textured dishes, and combine your work with watercolor techniques for beginners for painted details, collage art for beginners for mixed-media displays, and sell art online if you want to sell your pieces at craft fairs or online. You can also explore resin art for beginners for glossy finishes and junk journal ideas to document your clay journey. Open the clay, roll up your sleeves, and start shaping today.