
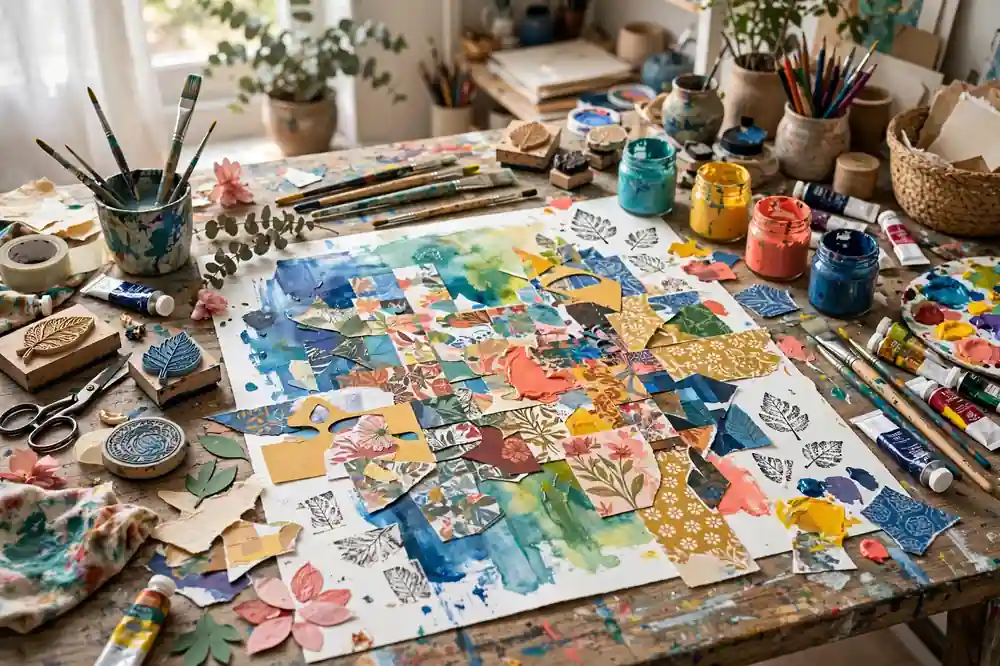
Mixed media art means combining two or more materials in one piece: paint with paper, ink with fabric, or pastel over a collage. It is one of the most forgiving ways to make art, because there is no single correct method and almost every accident can become a layer. Beginners love mixed media for exactly that reason. You do not need to master one medium before you start, and you can use supplies you already own, from old magazines to leftover paint.
That freedom can also feel overwhelming. With so many materials available, where do you begin, and how do you stop a piece from turning into a muddy mess? This guide answers both questions. You will learn a simple layering order, which material combinations work well together, and three beginner projects that teach the core skills. By the end, you will have a practical method for building rich, textured artwork one layer at a time.
What Counts as Mixed Media?
Any artwork that combines materials counts as mixed media. A watercolor painting with ink outlines qualifies. So does a canvas covered in acrylic paint, torn paper, and stitched thread. Even a sketchbook page with pencil, marker, and a pasted photograph is mixed media. The term describes the approach, not a specific style, which means your mixed media work can look realistic, abstract, or anything in between.
The appeal is creative freedom. If paint alone feels limiting, add paper texture. If a drawing feels flat, add a wash of color. Mixed media lets you solve problems by adding rather than erasing, which suits beginners who fear ruining a piece. Acrylic pour painting is a popular entry point, because poured paint creates beautiful backgrounds that you can draw or collage over once dry. Think of mixed media as cooking: you combine ingredients, taste as you go, and adjust until the result feels right.
Start With a Small, Sturdy Surface
Thin paper buckles under wet paint and glue, so start with heavy mixed media paper, watercolor paper, or a small canvas board. A size around nine by twelve inches is ideal: large enough to layer, small enough to finish in one sitting. Heavy paper handles paint, glue, and light collage without warping, and it forgives beginners who use more water than planned.
Prepare your surface with a thin coat of gesso if you use canvas board. Gesso gives paint something to grip and prevents paper collage from peeling. If you work in a sketchbook, choose one labeled for mixed media, since regular sketchbooks tear under wet media. Junk journal ideas offer a playful way to practice, because a journal page feels less precious than a canvas, and you can experiment freely without pressure to create a masterpiece.
Follow a Simple Layering Order
The golden rule of mixed media is to work from thin to thick and from background to foreground. Start with light washes and large shapes, then add paper collage, then draw or paint details on top. Wet layers must dry before you add dry media over them, or colors will smear. This order keeps your piece readable: the background stays behind, and the details stay crisp in front.
Limit yourself to three or four materials in your first pieces. A good starter combination is watercolor, ink, and torn paper. Watercolor sets the mood, paper adds texture, and ink defines the focal point. Watercolor techniques work well as a first layer, because washes dry fast and stay transparent enough for collage to show through. Gouache painting can add opaque highlights later, since it sits on top of other layers without disappearing.
Choose Materials That Play Well Together
Some combinations work beautifully, while others fight. Water-based materials like watercolor, gouache, and acrylic mix well together, especially when each layer dries fully. Oil-based materials, like oil pastels, resist water-based paint, which can be useful for resist effects but confusing for beginners. Ink over dry watercolor works well, but watercolor over wet ink smears. Test any new combination on scrap paper before using it on a real piece.
Adhesive matters too. A glue stick works for light paper, but heavier collage needs liquid gel medium, which dries clear and doubles as a sealant. Apply gel medium under and over collage pieces to lock them down. Resin art can seal a finished mixed media piece with a glass-like finish, though it suits advanced projects better than first attempts. Acrylic painting techniques are worth learning early, because acrylic mediums glue, seal, and texture your work in one versatile system.
Build Texture Without Clutter
Texture makes mixed media exciting, but too much texture in every area creates visual noise. Choose one or two textured areas as focal points, and keep the rest simpler. Torn paper edges, stenciled patterns, and stamped marks all add interest, but they compete if used everywhere. Squint at your piece: the focal point should still stand out. If everything shouts, nothing is heard. Leave breathing room, and let one strong texture carry each section.
Three Beginner Projects to Try
First, make a layered landscape. Paint a simple watercolor sky, tear colored paper for hills, and draw a tree in ink on top. This project teaches the full layering order in under an hour. Second, create an abstract color study. Cover a page with acrylic paint, scratch lines into the wet paint with a palette knife, and press textured objects like bubble wrap or leaves into it. You learn how materials interact without worrying about drawing anything recognizable.
Third, try a portrait collage. Draw a simple face outline, fill the skin with torn magazine paper in warm tones, and add ink details for eyes and hair. Collage portraits forgive proportion mistakes, because the paper shapes carry the image. Pastel drawing can soften collage edges afterward, since pastels blend paper boundaries into smooth transitions. Origami paper also makes excellent collage material, because its patterns and colors are designed to be decorative.
Keep Colors From Turning Muddy
Muddy color is the most common mixed media problem. It happens when too many wet colors mix on the surface, especially complementary colors like red and green. Prevent it by letting layers dry fully between color applications, and by limiting each area to two or three colors. Use a separate brush for each color family, and clean your water often. Dirty water dulls every color it touches.
Another trick is to keep one color dominant in each section. If a section is mostly blue, small touches of orange will pop without turning the whole area brown. Embroidery stitches can add clean color accents on top of paint, since thread color stays pure and never mixes with the paint below. When a section does turn muddy, cover it with collage paper or opaque gouache rather than adding more wet paint, which only deepens the problem.
Set Up a Workspace That Invites Experiment
Mixed media gets messy, and a good setup keeps the mess enjoyable instead of stressful. Cover your table with old newspaper or a plastic sheet, and keep a jar of clean water plus a rag within reach. Arrange your materials where you can see them: paints on one side, papers in the middle, and drawing tools on the other. When supplies are visible, you use them. When they are buried in a drawer, you forget they exist, and your piece ends up using only one medium.
Work standing up if you can, or at least keep your paper flat rather than tilted on an easel. Wet layers pool and drip on a tilted surface, which ruins collage edges. Keep finished layers safe by placing a sheet of wax paper over your work when you store it flat. Label your paint tubes and mediums, because acrylic medium and gesso look identical in unmarked bottles. A tidy workspace sounds boring, but it is what lets you focus on ideas instead of hunting for a brush mid-layer.
Keep a small notebook beside your workspace for ideas and material tests. Swatch new paints, note which glue held best, and sketch layout ideas before committing to a final piece. This habit saves time and money, because you test combinations on scrap paper instead of ruining a nearly finished artwork. Over weeks, the notebook becomes a personal reference guide, showing exactly which materials and layering orders give you the results you love most.
Finish, Seal, and Display Your Work
A finished mixed media piece needs protection, especially if it contains paper collage. Once everything is fully dry, brush a thin coat of clear gel medium or spray varnish over the surface. Work in a ventilated area, and apply two thin coats rather than one thick coat, which can trap bubbles. Sealing also unifies the surface, so matte paper and glossy paint sit together more comfortably.
Photograph your work in natural light before sealing, since varnish can add glare. Selling art online starts with good photographs, and mixed media pieces photograph best near a window with soft, indirect light. Seeing mixed media work at an exhibition can also inspire your next piece, because seeing it in person reveals textures that photographs hide. Mixed media rewards curiosity, so keep experimenting with new combinations, and let each piece teach you something for the next one.


