
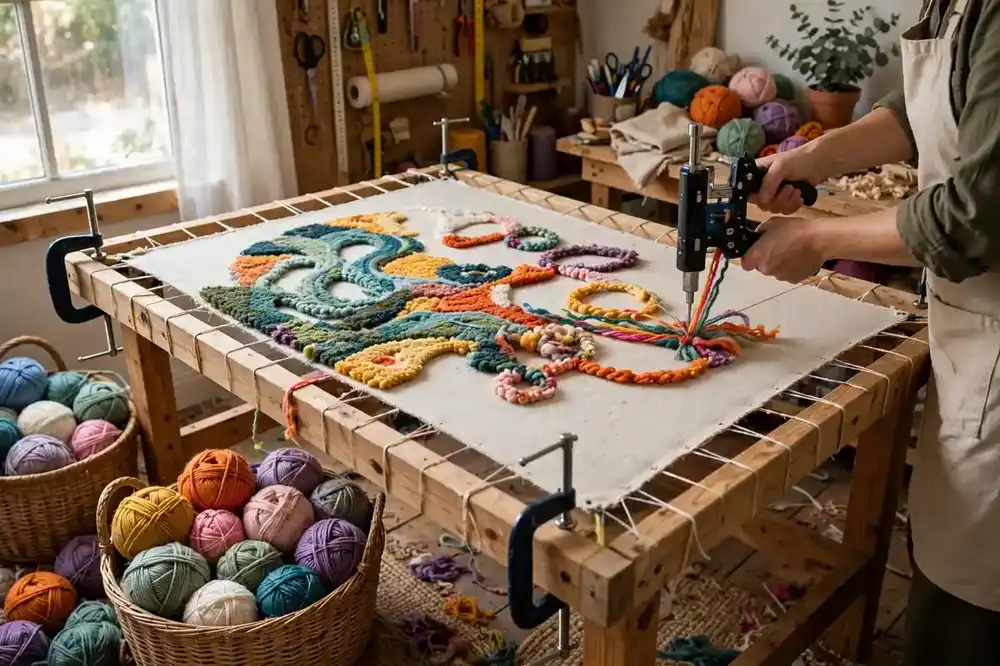
Scroll through social media in the USA today and you will see them everywhere: thick, fluffy, handmade rugs in bold shapes, wavy mirrors framed in yarn, and colorful wall hangings that look straight out of a design studio. Most of them are made with rug tufting, a craft that has exploded in popularity over the past few years. Rug tufting for beginners is more approachable than it looks. With a tufting gun, a frame, some yarn, and a little practice, you can create a soft, custom rug in a single weekend.
Tufting sits somewhere between textile art and woodworking, and that mix is part of its charm. It is fast, tactile, and forgiving, and the results look far more professional than the effort suggests. In this guide, you will learn what rug tufting is, which tools and materials you need, how to set up your frame, the step-by-step process for your first rug, and the finishing techniques that turn a tufted piece into something you can actually walk on or hang with pride.
What Is Rug Tufting for Beginners?
Rug tufting is the process of punching yarn through a backing cloth stretched tightly on a frame, using either a handheld tufting gun or a manual punch needle. The gun drives yarn through the cloth and leaves loops or cut pile on the front side, building up a soft, textured surface row by row. Unlike traditional rug weaving, which requires a loom and slow, careful weaving, tufting works quickly: a small rug can take just a few hours of active tufting once your frame is ready.
There are two main pile types. Loop pile leaves the yarn in loops, creating a firm, textured surface that works well for high-traffic rugs. Cut pile trims those loops open, giving the soft, plush feel most people picture when they think of a cozy rug. Most beginner tufting guns can do both, and many crafters start with cut pile because it is easier to shape and shear into clean designs. If you already enjoy textile crafts like macrame for beginners, you will recognize the same satisfaction of watching a soft, handmade piece grow under your hands.
Rug Tufting Tools and Materials You Need
The essential tool is a tufting gun, and this is where beginners should spend their money wisely. Entry-level electric tufting guns are widely available in the USA and usually include both cut and loop settings. You will also need a sturdy wooden frame, backing cloth, yarn, and finishing supplies. A frame can be built from lumber at home or bought ready-made, but it must hold the cloth drum-tight, because loose cloth causes uneven pile and skipped stitches.
Choosing Yarn and Backing Cloth
Most tufters use acrylic or wool yarn. Acrylic yarn is affordable, comes in endless colors, and is perfect for learning, since mistakes cost very little. Wool yarn feels more luxurious and wears better over time, but it costs more, so save it for a second project. For backing cloth, use primary tufting cloth or monk’s cloth with a clear grid, and stretch it evenly across the frame with a staple gun. Uneven tension is the number one cause of patchy results, so take your time on this step. A basic understanding of color theory for beginners will also help you choose color combinations that look intentional rather than random.
Safety Gear and Workspace Setup
A tufting gun is a power tool, so treat it with respect. Always keep your free hand behind the frame, never in front of the gun’s path, and unplug the gun when threading or adjusting it. Wear safety glasses, especially when trimming pile, since tiny yarn fibers fly everywhere. Work in a space you can vacuum easily, and cover the floor under your frame, because tufting creates a surprising amount of fluff. Good lighting matters too: you need to see your design lines clearly as you trace them on the cloth.
How to Make Your First Tufted Rug Step by Step
Start by drawing your design on the back of the backing cloth with a marker. Beginners should choose a simple, bold design with large shapes: a rainbow arch, a flower, a smiley face, or an abstract blob. Fine details and thin lines are hard to tuft cleanly, so save those for later projects. Flip the frame so you work from the back, since the pile forms on the opposite side of the cloth from where the gun enters.
Step 1: Thread the Gun and Test on Scrap Cloth
Thread your yarn through the gun following the manufacturer’s diagram, and test on a scrap piece of cloth stretched on your frame. Practice straight lines first, then curves, keeping a steady speed and even pressure against the cloth. If the gun skips or the yarn pulls out, the cloth may be too loose, the yarn feed may be tangled, or you may be moving too fast. A few practice rows will teach you the rhythm faster than any video, so do not skip this step.
Step 2: Tuft Your Design Section by Section
Work one color at a time, filling each shape completely before moving to the next. Hold the gun flat against the cloth and move slowly along your drawn lines, overlapping rows slightly so no backing shows through. For clean edges, tuft slightly past the outline of each shape, since trimming later will sharpen the borders. If you make a mistake, simply pull the yarn out from the back and redo the section. This forgiveness is one reason tufting is so beginner-friendly compared with crafts like watercolor techniques for beginners, where a wrong stroke is much harder to undo.
Step 3: Apply Backing and Finish the Rug
Once tufting is complete, brush a layer of latex rug adhesive over the back to lock every yarn loop in place, and let it dry fully for at least a day. Then glue a non-slip backing fabric over the adhesive and trim the edges neatly. Flip the rug over and shear the front with electric shears or sharp scissors, leveling the pile and carving crisp lines between colors. Shearing is the most satisfying part of the whole process, because a fuzzy, rough piece suddenly transforms into a clean, professional-looking rug.
Common Rug Tufting Mistakes Beginners Should Avoid
The most common mistake is working with loose cloth, which causes the gun to jam and the pile to vary in height. Always re-tighten the cloth before starting, and check the tension again after each color change. Another mistake is using the wrong yarn weight: very thin yarn slips out easily, while very thick yarn can jam a beginner gun. Medium-weight acrylic yarn, often labeled worsted weight in American craft stores, is the safest starting point.
Beginners also tend to rush the finishing stage, but finishing is what separates a rug that lasts from one that sheds and falls apart. Let the adhesive dry completely, use enough glue to coat every loop, and do not skip the backing fabric if the rug will sit on a hard floor. If you plan to hang your piece as wall art instead, the same display ideas behind bedroom wall art ideas can help you mount it securely and show off its texture in the best light.
Rug Tufting Project Ideas and Costs in the USA
A beginner setup in the USA typically costs between 150 and 300 dollars, including the gun, frame materials, cloth, yarn, and adhesive. That sounds like a lot, but one gun and frame can produce dozens of rugs, and handmade tufted rugs sell for 100 dollars or more at craft markets. Popular first projects include small bathroom rugs, wavy wall hangings, mug rugs, and pet-shaped mats. Many American crafters start with gifts for friends, then move on to custom orders once their shearing skills improve.
Tufting also pairs beautifully with other art forms. The bold shapes and bright colors of tufted pieces echo the energy of modern abstract art trends, and many tufters sketch their designs first using skills from landscape painting for beginners or collage art for beginners to plan their compositions. If you ever want to sell your rugs, learning how to sell art online will help you photograph the texture properly, since texture is what buyers pay for.
Planning Your Rug Design Before You Tuft
Good planning saves more time than any tool. Before you stretch your cloth, sketch your design on paper at full size and decide exactly where each color will go. Bold shapes with at least two inches of width tuft cleanly, while thin lines and tiny details often blur into the surrounding pile. If you want text on a rug, use block letters at least three inches tall so the yarn can form each letter clearly. Trace your final sketch onto the backing cloth with a thick marker, and double-check that the design reads correctly from the back, since tufting mirrors the image. A few minutes of planning here prevents hours of pulling yarn out and redoing sections later.
Conclusion: Start Tufting Your First Rug This Weekend
Rug tufting for beginners is fast, fun, and far less intimidating than it appears on video. Build or buy a sturdy frame, stretch your cloth tight, practice on scrap fabric, and start with a simple, bold design. Work color by color, finish with adhesive and backing, and shear carefully to reveal the clean design underneath. Your first rug may not be perfect, but it will be soft, colorful, and unmistakably yours. Keep exploring with acrylic pour painting, mixed media art for beginners, junk journal ideas, and visiting an art exhibition to keep your handmade home full of new ideas.


