
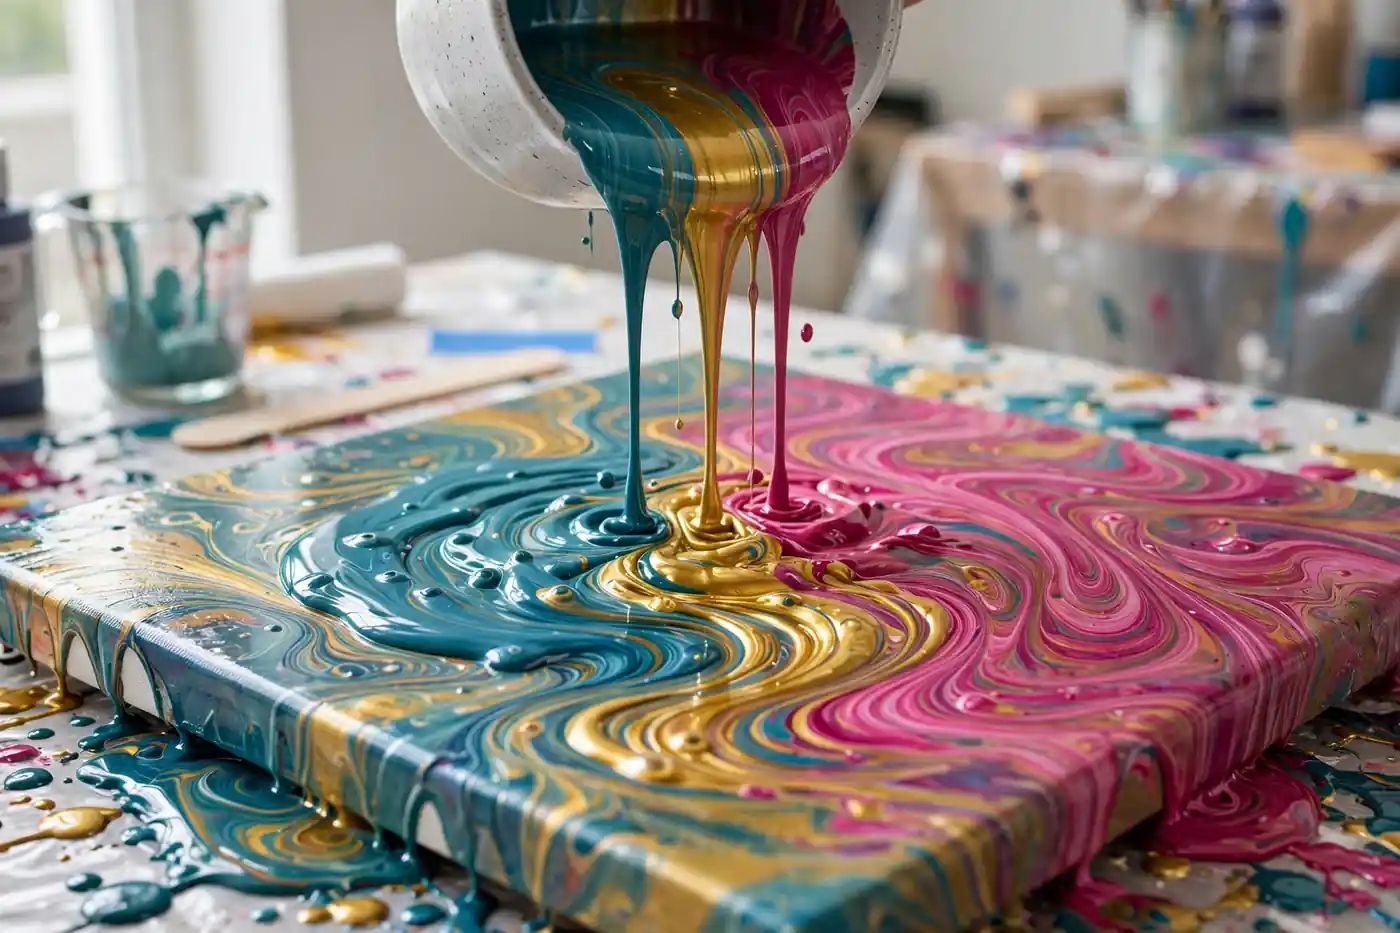
Acrylic pour painting looks like magic. Swirls of color flow across a canvas, blending into marble-like patterns, cells, and lacing that no brush could ever create. It is one of the most satisfying art forms a beginner can try, because the paint does most of the creative work for you. If you have ever watched a pour video online and felt the urge to try it, this complete guide to acrylic pour painting will take you from your first cup of paint to gallery-worthy fluid art.
Pour painting, also called fluid art, has exploded in popularity across the United States because it is accessible, affordable, and endlessly surprising. You do not need drawing skills or years of practice. You need the right paint consistency, a few simple techniques, and the willingness to let go of control. Let us dive into everything you need to know.
What Is Acrylic Pour Painting?
Acrylic pour painting is a technique where fluid acrylic paint is poured onto a canvas or panel and tilted to create abstract designs. Instead of applying paint with a brush, you mix acrylic paint with a pouring medium that thins it to a honey-like consistency, then pour, drip, or flip it onto your surface. Gravity and the movement of your hands create the artwork.
The magic ingredient is the pouring medium. Plain acrylic paint is too thick to flow beautifully, and paint thinned with only water becomes weak and cracks as it dries. A pouring medium keeps the paint’s color intensity and flexibility while giving it the perfect flowing consistency. This one supply makes the difference between muddy, cracked results and the glossy, vibrant pours you see from experienced artists.
Acrylic Pour Painting Supplies: What You Actually Need
You can start acrylic pour painting with a surprisingly short shopping list. Here is the essential kit:
Acrylic paints. Student-grade acrylics work fine for beginners. Choose 4 to 6 colors that look good together; a classic starter palette is a dark color, a light color, a metallic gold or copper, and two accent colors. Avoid mixing too many colors in one pour, because they blend into brown.
Pouring medium. This is non-negotiable. Liquitex Pouring Medium and Floetrol are the two most popular options in the US. Floetrol is a paint conditioner from the hardware store that many pour artists swear by because it is affordable and creates beautiful cells.
Canvases or panels. Start with small canvases, 8×10 inches, so you use less paint while learning. Stretched canvases work, but rigid wood panels are better because they do not sag under the weight of wet paint.
Cups, stir sticks, and gloves. Plastic cups for mixing each color, wooden sticks for stirring, and nitrile gloves to keep your hands clean. A plastic tablecloth or drop cloth protects your workspace, because pour painting is gloriously messy.
Optional: silicone oil and a torch. A few drops of silicone oil in your paint create cells, those fascinating circular patterns. A quick pass with a kitchen torch pops air bubbles and helps cells form. Both are fun upgrades once you master the basics. If you enjoy experimental techniques like these, you will also love the glossy surprises of resin art for beginners, which shares the same spirit of controlled chaos.
How to Mix Paint for Acrylic Pour Painting
Getting the consistency right is the most important skill in acrylic pour painting. The classic ratio is roughly 1 part paint to 2 to 3 parts pouring medium, but the real test is visual: lift your stir stick and let the paint drizzle back into the cup. It should flow in a smooth, continuous stream, like warm honey. If it drops in blobs, it is too thick. If it runs like water, it is too thin.
Mix each color in its own cup, stirring slowly to avoid creating bubbles. Let the cups sit for a few minutes so any bubbles rise and pop. Many beginners rush this step and end up with pinholes in their dried painting. Patience at the mixing stage pays off in the final result. Test your colors on a scrap piece first; colors look different wet than dry, and acrylics typically dry slightly darker.
The Dirty Pour: The Easiest Acrylic Pour Painting Technique
The dirty pour is where every beginner should start. Layer your mixed colors one on top of another in a single cup, pouring each new color right into the center of the last. Do not stir. Flip the cup upside down onto your canvas, lift it, and watch the paint spread. Then tilt the canvas slowly in each direction, letting the paint flow and cover the surface.
The beauty of the dirty pour is its unpredictability. The layered colors stretch and marble as they flow, creating ribbons and blends you could never plan. Tilt gently; aggressive tilting muddies the colors together. When the canvas is covered and you love what you see, stop. Knowing when to stop is a genuine skill in pour painting, because the paint keeps moving for a while after you set the canvas down.
The Flip Cup Technique
The flip cup is a variation of the dirty pour that creates a dramatic bloom of color. After layering your colors in the cup, place your canvas face-down on top of the cup, hold them together firmly, and flip the whole thing over. Lift the cup slowly and the paint releases in a perfect circle. Then tilt to spread it. This technique gives you more control over where the color lands and often produces stunning radial patterns.
The Puddle Pour and Swipe
In a puddle pour, you pour separate puddles of each color directly onto the canvas, then tilt to blend them where they meet. This gives you more control over the composition than a dirty pour. The swipe technique takes it further: after pouring your puddles, drag a damp paper towel or palette knife lightly across the surface. The swipe stretches the colors into spectacular cells and lacing, especially when silicone oil is involved. These flowing, organic results share DNA with the modern abstract art trends dominating American galleries right now.
Creating Cells in Acrylic Pour Painting
Cells are the round, cellular patterns that make pour paintings so mesmerizing. They form when paints of different densities interact, and you can encourage them with a few techniques. Adding 2 to 3 drops of silicone oil per cup of paint is the most reliable method; the oil resists the water-based paint and pushes through it in round formations.
A kitchen torch passed quickly over the surface, held 6 to 8 inches away and kept moving, pops surface bubbles and activates cell formation. Never hold the flame still, and always work in a ventilated space. Some artists also get cells without any additives by layering a dense metallic paint over lighter colors. Experiment with each method and photograph your results, because the variables are endless and your notes become your personal recipe book.
Drying and Finishing Your Pour Painting
Pour paintings need to dry flat and level, or the paint will slide to one side. Place your canvas on cups or blocks so air circulates underneath, and cover it loosely with a cardboard box to keep dust off. Drying takes 24 to 72 hours depending on thickness and humidity. Resist the urge to touch it; fingerprints in wet pour paint are permanent.
Once fully cured, usually after 2 to 3 weeks, seal your painting with a varnish or resin coat. A glossy varnish makes the colors pop and protects the surface. Many artists finish their best pours with a glass-like epoxy finish that deepens every swirl. Finished pour paintings make stunning home decor, and you will find endless display inspiration in these living room makeover ideas and bedroom wall art ideas.
Common Acrylic Pour Painting Mistakes to Avoid
Paint too thick or too thin. Consistency is everything. Do the honey-drizzle test with every single cup before you pour.
Too many colors. More than 5 or 6 colors in one pour usually blend into mud. Limit your palette and let each color shine.
Over-tilting. Every tilt blends the colors further. Tilt just enough to cover the canvas, then stop and let the paint settle.
Uneven drying surface. A canvas that is not level will send all your beautiful cells sliding to one edge. Use a spirit level before you pour.
Touching it too soon. Wet pour paint looks dry long before it is. Wait the full drying time before varnishing or framing. These patience lessons apply to every painting medium, from watercolor techniques to oil painting techniques and the broader acrylic painting techniques every beginner should know.
Taking Your Acrylic Pour Painting Further
Once you master the basic pours, a whole world of fluid art opens up. Try the Dutch pour, where you blow the paint across the canvas with a hair dryer or your own breath through a straw, creating wispy, feathered designs. Try pouring over textured surfaces, or combine pouring with traditional brushwork by adding details once the pour is dry.
Many pour artists develop signature styles by experimenting with unusual tools: combs dragged through wet paint, string pulled through puddles, or balloons pressed onto the surface. Document everything, because your best accidents become your techniques. The fluid art community is wonderfully generous online, so share your work and learn from others. For a dose of inspiration about where your art journey can go, read our guide to visiting art exhibitions, and if you want to generate concept palettes digitally first, learn how to use Midjourney for color inspiration. Fellow makers exploring other hands-on crafts will also enjoy our pottery for beginners guide.
Conclusion: Let the Paint Do the Talking
Acrylic pour painting is proof that you do not need to be a trained artist to create something beautiful. Mix your paints to the right consistency, choose a technique, and let gravity and chemistry create art with you. Every pour is a surprise, and that surprise is the whole point.
Start with a dirty pour this weekend. Protect your table, mix your colors, and flip that cup. Your first pour might be messy, and that is perfect. The second one will be better, and by your tenth, you will have pieces worth hanging. The paint is waiting. Go pour.


