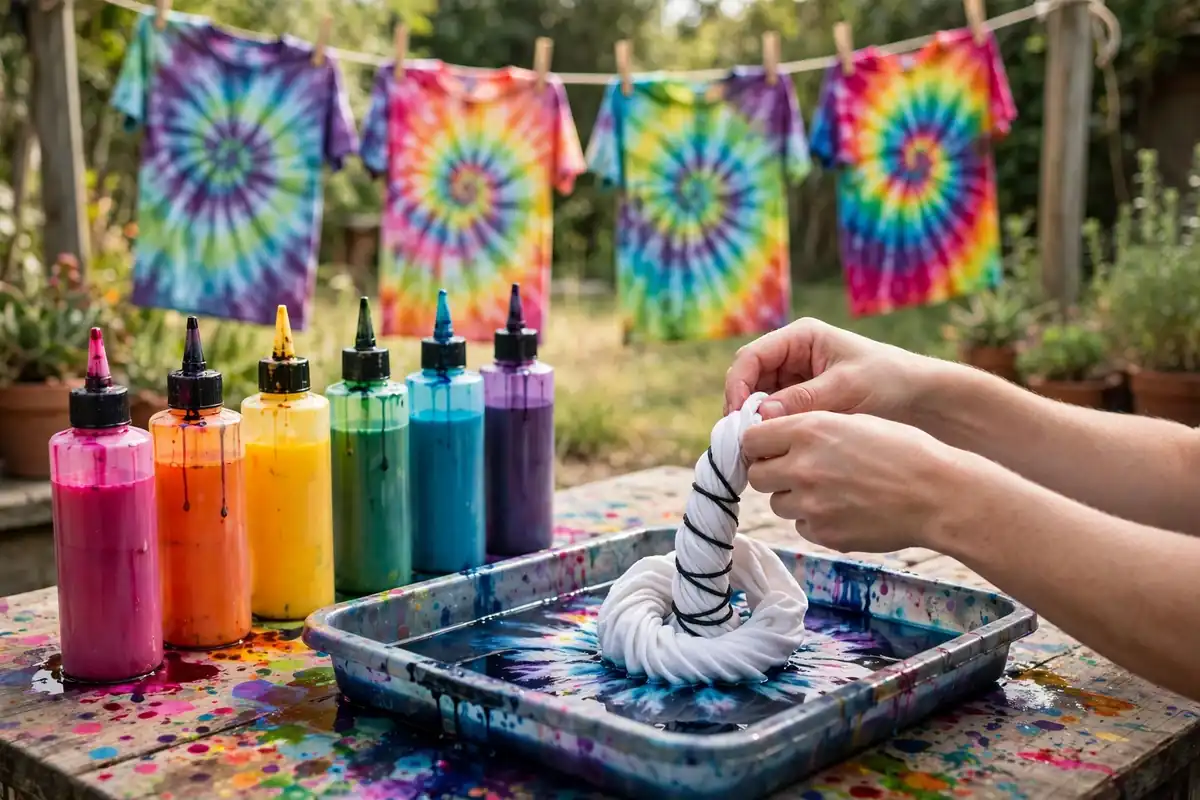
Tie dye never really went away, but in the United States it has come roaring back. From music festivals in California to craft nights in Ohio living rooms, tie dye for beginners is one of the most searched and most shared crafts in the country. The appeal is easy to understand. You start with a plain white shirt, add a little color and a few rubber bands, and you end up with something nobody else owns. This guide walks you through tie dye for beginners step by step, so your first project looks bright, bold, and wash-proof instead of muddy and faded.
Best of all, tie dye is forgiving. Unlike painting, where one wrong stroke can ruin a canvas, tie dye rewards happy accidents. Even so, a few simple choices make the difference between a shirt you love and a shirt that ends up at the back of the drawer. Follow the steps below and you will get strong color, crisp patterns, and results that survive the washing machine.
What Is Tie Dye and Why Does It Work So Well?
Tie dye is a resist-dyeing technique. You fold, twist, or bind fabric so that dye cannot reach some areas, while other areas soak up color. When you unfold the fabric, the bound areas stay white and the dyed areas reveal a pattern. The classic spiral, the bullseye, the stripes, and the crumple pattern all come from different ways of folding and binding.
The science is simple. Most tie dye kits in the United States use fiber-reactive dyes, which form a permanent chemical bond with cotton fibers. That bond is why good tie dye stays bright through dozens of washes, while cheap fabric paint simply sits on the surface and fades. If you want long-lasting results, always dye natural fibers such as 100 percent cotton, rayon, or hemp. Polyester blends resist dye and produce pale, disappointing color, so check the label before you begin.
Tie dye also connects beautifully with other crafts. If you enjoy shibori dyeing, you will recognize the same folding and resist ideas, and if you love bold color, our guide to color theory for beginners will help you pick combinations that pop instead of clashing.
Tie Dye Supplies You Need for Your First Project
You do not need a professional studio. A basic kit and a few household items are enough. Gather everything before you start, because once your hands are covered in dye, you will not want to hunt for supplies.
- One 100 percent cotton T-shirt, pre-washed without fabric softener
- A tie dye kit with fiber-reactive dye, or separate dye bottles and soda ash
- Rubber bands, string, and a few plastic zip ties
- Plastic squeeze bottles, gloves, and an apron or old clothes
- Plastic wrap, zip-top bags, and a plastic-covered work surface
- A bucket, a measuring cup, and old towels for cleanup
Pre-washing matters more than most beginners realize. New shirts carry a factory finish that blocks dye. Wash your shirt in hot water with a small amount of detergent, skip the softener, and dry it before dyeing. Then soak it in a soda ash solution for about 20 minutes. Soda ash raises the pH of the fabric and helps the dye bond permanently. Most kits include soda ash, and you can find it in the laundry aisle of many American grocery stores.
How to Tie Dye Step by Step
Step 1: Choose Your Pattern
Start with the spiral, the most forgiving pattern for a first project. Lay your damp shirt flat, pinch the center, and twist it into a tight flat spiral, like a cinnamon roll. Keep twisting until the whole shirt forms a round bundle, then secure it with three or four rubber bands crossing over the center. The bands divide the bundle into wedge-shaped sections, and each section gets its own color.
For a bullseye, pinch the center of the shirt and pull it upward into a cone, then wrap rubber bands at intervals down the cone. For stripes, accordion-fold the shirt into a long strip and band it at intervals. For a crumple pattern, simply scrunch the shirt into a ball and wrap it loosely with bands. Each method creates a different look, so try one pattern per shirt until you learn how they behave.
Step 2: Apply the Dye
Put on gloves and work on a plastic-covered surface outdoors or in a sink. Apply dye generously to each section, using a different color for each wedge of your spiral. Push the dye into the folds with the squeeze bottle tip, because dye that only sits on the surface will wash out pale. Flip the bundle and dye the back in the same pattern, matching colors to the front as closely as you can.
Less is not more here. Beginners often under-dye, and the result is a washed-out shirt with white patches that look accidental rather than intentional. Saturate the fabric until dye pools slightly on the surface. If you are using three colors, keep them in the same color family or use a simple triad, such as turquoise, fuchsia, and yellow. Opposites on the color wheel, such as red and green, can turn brown where they meet, so leave a little white space between strong opposites.
Step 3: Let the Dye Set
Wrap the dyed bundle tightly in plastic wrap or seal it in a zip-top bag, then leave it somewhere warm for 6 to 8 hours, or overnight for the brightest color. Do not rush this step. The chemical bond between dye and cotton needs time and warmth, and cutting it short is the most common reason beginners get faded results. A warm garage in summer is ideal, but a sunny windowsill works too.
Step 4: Rinse and Wash
Keeping your gloves on, remove the bands and rinse the shirt under cold running water until the water runs mostly clear. Then wash it alone in the washing machine on cold with a small amount of detergent. Dry it, and admire your work. For the first few washes, wash tie-dyed items separately or with similar colors, because a little extra dye may still release.
Five Classic Tie Dye Patterns to Try Next
Once you have mastered the spiral, branch out. The heart pattern, made by folding the shirt in half and drawing half a heart before binding, is a favorite for gifts. The sunburst uses small pinched points tied with bands to create star shapes. The striped ombre effect comes from dipping sections of a shirt into progressively darker dye baths. The ice dye method, where you cover a scrunched shirt with ice and sprinkle powdered dye on top, creates soft watercolor-like blends that are hugely popular on social media.
Each pattern teaches you something new about how dye moves through fabric. That understanding transfers directly to other textile crafts, from botanical illustration color mixing to the layered washes in watercolor techniques for beginners. Keep a photo log of every project, noting the pattern, colors, and setting time, so you can repeat your favorites.
Common Tie Dye Mistakes and How to Fix Them
Muddy colors usually come from mixing too many dyes in one spot, or from using polyester-blend shirts. Faded color usually means the dye did not set long enough, or the shirt was not pre-washed. White patches that look wrong often mean the bundle was bound too tightly, so dye could not reach the fabric inside.
If a shirt comes out too dark, you can lighten it slightly with a diluted bleach soak, but work carefully and outdoors, because bleach damages cotton quickly. If a shirt comes out too pale, you can re-dye it once it is dry, using a darker color over the first result. Tie dye is one of the few crafts where a second attempt often looks better than the first, so do not throw a disappointing shirt away.
Safety matters too. Always wear gloves, protect your work surface, and keep dye away from children and pets until the project is rinsed. Fiber-reactive dye is safe on finished fabric, but the powder should never be inhaled or eaten. Store dye bottles upright, labeled, and out of reach of small children.
Tie Dye Project Ideas Beyond T-Shirts
Once you are confident, try dyeing socks, tote bags, pillowcases, tapestries, and even plain cotton curtains. Tie-dyed tapestries make striking wall art, and you can pair them with ideas from bedroom wall art ideas to refresh a room on a budget. Tie-dyed tote bags make excellent gifts, and a set of matching dyed napkins can transform a summer table.
Tie dye also sells well. Many American makers turn their hobby into a small side business through craft fairs and online shops. If that interests you, read our guide to sell art online before listing your first item, and think about photographing your work in natural light for the best results.
Tie Dye Frequently Asked Questions
How long should tie dye sit before rinsing?
At least 6 to 8 hours, and overnight is better. Longer setting time means brighter, longer-lasting color, especially with fiber-reactive dyes on cotton.
Can you tie dye without soda ash?
You can, but colors will be paler and fade faster. Soda ash is inexpensive and makes a dramatic difference, so it is worth using on every project.
Does tie dye work on colored shirts?
Yes, but the results are unpredictable, because the new dye mixes with the existing color. For predictable results, start with white or very light shirts.
How do you keep tie dye from fading?
Use fiber-reactive dye, let it set fully, wash in cold water, and avoid harsh detergents and hot dryers. Cold washes preserve color far longer than hot ones.
Conclusion: Your First Tie Dye Project Starts Today
Tie dye for beginners is all about three things: natural fabric, enough dye, and enough patience. Pre-wash your shirt, soak it in soda ash, bind a simple spiral, saturate it with color, and let it set overnight. Do that, and your first shirt will look like it came from a boutique rather than a first attempt.
From there, the craft opens up quickly. Try new patterns, experiment with ice dye, dye a tote bag for a friend, or combine your skills with mixed media art for beginners, collage art for beginners, and sewing for beginners to create pieces that are entirely your own. You can also explore macrame for beginners for matching home decor, acrylic pour painting for more color play, and junk journal ideas to document your dyeing journey. So grab a white shirt, pick your colors, and start twisting. Your brightest project is one afternoon away.