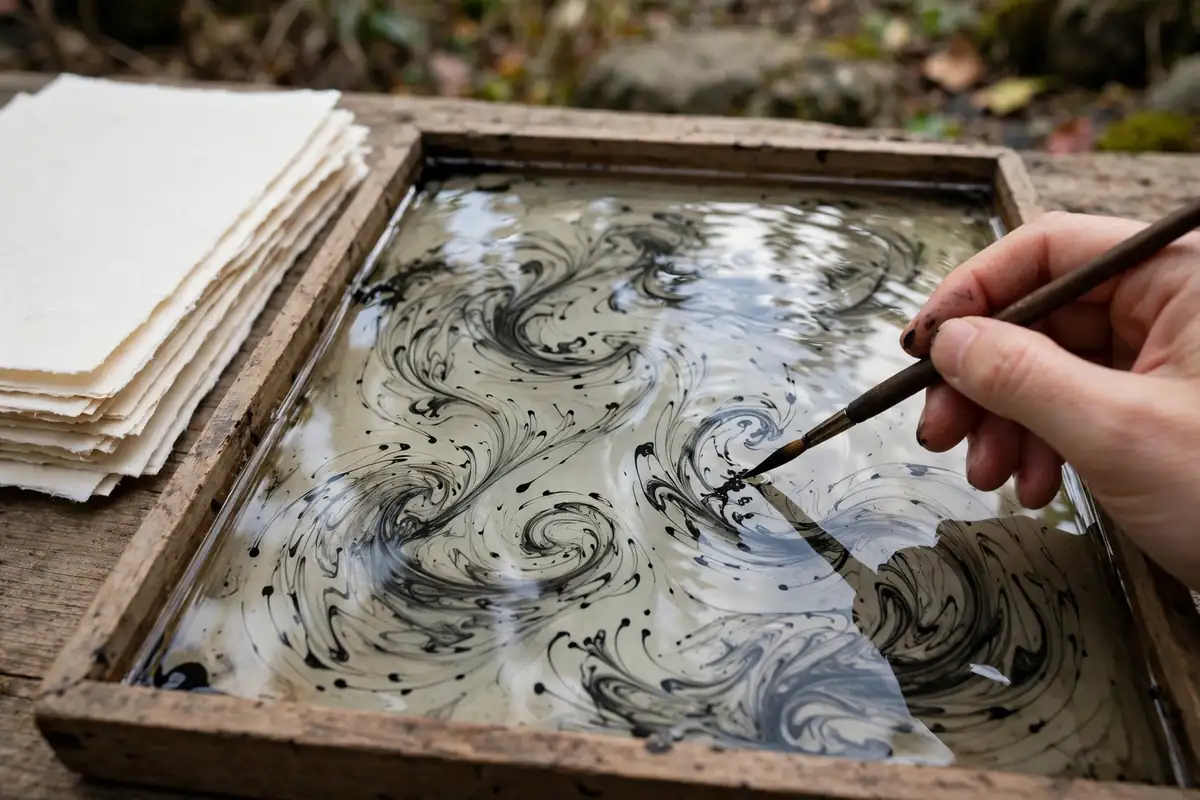
Suminagashi marbling art begins with a still tray of water, a drop of ink, and a breath of air. The ink blooms across the surface in delicate rings and veins, like smoke frozen on water. Then a sheet of paper is laid gently on top, lifting the pattern off the water in a single, magical moment. No two prints are ever alike, and that unpredictability is exactly why artists have practiced suminagashi for nearly a thousand years.
Suminagashi, which means “floating ink” in Japanese, is one of the oldest forms of marbling in the world. It traveled from Japan to Turkey, Europe, and eventually to the United States, where it now thrives among paper artists, bookbinders, and crafters. Modern makers use suminagashi prints for stationery, book covers, wall art, and gift wrap, and the basic technique is simple enough for a beginner to try in a single afternoon.
This guide introduces suminagashi marbling art for beginners. You will learn what it is, how it differs from other marbling styles, what supplies you need, and how to create your first prints step by step. You will also find tips for controlling patterns, fixing common problems, and using your finished papers in beautiful projects.
What Is Suminagashi Marbling?
Suminagashi is a paper marbling technique in which ink is floated on the surface of water and transferred to paper. Unlike Western marbling, which often uses thickened water and combs to create elaborate patterns, traditional suminagashi uses plain water and relies on the natural spread of ink, guided by a breath, a fan, or the touch of a brush. The results are organic and flowing: concentric rings, wispy veins, and soft, cloud-like shapes that resemble marble stone, water currents, or smoke.
The word suminagashi combines “sumi,” meaning ink, and “nagashi,” meaning floating. Traditionally, artists used sumi ink, made from soot and glue, diluted in water. Today, beginners can use sumi ink, acrylic ink, or specialized marbling inks. Each ink behaves slightly differently on water, so part of the fun is experimenting to find the look you love. For artists who enjoy fluid, unpredictable media, alcohol ink art offers a similar thrill of color that moves on its own.
Suminagashi differs from other marbling in its simplicity and its philosophy. There is no combing, no thickening agent, and very little control, which makes it meditative rather than technical. The artist sets conditions, drops the ink, guides it gently, and accepts what the water gives. That surrender to chance is part of the tradition, and it makes every print feel like a small discovery.
Suminagashi Supplies for Beginners
- A shallow tray: A baking pan, photo tray, or shallow container larger than your paper works well. White or light-colored trays make it easier to see the ink.
- Sumi ink or acrylic ink: Start with black sumi ink for classic prints, then add one or two colors once you understand how ink spreads.
- Paper: Absorbent, uncoated paper works best. Rice paper, kozo paper, and lightweight watercolor paper are all good choices.
- Brushes: A small brush for dropping ink and a larger, soft brush for lifting prints. Bamboo brushes are traditional and inexpensive.
- A surfactant: A tiny drop of dish soap or ox gall, diluted in water, helps ink spread in rings. Use very little; a toothpick tip is enough.
- Water: Plain tap water at room temperature is fine. Fill the tray about an inch deep.
- Drying space: A clothesline, drying rack, or clean flat surface where wet prints can dry without sticking.
You do not need an expensive kit to start. A baking pan, a bottle of sumi ink, and a pack of rice paper will carry you through your first dozen prints. If you enjoy paper crafts, you may already know origami for beginners, and suminagashi prints make stunning paper for folding, card making, and book covers.
How to Create Suminagashi Prints Step by Step
Step 1: Set Up Your Tray
Fill your tray with about an inch of room-temperature water and let it settle completely still. Any movement in the water will distort your pattern, so work on a stable table away from drafts and foot traffic. Place your paper, brushes, ink, and surfactant within easy reach, since marbling moves quickly once the ink hits the water.
Step 2: Drop the First Ink
Dip your brush in ink and hold it just above the water. Let a single drop fall into the center of the tray. Watch it spread into a ring. Add a second drop in the center of the first ring, and a third inside that. Each drop pushes the previous rings outward, creating the classic concentric pattern. Alternate ink and a tiny touch of surfactant to make rings spread wider and thinner.
Step 3: Guide the Pattern
Now shape the rings. Blow gently across the surface to push ink into waves, or touch the surface lightly with a clean brush tip to draw veins through the rings. A soft fan creates ripples, while a single slow breath makes soft, smoky curves. Work quickly but calmly: ink keeps spreading, and the pattern changes every second. When the design looks pleasing, stop. Overworking the water usually muddies the pattern rather than improving it.
Step 4: Lay the Paper and Lift the Print
Hold your paper by opposite corners and bow it slightly downward in the center. Lower the center onto the water first, then let the sides fall gently outward. This rolling motion prevents air bubbles, which leave blank spots. Let the paper rest on the water for a few seconds, then lift it by two corners and hold it over the tray to drip. Lay it flat or hang it to dry. The print will look slightly softer when dry, so judge colors after drying, not while wet.
Controlling Your Suminagashi Patterns
Beginners often ask how much control is possible in suminagashi. The honest answer is: some, but never total. You can influence the result in several ways. More surfactant makes rings spread thinner and wider. Less ink makes delicate, pale patterns, while more ink makes bold, dark ones. Dropping ink in one spot creates rings; dropping in several spots creates overlapping circles. Blowing hard creates dramatic waves, while blowing softly makes gentle curves.
Color choice also shapes the mood of a print. Black on white paper gives a classic, elegant look suited to framing and stationery. Adding one accent color, such as indigo or crimson, creates depth without chaos. Beginners should limit themselves to two or three colors until they understand how each ink spreads, since too many colors can turn muddy. The same restraint applies in watercolor techniques for beginners, where a limited palette often produces cleaner paintings.
Keep a notebook of what you try: how many drops, how much surfactant, which inks, and what happened. Suminagashi rewards observation. After ten prints, you will start to predict how a drop will behave, and after fifty, you will develop a personal style that is recognizably yours.
Common Suminagashi Problems and Fixes
- Ink sinking instead of floating: The ink may be too thick. Dilute it slightly with water and try again.
- Rings not spreading: Add a tiny touch more surfactant, or try a different ink, since some inks spread more readily than others.
- Blank spots on the print: Air bubbles were trapped under the paper. Lower the paper center-first, slowly, next time.
- Muddy colors: Too many inks or too much handling. Limit colors and stop guiding the pattern sooner.
- Paper tearing when wet: The paper is too thin or was left on the water too long. Use slightly heavier paper and lift promptly.
- Prints fading when dry: Some inks lighten as they dry. Use a little more ink, or choose lightfast inks for work you plan to frame.
Do not throw away imperfect prints. A print with a blank corner can be trimmed into a smaller piece, used as a card front, or layered in a collage. In fact, some of the most interesting collage art for beginners projects begin with marbled offcuts that were too beautiful to waste.
Beautiful Ways to Use Suminagashi Prints
Once you have a stack of dried prints, the possibilities open up. Frame a favorite print in a simple white frame for instant wall art. Fold prints into envelopes, book covers, or greeting cards. Cut them into strips for bookmarks, or use them as drawer liners and gift wrap. Bookbinders prize suminagashi endpapers, and a handmade journal covered in your own marbled paper makes a thoughtful gift.
Suminagashi also pairs beautifully with other art forms. A marbled background can sit behind calligraphy for beginners lettering, turning a simple quote into a work of art. A print can become the sky in a mixed-media landscape, or the water in a botanical illustration for beginners composition. Because every print is unique, anything you make with it is automatically one of a kind.
Conclusion: Let the Water Paint
Suminagashi marbling art reminds us that creativity does not always mean control. Sometimes the most beautiful results come from setting up the right conditions and then stepping back to let the materials speak. A tray of water, a few drops of ink, and a sheet of paper are enough to create something no one has ever seen before, and no one will ever see again.
Start with black ink and white paper, and make ten prints without judging them. Notice how the ink moves, how your breath shapes it, and how each lift feels like opening a gift. Then add color, try larger paper, and share your favorites with friends. For more fluid and paper-based art, explore resin art for beginners, mandala art for beginners, urban sketching for beginners, color theory for beginners, sketching for beginners, embroidery stitches for beginners, and paint by numbers.