
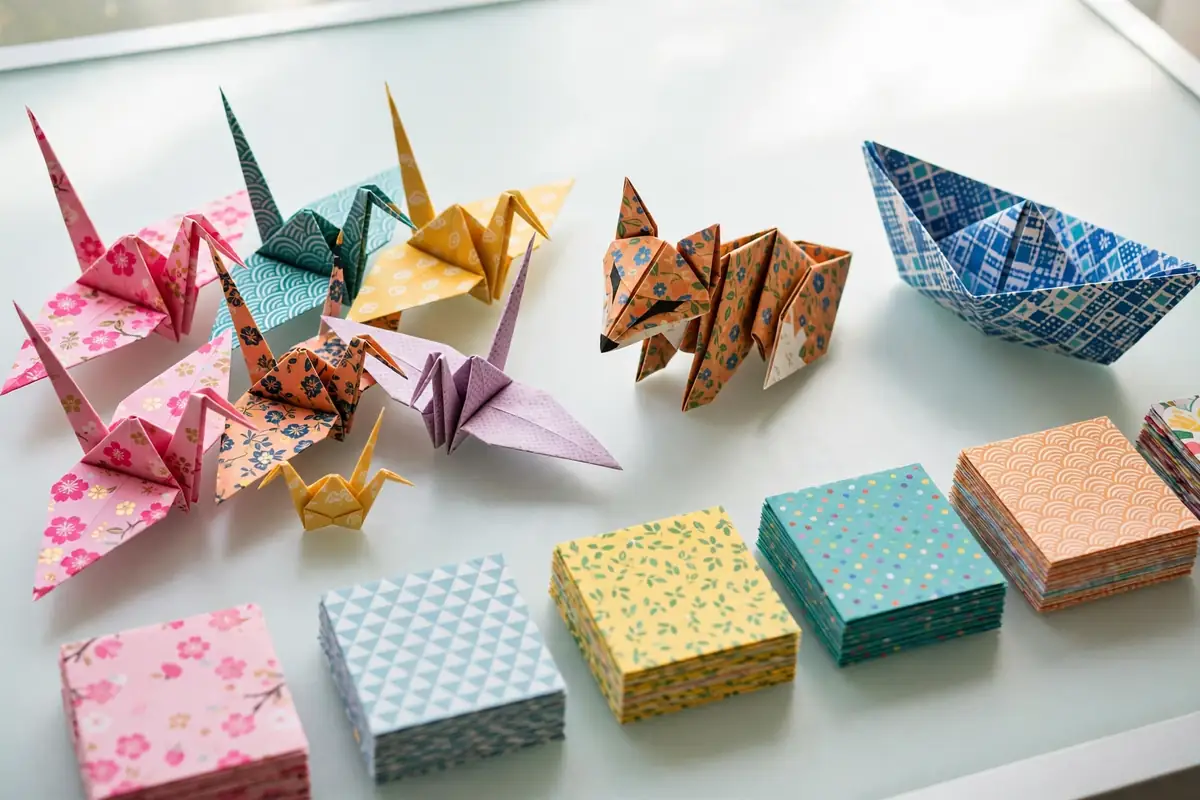
Origami for beginners is one of the friendliest introductions to making art with your hands. All you need is a single square sheet of paper, and within minutes you can hold a crane, a boat, or a jumping frog that you created from nothing. No glue, no scissors, no expensive supplies: just folds.
Origami comes from Japan, where paper folding has been practiced for centuries as both an art form and a meditation. Today it is loved worldwide by kids learning focus, adults seeking a calming hobby, and artists who sculpt entire exhibitions from folded paper.
This guide teaches you the paper to buy, the basic folds every model uses, and five easy models in the right learning order. By the end, you will fold with confidence and know exactly how to keep improving.
Choosing the Right Origami Paper
Standard origami paper, called kami, is thin, crisp, and colored on one side and white on the other. It usually comes in 6 by 6 inch squares, which is the perfect size for beginners: large enough to fold comfortably, small enough to stay manageable.
Avoid printer paper for your first models. It is thick, rectangular, and tears at sharp creases, which makes learning frustrating. Foil-backed paper and fancy washi are beautiful, but save them until your basic folds feel automatic.
Start with an inexpensive variety pack. You will fold a lot of imperfect models in week one, and cheap paper removes the fear of wasting a sheet. That same low-pressure mindset helps in every paper craft, including the projects in our junk journal ideas collection.
The Six Basic Folds You Must Know
Nearly every origami model in the world is built from two foundation folds. The valley fold bends paper toward you, like a valley between hills. The mountain fold bends paper away from you, like a mountain ridge. Master these two, and diagrams suddenly become easy to read.
Next come four simple combinations. The reverse fold tucks a point inside the model, creating heads, beaks, and tails. The squash fold opens a pocket and flattens it into a new shape. The petal fold lifts a point upward using a squash, and the rabbit-ear fold pinches both sides of a point together.
Practice each fold on scrap paper before starting a real model. Crisp, accurate creases are the whole secret of origami, just as precise pen control underpins our calligraphy for beginners guide: small accuracy, repeated, becomes beautiful results.
Understanding Origami Bases
A base is a standard starting shape that many models share. The waterbomb base, a triangular form, leads to boats and balloons. The preliminary base, a smaller square shape, leads to the famous crane. The kite base, the fish base, and the frog base each open their own families of models.
Learning bases is like learning chord shapes on a guitar. Memorize four or five, and hundreds of models become accessible, because you already know the first third of each diagram by heart.
Fold each base slowly ten times. Speed will come on its own later; accuracy must be trained first.
Model 1: The Classic Paper Boat
The boat is the traditional first model, because it teaches symmetry and the waterbomb-style opening move. Start with a rectangle for this one model only, fold it in half, and bring the top corners to the center to form a house shape.
Fold the loose flaps up on both sides, open the shape into a diamond, and repeat the flap folds. Then gently pull the two outer points apart, and the boat opens like magic. Flatten the base so it sits proudly on the table.
If your boat leans, check that your center creases lined up exactly. Boats forgive small errors, which is exactly why teachers start with them.
Model 2: The Jumping Frog
Children adore this model, and adults secretly do too. The frog uses a rectangle of card stock, several waterbomb folds, and clever leg folds. Press its back, and it hops across the desk.
The frog teaches an important lesson: paper choice matters. Thin kami folds beautifully but makes a frog too light to jump well, so switch to heavier paper once you know the sequence.
Keep a bowl of finished frogs as desk decor, or gift them. Handmade paper pieces carry the same charm as the stitched projects in our embroidery stitches for beginners guide: small, personal, and quietly impressive.
Model 3: The Paper Crane
The crane is the icon of origami, symbolizing peace and good luck. It begins from the preliminary base, moves through petal folds, and finishes with reverse folds for the head and tail. It looks complex, yet it is only about twenty steps.
Fold your first crane slowly with a video or diagram beside you, and expect it to look a little lopsided. Your fifth crane will look elegant. Your twentieth will take four minutes.
Cranes make wonderful decorations: string them into garlands, hang them from a mobile, or arrange them on a shelf. Many folders display them alongside framed prints, using the placement ideas from our bedroom wall art ideas guide to build a gallery corner.
Model 4: The Easy Fox Face
If the crane still feels ambitious, fold a fox face instead. This model takes six folds from a single square: fold a triangle, fold the ears down, flip it over, and draw on the face. It is the perfect first model for young children.
Simple models like this build confidence fast. Success in five minutes motivates beginners far better than a heroic three-hour project that ends in a crumpled ball.
Try a whole family of foxes in different paper patterns. Patterned paper transforms identical folds into distinct characters, a principle that block printers also exploit, as shown in our linocut printing for beginners tutorial.
Model 5: The Tulip and Stem
The origami tulip introduces gentle shaping, because you softly inflate and round the flower head instead of leaving every fold flat. Paired with a simple folded stem and leaf, it makes a bouquet that never wilts.
Paper flowers are popular for weddings, classrooms, and spring decor across the United States. A dozen tulips in pastel paper costs almost nothing and photographs beautifully.
Once paper crafts click, many beginners branch out into other hands-on arts. If shaping with your fingers feels satisfying, you will probably love the beginner projects in our pottery for beginners guide, where flat slabs become real vessels.
Tips for Clean, Professional-Looking Folds
First, always fold on a hard, flat surface, never in your hands. Second, run a fingernail or a bone folder along each crease to sharpen it. Third, align edges and corners before you crease, not after; a fold is nearly impossible to unmake cleanly.
Work in good light, and rotate the model rather than reaching awkwardly across it. Also, slow down at the final steps of any model, because that is where rushed folders lose accuracy.
Photograph your best models to track progress. A quick phone snap of each week’s favorite fold builds a motivating timeline; our phone photography tips will help those little paper sculptures look as good in photos as they do on your desk.
Where Origami Can Take You
Origami grows with you. Intermediate folders tackle modular geometric balls built from thirty identical units, while advanced artists design their own insects, dragons, and human figures. Engineers even use origami mathematics to design folding solar panels and medical devices.
Origami also shines in exhibitions, where giant folded installations fill gallery spaces. If you ever visit a paper art show, the visitor advice in our art exhibition first-timer’s guide will help you appreciate the technique behind the spectacle.
And yes, skilled folders sell their work: wedding decor, nursery mobiles, and custom cranes all find buyers. If that path interests you later, our guide on how to sell art online covers the storefronts and pricing basics that paper artists use too.
Common Beginner Origami Mistakes
The most common mistake is using paper that is too thick or too large. Oversized sheets feel easier but produce floppy, imprecise models. Stick with standard 6-inch kami until your folds are sharp.
Another mistake is skipping the base practice and jumping straight to a complex dragon. Every torn sheet that follows teaches the same lesson: bases first, glory later.
Finally, many beginners crease too softly at the beginning and too hard at the end. Reverse that: firm creases early create the structure, and gentle handling late protects the finished shape. For a second relaxing medium to alternate with folding days, the pour methods in our resin art for beginners guide offer the same meditative, step-by-step satisfaction.
Conclusion
Origami for beginners asks for almost nothing: a square of paper, a flat table, and a little patience. Learn the valley and mountain folds, practice the classic bases, and work through the boat, frog, crane, fox, and tulip in order.
Fold your first boat today, even if it sails a little crooked. A week from now, a paper crane will sit on your desk, and you will understand how something so simple became something so beautiful: one careful fold at a time.


