
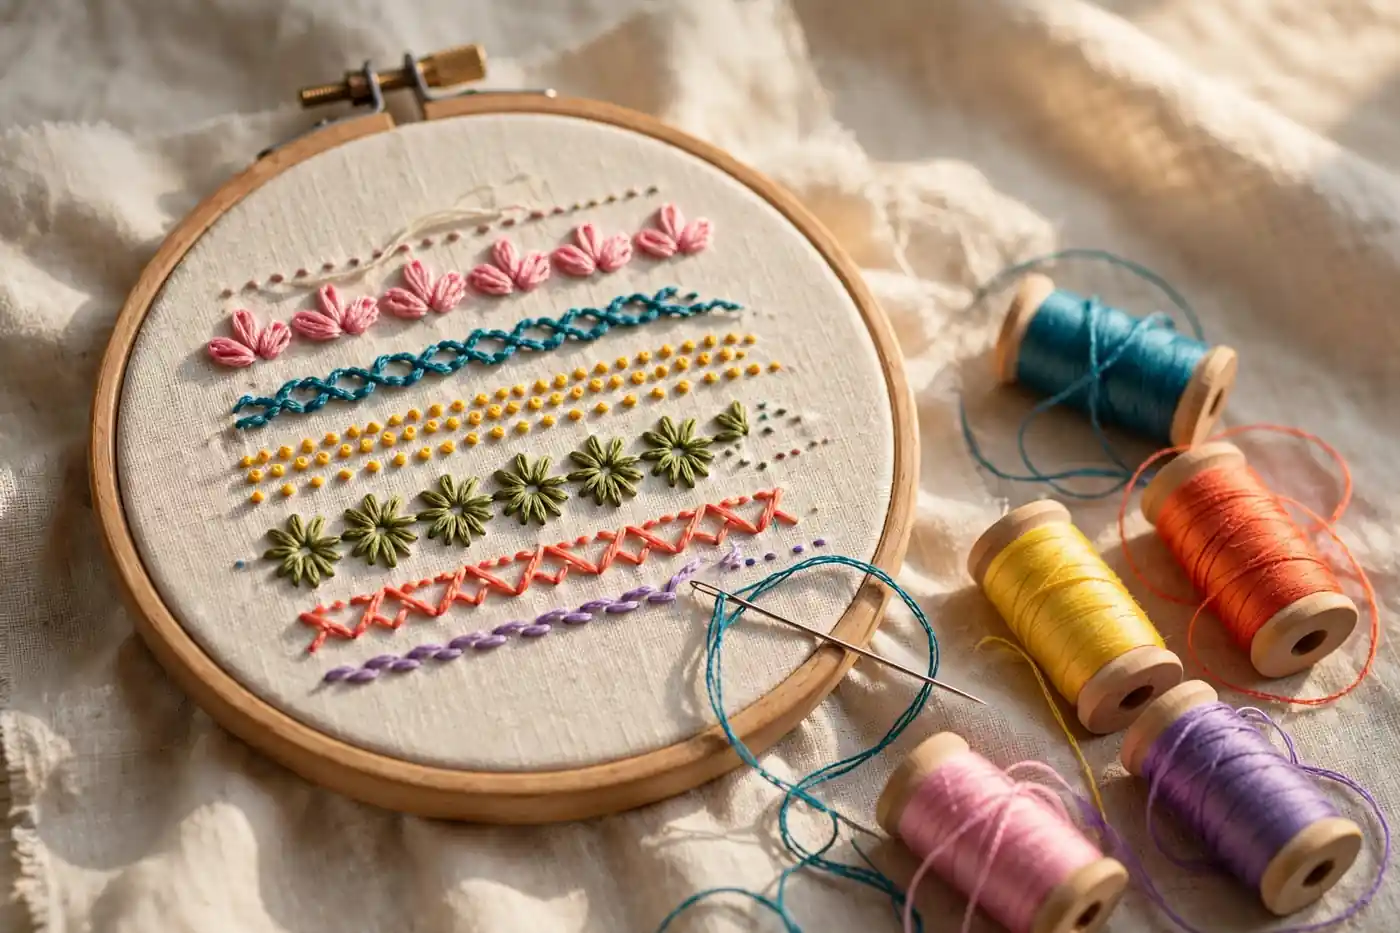
Hand embroidery is one of the oldest art forms in the world, and right now it is also one of the trendiest. As Americans trade screen time for analog hobbies, searches for embroidery, visible mending, and stitching have surged. There is something deeply satisfying about pulling a needle through fabric and watching a design bloom one stitch at a time. If you want to learn, you do not need dozens of techniques. Mastering a handful of essential embroidery stitches for beginners unlocks nearly every project you will ever want to make.
This guide teaches you the core embroidery stitches for beginners: what each one is for, how to work it step by step, and which projects it suits best. By the end, you will have a complete stitch vocabulary and a practice sampler you can actually hang on your wall.
Why Learn Embroidery Stitches for Beginners Now
Embroidery hits a sweet spot that few hobbies manage: it is cheap to start, portable, meditative, and genuinely useful. A basic kit costs less than a takeout dinner, and you can stitch on a couch, on a train, or in a park. The repetitive motion is calming in the way knitting is, and the finished pieces, from hoop art to embellished clothing, look impressive far beyond the skill required.
Embroidery also connects you to a massive creative community. Visible mending, the art of repairing clothes with decorative stitching, has become a sustainability statement, with searches up dramatically. Learning embroidery stitches for beginners is the gateway to all of it: mending, hoop art, embellished denim, and heirloom gifts. It shares the slow, handmade satisfaction of other fiber crafts, including the timeless techniques in our guide to old-fashioned darning and craftsmanship.
Embroidery Supplies: The Starter Kit
You need remarkably little to begin. An embroidery hoop, 6 inches is the perfect starter size, holds your fabric taut. Embroidery floss, the six-stranded cotton thread sold in every craft store, gives you hundreds of colors for pennies. A pack of embroidery needles with large eyes, a small pair of sharp scissors, and a piece of cotton or linen fabric complete the kit.
For transferring designs, beginners have easy options: draw directly on fabric with a water-soluble pen, use iron-on transfer patterns, or print simple designs and trace them with a lightbox or sunny window. Do not invest in expensive linen or specialty threads yet. Practice on quilting cotton or even an old pillowcase; your first stitches are about learning motion, not making masterpieces. Makers who love building a supply stash for a new craft will recognize the same excitement found in starting resin art or pottery.
The 10 Essential Embroidery Stitches for Beginners
These ten stitches form the foundation of hand embroidery. Learn them in this order, because each one builds on skills from the last.
1. Running Stitch
The running stitch is the simplest of all embroidery stitches for beginners: weave the needle in and out of the fabric in a dashed line. It is the basis of Japanese sashiko, quilting, and gathering. Keep your stitches even in length, about a quarter inch, and your dashed lines will look clean and professional. Use it for outlines, borders, and basting layers together.
2. Backstitch
The backstitch creates a solid, unbroken line, perfect for outlines and lettering. Bring the needle up one stitch-length ahead, then go back down at the end of the previous stitch. Each new stitch starts ahead and lands on the last one’s endpoint. When your lines need to look like drawn ink, backstitch is the answer. It is the stitch you will use most for text and detailed outlines, and it pairs beautifully with hand-lettered designs like those in our calligraphy for beginners guide.
3. Stem Stitch
The stem stitch makes a beautiful rope-like line, slightly raised and textured. Work it like a slanted backstitch, always keeping the thread to the same side of the needle. It is the classic stitch for plant stems, vines, and curved outlines, and it gives lines an organic, flowing quality that flat backstitch cannot match.
4. Split Stitch
The split stitch is worked like a backstitch, except the needle comes up through the middle of the previous stitch, splitting its fibers. This creates a braided, textured line that is excellent for filled areas and fine curves. It takes slightly longer than backstitch, but the rich texture is worth it for focal elements.
5. Chain Stitch
The chain stitch forms a series of interlocking loops that look like a chain. Bring the needle up, form a loop with the thread, and take the needle back down through the same hole, coming up a stitch-length ahead inside the loop. Chain stitch makes bold, decorative lines and fills areas quickly with wonderful texture. It is a favorite for outlining bold folk-art designs.
6. Lazy Daisy Stitch
The lazy daisy is a single detached chain stitch, and it is how embroiderers make petals and leaves. Make one chain loop, then anchor it with a tiny straight stitch over the loop’s end. Five or six lazy daisies arranged in a circle become a flower; a single one becomes a leaf. This one stitch unlocks nearly all floral embroidery.
7. French Knot
French knots are tiny, and beginners often fear them, but they are simple once you feel the motion. Bring the needle up, wrap the thread around the needle two or three times, hold the wraps taut, and push the needle back down very close to where it came up. The result is a perfect little textured dot. Use French knots for flower centers, eyes, starry skies, and any detail that needs a raised dot. They add delightful dimension to hoop art destined for display, like the pieces in our bedroom wall art ideas.
8. Satin Stitch
The satin stitch fills shapes with smooth, flat stitches laid side by side, like coloring with thread. Outline the shape first, then fill it with parallel stitches placed close together. Keep your tension even and do not pull too tight, or the fabric will pucker. Satin stitch gives petals, leaves, and monograms a luxurious, solid finish.
9. Blanket Stitch
The blanket stitch creates a looped edge along fabric borders. Bring the needle up on the edge line, then take it down a stitch-length ahead and slightly in from the edge, looping the thread under the needle before pulling through. It makes beautiful edgings for felt ornaments, applique, and, true to its name, blankets.
10. Cross Stitch
The cross stitch is two diagonal stitches forming an X, and it is the foundation of an entire embroidery genre. Work rows of half-crosses in one direction, then come back across them to complete the X shapes. Keeping all your top stitches slanting the same way gives the finished piece a uniform, professional look. Cross stitch is perfect for samplers, monograms, and geometric patterns.
Your First Project: The Beginner Stitch Sampler
The best first project for anyone learning embroidery stitches for beginners is a sampler: one hoop containing a row of each stitch you have learned. Draw ten horizontal guidelines on your fabric, label each row lightly in pencil, and stitch one row per technique. Use a different floss color for each row to make it cheerful.
A sampler removes all performance pressure because its purpose is practice, not beauty. Yet finished samplers look genuinely charming framed on a wall, and yours becomes a personal reference you will consult for years. Photograph each row as you finish it; watching your stitches get neater row by row is incredibly motivating. Handmade pieces like this also make thoughtful gifts, in the same spirit as the projects in our DIY soy candle guide and polymer clay earrings tutorial. For more on the world of handmade jewelry, explore the allure of earrings and the latest kasulaperu designs.
Common Beginner Mistakes and How to Fix Them
Pulling thread too tight. Tight stitches pucker the fabric. Aim for stitches that lie flat and relaxed; the thread should never strain.
Using all six strands. Embroidery floss separates into six strands. Most stitching uses two or three. Using all six makes clumsy, bulky stitches.
Giant knots on the back. Start with a waste knot or weave your tail under existing stitches instead of tying bulky knots that show through.
Skipping the hoop. Stitching without a hoop seems faster, but the fabric shifts and your stitches go crooked. Always use the hoop.
Choosing too-complex designs. Start with bold, simple shapes. Intricate patterns demand stitch control you are still building. This progression principle applies everywhere in art, and you will see it echoed in our living room makeover ideas, where simple foundations come before layered details.
Taking Your Embroidery Further
Once the ten foundational stitches feel natural, the embroidery world opens wide. Try stitching on clothing: a floral sprig on a denim jacket pocket or a monogram on a tote bag turns everyday items into personal statements. Visible mending lets you repair jeans and sweaters with decorative stitching that looks intentional and beautiful.
Experiment with combining stitches in single designs: satin-stitched petals with French knot centers and stem-stitched vines make a complete floral motif from just three techniques. Join an online stitch-along for community and accountability, or gift your early hoops to friends; handmade embroidery carries a warmth that store-bought decor never will.
Conclusion: One Stitch at a Time
Learning embroidery stitches for beginners is not a race. Each stitch you master stays with you forever, and ten stitches are enough for a lifetime of projects. Thread your needle, hoop your fabric, and stitch your first running stitch today.
A month from now, you will look at your sampler and see ten neat rows where once there were wobbles. That visible progress is the quiet joy of embroidery. Keep stitching, keep experimenting, and enjoy every loop and knot along the way.


