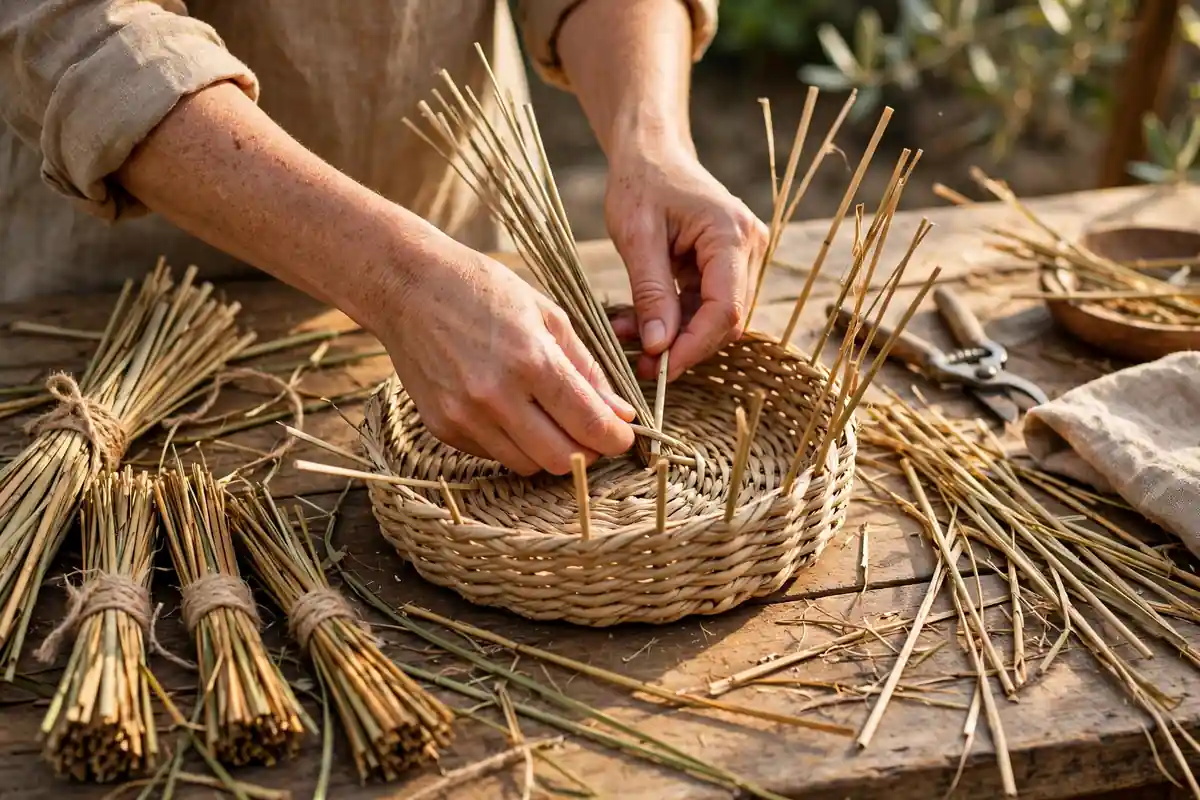
There is something deeply calming about weaving a basket by hand. You start with a bundle of plain reeds, and through a simple rhythm of over and under, a sturdy, beautiful container takes shape in your hands. Basket weaving for beginners is one of the oldest crafts in the world, yet it feels fresh and modern today, with American makers creating everything from rustic farmhouse baskets to sleek, minimalist storage pieces for contemporary homes.
Unlike many crafts, basket weaving needs very little equipment, and the basic technique can be learned in a single afternoon. You do not need to draw, sew, or paint. You need patience, a little practice, and a willingness to let your first basket be slightly uneven. That first basket, imperfect as it may be, will still hold fruit, blankets, or yarn, and it will be entirely yours.
This guide covers basket weaving for beginners from start to finish. You will learn about the best materials, the basic weave every basket uses, how to shape the base, sides, and rim, and how to finish and care for your work. By the end, you will be ready to weave a simple round basket and plan your next, more ambitious project.
What Is Basket Weaving?
Basket weaving is the craft of interlacing flexible materials, called weavers, around a set of upright supports, called stakes or spokes, to form a container. The weavers pass over one stake and under the next, row after row, building a wall that is both strong and flexible. This same principle appears in many fiber crafts. If you have tried weaving for beginners on a loom, the over-under rhythm will feel familiar, though basket weaving works in the round and shapes a three-dimensional object.
Baskets have been made for thousands of years from whatever plants grew nearby: willow, reed, grasses, rushes, and even bark. In the United States, Native American basket traditions are especially rich, with distinct regional styles using materials like sweetgrass, ash splints, and pine needles. Modern beginners usually start with reed, a cane-like material sold in coils at craft stores, because it is consistent, easy to soak and bend, and forgiving of mistakes.
Today, basket weaving appeals to people who want screen-free, hands-on hobbies and beautiful, useful objects for their homes. A handmade basket is practical storage, but it is also a piece of art. The natural texture of reed or seagrass suits nearly every decorating style, from farmhouse to coastal to modern minimal.
Basket Weaving Materials and Tools
One of the joys of basket weaving is how little you need to begin. A basic starter kit, or a few supplies gathered separately, will cover your first several baskets.
- Reed: Flat reed for stakes and round reed for weaving are the classic beginner combination. Seagrass and raffia are softer alternatives that give a more rustic look.
- A basin and water: Reed must be soaked for 10 to 20 minutes before weaving so it bends without snapping. Keep a towel nearby for drips.
- Scissors or snips: Sharp scissors cut soaked reed cleanly. A small pair of garden snips also works well.
- Clothespins or clips: These hold stakes in place while you work and keep the rim steady during finishing.
- A measuring tape and pencil: Marking stake lengths keeps your basket even and symmetrical.
- A base mold (optional): A bowl or wooden block helps beginners keep the base flat and the sides straight.
Buy reed in natural, undyed form for your first basket. Dyed reed looks lovely, but color can distract from learning the weave itself. Once you feel confident, try a basket with a few dyed weavers for stripes or patterns. Makers who enjoy natural materials may also like macrame for beginners, which uses cotton cord to create knotted wall hangings and plant holders.
The Basic Weave Every Beginner Must Learn
Almost every beginner basket uses plain weave, also called over-under weave. One weaver passes over one stake, under the next, over the next, and so on around the basket. On the next row, the pattern reverses: where you went over before, you now go under. This simple alternation locks the weavers together and builds a stable wall.
The key to a good-looking basket is even tension. Pull each weaver snug against the row below, but not so tight that it bends the stakes inward. Push each row down firmly with your fingers as you go, and check every few rows that the stakes are still evenly spaced. If a stake leans, gently nudge it back into place before the next row locks it in.
When you run out of weaver, overlap the new piece over the old one for a few stakes, hiding the join on the inside of the basket. Trim the ends neatly so they do not poke out. Experienced weavers make joins nearly invisible, but beginners should not worry: a small overlap inside the basket is barely noticeable, and it becomes neater with each basket you make.
How to Weave a Simple Round Basket Step by Step
Step 1: Prepare and Lay Out the Base
Soak your reed until it bends easily without cracking. For a small round basket, cut eight flat stakes of equal length. Lay four stakes side by side, then lay the other four across them at right angles, weaving them over and under so they lock into a square grid. This woven square is the center of your base. Gently pull the stakes to even out the grid, leaving equal lengths sticking out on all sides.
Step 2: Weave the Base
Take a long, thin weaver and begin weaving around the base grid, going over and under the groups of stakes. After two or three rounds, split the groups so you weave around individual stakes instead. Keep the base flat on the table and push each round tight against the last. When the base reaches the size you want, usually six to eight inches across for a first basket, bend the stakes upward to form the walls. This bend, called “upsetting,” is the moment your flat base becomes a basket.
Step 3: Weave the Sides
Continue weaving around the upright stakes, alternating over and under. To shape the basket, pull weavers slightly tighter for a narrower top, or let stakes lean outward for a wider opening. Most beginners aim for straight sides or a gentle flare, which is easier to control. Weave until the sides reach your chosen height, usually about the same as the base diameter. Keep checking that the basket sits level and the rim height is even all the way around.
Step 4: Finish the Rim
The rim gives your basket strength and a finished look. The simplest finish is to bend each stake down beside its neighbor and tuck it into the weaving on the inside, trimming any excess. For a sturdier rim, add a thicker reed lashed around the top edge with a thin weaver wrapped over it. Clip everything in place while it dries, then remove the clips and trim stray ends. Let the basket dry completely before use, since soaked reed shrinks slightly as it dries and tightens the weave.
Common Beginner Mistakes and Easy Fixes
- Reed snapping: The reed is too dry. Soak it longer, and re-wet pieces as you work if they stiffen.
- Wonky, leaning sides: Uneven tension is usually the cause. Push rows down evenly and straighten stakes every few rounds.
- Base that will not lie flat: The center grid may be too loose. Re-weave the first rounds more tightly, or use a mold to hold the base flat.
- Gaps in the wall: Rows were not pushed down firmly. Use your fingers or a flat tool to pack each row against the last.
- Rim at different heights: Count rows as you weave, and mark the target height on one stake so you stop at the same row all around.
Remember that handmade baskets are supposed to show the hand of the maker. Slight variations in tension and spacing are normal and charming. If a basket leans a little, call it character, use it proudly, and apply what you learned to the next one. Progress in basket weaving is visible: most makers see a clear improvement between their first and third baskets.
Basket Weaving Project Ideas for Beginners
Once you have made a simple round basket, try a rectangular bread basket, which uses the same weave on a different base shape. A small planter basket is another satisfying project, and it pairs beautifully with a botanical illustration for beginners print on the wall nearby. Storage baskets for shelves, coasters woven from flat reed scraps, and tiny gift baskets for holidays are all within reach after a few practice pieces.
You can also experiment with materials. Seagrass gives a soft, coastal feel, while willow rods create a sturdier, more rustic basket. Adding a few rows of dyed reed creates stripes, and weaving in a different material, such as cotton rope or fabric strips, produces a mixed-media look. For more colorful handmade decor, try diamond painting for beginners and alcohol markers for beginners. For more craft ideas using natural fibers, explore string art for beginners and cross stitch for beginners, both of which pair well with handmade home decor.
Caring for Your Handmade Baskets
Reed baskets are durable but dislike prolonged dampness. Dust them with a dry cloth, and wipe spills quickly. If a basket gets dusty, a soft brush reaches between the weavers. Keep baskets out of constant direct sunlight, which can fade dyed reed and dry out natural fibers. If a basket is crushed slightly, mist it lightly with water, reshape it by hand, and let it dry in the corrected shape.
Conclusion: Weave Your First Basket This Weekend
Basket weaving for beginners is proof that a simple, ancient technique can still feel exciting. With soaked reed, a basin of water, and the over-under rhythm, you can make something useful and beautiful in a single afternoon. Start with a small round basket, keep your tension even, and do not worry about perfection. Your hands will learn the rhythm faster than you expect.
As you weave more, you will develop an eye for shape, proportion, and color that carries into other crafts too. Whether your baskets hold bread, blankets, plants, or craft supplies, each one tells the story of an afternoon spent making something real. Gather your reed, soak it well, and weave your first basket this weekend. For further inspiration in fiber and texture, try needle felting for beginners, sewing for beginners, pottery for beginners, mandala art for beginners, and collage art for beginners.