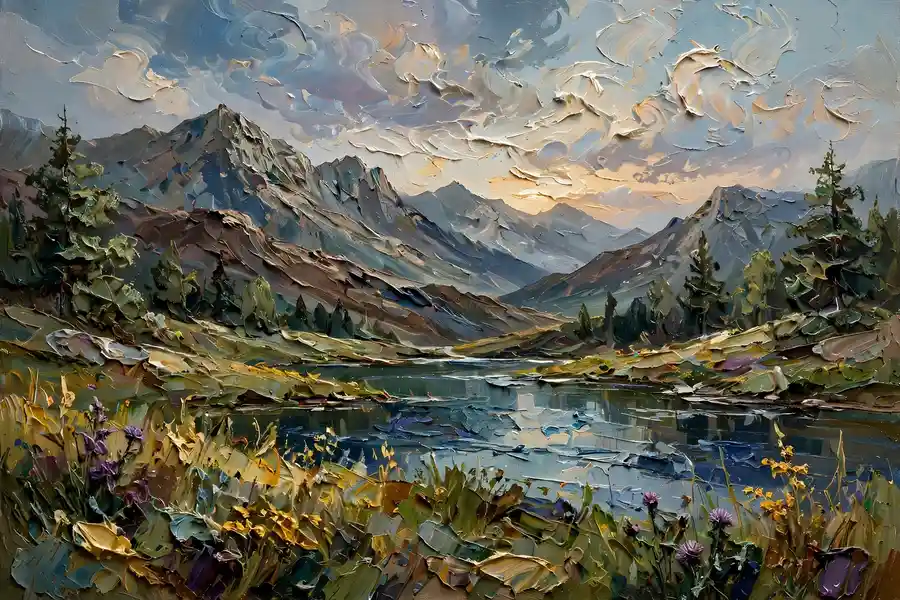
What impasto painting technique Means for Artists
The impasto painting technique applies paint thickly, so it stands proud of the canvas surface and catches real light, creating a sculptural, tactile quality that flat painting cannot match. The word impasto comes from Italian, meaning dough or paste, and it describes paint laid on so thickly that brush and palette knife marks remain visible as three-dimensional texture. From Van Gogh’s swirling skies to contemporary palette knife landscapes, impasto has given paintings an energy and physical presence that viewers can almost feel.
Impasto works because thick paint interacts with light in the room, not just with the light painted in the picture. Ridges cast tiny shadows, knife marks catch highlights, and the surface changes as the viewer moves, which makes an impasto painting feel alive in a way that a smooth painting does not. That physical quality suits subjects with energy and texture, such as turbulent water, windswept trees, thick foliage, and expressive portraits, where the paint itself becomes part of the subject. A related guide is oil painting techniques every beginner should know.
Why impasto painting technique Matters
Texture in impasto also creates a hierarchy of attention, since thick, textured passages draw the eye while thin, flat passages recede. Painters use that contrast deliberately, applying impasto to the focal point and keeping supporting areas thinner and quieter. Without that contrast, a painting covered entirely in thick paint can feel heavy and exhausting, so impasto is most powerful when it is selective rather than universal.
Impasto requires practical care, because thick oil paint dries slowly and can crack or wrinkle if it is applied over a wet, flexible layer or dried too quickly. Painters often use impasto mediums, such as cold wax or impasto gel, to add body without adding excessive oil, and they allow thick passages to dry slowly in a dust-free, well-ventilated space. Acrylic impasto dries faster and more safely, but it still needs a sturdy support, since heavy paint can warp thin canvas. For more on a nearby skill, see acrylic painting techniques for beginners.
Tools and Materials You Will Need
Start with a small, reliable kit rather than buying everything at once. The items below cover most early projects, and you can add specialty supplies later as your interests narrow. This pairs well with color theory for beginners.
- Heavy-body oil or acrylic paints that hold their shape when applied thickly
- Palette knives in several shapes for bold, sculptural marks
- Stiff-bristle brushes that can push thick paint without bending
- Impasto medium, cold wax medium, or modeling paste for extra body
- A sturdy primed canvas or panel that will not warp under heavy paint
Key Techniques to Practice
Palette knife impasto
Load a palette knife with thick paint and spread, scrape, or dab it onto the canvas, creating flat planes, ridges, and sharp edges. Palette knife marks are bold and architectural, and they suit rocks, buildings, mountains, and other subjects with strong, simple forms. You may also enjoy landscape painting for beginners.
Brush impasto
Apply thick paint with a stiff brush in loaded, directional strokes, letting bristle marks remain visible in the paint. Brush impasto suits foliage, water, and skies, where directional strokes can suggest movement and energy while building a rich surface.
Layered impasto
Build impasto in stages, allowing earlier thick layers to dry or firm up before adding later ones, so the surface gains depth without collapsing. Layering lets you create complex textures, such as a thick foreground over a thinner background, while keeping the painting structurally sound. A useful companion guide is how to draw faces.
Impasto highlights and accents
Reserve the thickest paint for highlights and focal accents, such as sunlit petals, sparkling water, or a bright cheekbone, while keeping shadows thinner. Thick highlights catch real light and draw the eye, which makes the painting’s focal point glow with physical as well as painted light.
Step by Step: Your First Project
- Plan the painting and decide which areas will carry impasto and which will stay thin, so texture supports the composition.
- Block in the composition thinly first, establishing drawing and values without heavy paint. For a related approach, see still life drawing for beginners.
- Apply impasto to the focal areas with a palette knife or stiff brush, working with confident, directional marks.
- Add texture gradually, stepping back often to check that thick passages enhance rather than overwhelm the painting.
- Let the painting dry slowly in a dust-free space, and avoid varnishing until thick passages are fully dry and firm. This connects naturally with sketching for beginners.
Common Mistakes to Avoid
- Covering the entire painting in thick paint, which removes contrast and makes the surface heavy and tiring.
- Applying thick oil paint over a wet, oily layer, which can cause wrinkling, cracking, or slow, uneven drying. A helpful next read is mixed media art for beginners.
- Using a thin, flexible canvas for heavy impasto, which can warp, sag, or crack under the paint’s weight.
- Overworking thick paint until brush and knife marks disappear, which defeats the purpose of impasto altogether.
Practical Tips That Make a Difference
- Use a sturdy panel or a well-stretched, heavy canvas for impasto work, so the support can carry the paint’s weight. For broader context, see gouache painting for beginners.
- Mix impasto medium into oil paint rather than adding excessive linseed oil, which would make thick paint too fluid and slow to dry.
- Clean palette knives immediately after use, since dried thick paint is difficult to remove and can damage the knife edge.
- Photograph impasto paintings in raking light occasionally, since side light reveals the surface texture and helps you judge its effect. A related topic worth exploring is charcoal drawing techniques.
Choosing Materials and Subjects
For materials, heavy-body paint is essential for impasto, since fluid paint will level and lose its texture as it dries. Palette knives in a few shapes, including a trowel shape for broad areas and a diamond shape for details, cover most impasto needs, and stiff hog-bristle brushes suit oil impasto better than soft synthetic brushes. For supports, a cradled wood panel is the most stable choice for heavy impasto, while a well-stretched canvas with a sturdy frame is a practical alternative for larger work. This builds nicely on visiting an art exhibition.
For subjects, start with a landscape or a still life with strong texture, such as a rocky coastline, a field of flowers, or a basket of fruit, since these subjects benefit obviously from thick paint. A seascape with breaking waves is another excellent impasto subject, because knife marks can suggest foam and spray with remarkable economy. Avoid portraits for early impasto practice, since thick paint on a face can easily look lumpy rather than modeled, unless it is used selectively for highlights and hair.
A Four-Week Practice Plan for impasto painting technique
A short, regular practice plan will improve your impasto painting technique faster than occasional long sessions, because skills consolidate between sessions and each week builds on the last. Treat the plan as a guide, not a rigid rule, and adjust the pace to fit your schedule and energy.
- Week one: focus on fundamentals. Spend three short sessions on basic exercises for impasto painting technique, keeping each session under an hour and noting what felt easy and what felt difficult in a sketchbook.
- Week two: apply the fundamentals to a simple finished piece using impasto painting technique, working slowly and comparing your result with your reference or your earlier exercises at each stage.
- Week three: try a slightly harder subject or a new material related to impasto painting technique, and deliberately practice the part you found hardest in week one, since targeted practice improves weak areas fastest.
- Week four: complete a small project that combines everything you practiced, share it with a friend or an online art community for feedback, and choose one skill to carry into your next month of practice.
Frequently Asked Questions
What paint is best for impasto painting?
Heavy-body oil or acrylic paint works best, since it holds brush and knife marks as it dries. Fluid paints level out and lose texture, so choose heavy-body tubes and add impasto medium if you need even more body.
How long does impasto oil paint take to dry?
Thick oil impasto can take weeks or even months to dry fully, depending on thickness, pigment, and medium, and it should be left undisturbed in a dust-free space. Acrylic impasto dries much faster, usually within hours to days, which makes it a practical alternative for impatient painters.
Can I use impasto with watercolor?
Watercolor is a thin, transparent medium and does not suit true impasto, since it cannot hold thick, sculptural marks. For textured watercolor effects, use dry brush, granulation, or mixed media instead, and reserve impasto for oil and acrylic painting.
Will impasto paintings crack over time?
Impasto can crack if thick paint is applied over a flexible or wet layer, dried too quickly, or varnished before it is fully dry. Following fat over lean, using a sturdy support, and allowing slow, complete drying will greatly reduce the risk of cracking.
Final Thoughts
The impasto painting technique turns paint itself into a subject, giving a painting a physical presence that flat color alone cannot achieve. Use it selectively, apply it confidently with brush and knife, support it with a sturdy surface, and let it dry patiently, because an impasto passage placed with intention will catch the light, draw the eye, and remind every viewer that a painting is not just an image, but an object made by a human hand. For another angle, see how to sell art online.