
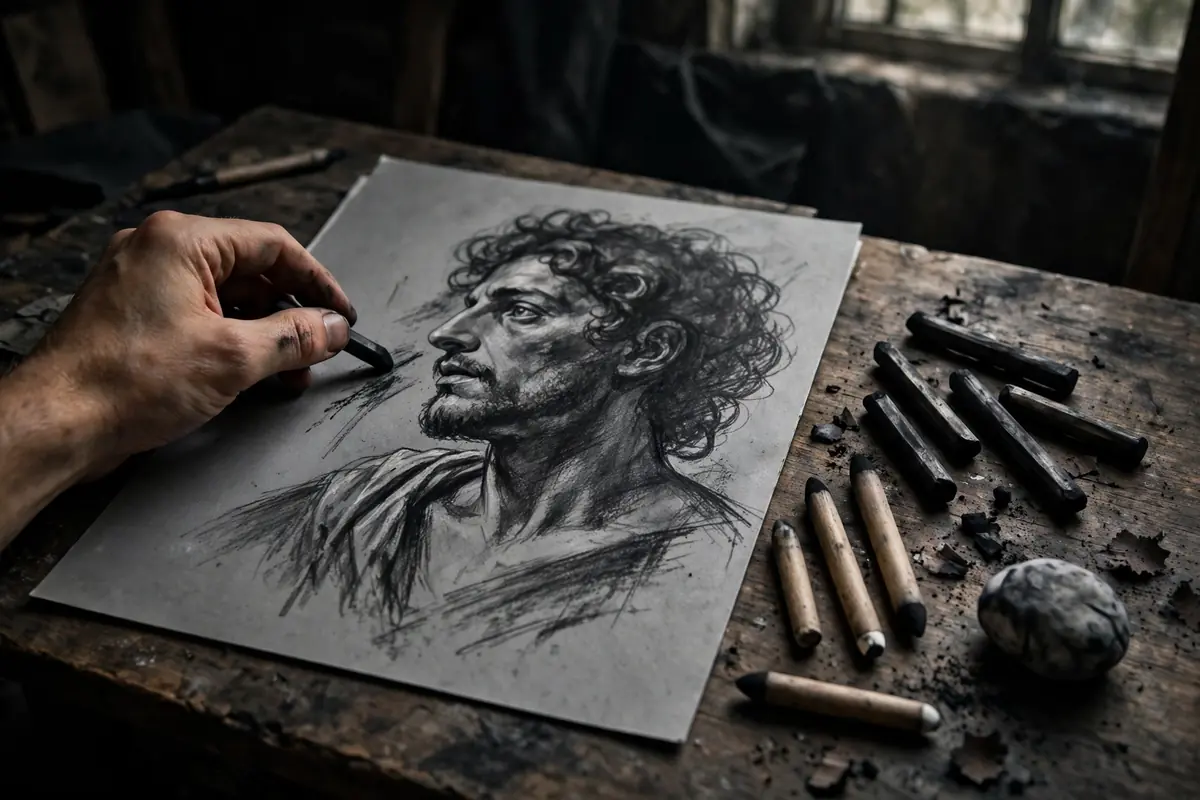
Charcoal is one of the oldest drawing materials in human history — artists were sketching with burned sticks tens of thousands of years before pencils existed — yet it remains one of the most expressive mediums you can pick up today. Deep blacks, velvety grays, and dramatic light effects are all possible with a few sticks of charcoal and the right knowledge. This complete guide to charcoal drawing techniques for beginners covers the tools, the essential shading methods, how to control values, a step-by-step first project, and how to stop your drawings from turning into smudged disasters.
Why Learn Charcoal Drawing Techniques?
Charcoal teaches you to see light and shadow faster than any other medium. Because it is so fluid and forgiving, you spend less time fighting the material and more time understanding values — the single skill that separates amateur drawings from professional ones. Artists who master charcoal drawing techniques find that every other medium gets easier: the value control transfers directly into how to draw faces in graphite, into colored pencil drawing techniques, and even into painting.
Charcoal is also incredibly affordable. A starter set of vine and compressed charcoal, a kneaded eraser, and a pad of newsprint costs less than a single dinner out. And because charcoal drawings photograph with such dramatic contrast, they perform exceptionally well in online portfolios — a fact that matters when you start drawing anime-style characters or building an audience for your art.
Essential Tools for Charcoal Drawing Techniques
Types of Charcoal
Vine charcoal is thin, light, and easy to erase. It produces soft gray marks and is perfect for initial sketches and blocking in large shapes. Because it lifts off the paper so easily, it is the ideal charcoal for beginners learning to plan compositions.
Compressed charcoal comes in sticks or pencils and produces rich, intense blacks. It is much harder to erase, so reserve it for your darkest darks and final bold strokes. The contrast between soft vine charcoal and deep compressed charcoal is what gives charcoal drawings their signature drama.
Charcoal pencils offer precision. Use them for fine details like eyelashes, hair strands, and crisp edges that a chunky stick cannot manage. Keep one hard and one soft charcoal pencil in your kit.
Paper, Erasers, and Blending Tools
Charcoal needs tooth — textured paper that grabs the pigment. Toned or gray pastel paper is a favorite because the mid-tone background lets you add both white highlights and black shadows. A kneaded eraser lifts charcoal gently for highlights and corrections; a vinyl eraser removes it completely for crisp white areas. Blending stumps and tortillons smooth tones, while a chamois cloth lays in broad soft gradients. Fixative spray protects finished work — always spray outdoors or in a ventilated space.
If you already enjoy how to draw hands in graphite, you will love how quickly charcoal captures the same forms with richer, more painterly values.
7 Fundamental Charcoal Drawing Techniques
1. Blocking In (Mass Drawing)
Forget outlines. Hold a stick of vine charcoal on its side and block in the big shapes of your subject as simple masses of tone. Squint to simplify what you see into three or four value shapes. This technique — drawing the shadows as shapes rather than the objects as lines — is the foundation of every realistic charcoal drawing and the fastest way to improve.
2. Hatching and Cross-Hatching
Build tone with parallel lines (hatching) and overlapping layers of lines at angles (cross-hatching). Keep your lines confident and consistent; vary their spacing and pressure to control value. Hatching gives drawings an energetic, classical feel and is especially effective for studies of hands, faces, and drapery.
3. Blending and Smudging
Use a blending stump, chamois, or your fingertip to smooth charcoal into seamless gradients. Blending creates the soft transitions of skin, fog, and distant landscapes. The key rule: blend deliberately in one direction, not back and forth, which creates muddy, directionless tone. Blend the mid-tones and leave your darkest darks and lightest lights crisp for contrast.
4. Subtractive Drawing (Eraser Drawing)
Cover the entire paper with a mid-tone wash of charcoal, then draw by erasing. Pull out highlights with a kneaded eraser and carve forms with a vinyl eraser. This reversed way of working — starting dark and finding the light — trains your eye to see highlights as shapes, a skill that transforms portraits and still lifes. Bold subtractive marks are also a staple of modern abstract art trends, where dramatic black-and-white contrast carries entire compositions.
5. Stippling
Build value from thousands of tiny dots. Stippling is slow but produces extraordinary control over gradients and is perfect for detailed textures like skin pores, stone, and fabric. Use it sparingly in large drawings — it is best reserved for focal areas where you want the viewer’s eye to linger.
6. Scumbling and Texture Marks
Drag the side of a charcoal stick lightly over the paper’s texture to create broken, grainy marks. Scumbling suggests rough bark, weathered stone, stubble, and tousled hair with almost no effort. Combine it with smooth blended areas and the contrast of textures will make your drawings feel three-dimensional.
7. Edge Control
Great drawings need both sharp and soft edges. Sharpen edges where you want focus — the eyes in a portrait, the rim of a cup. Soften edges where forms turn away from the light or recede into shadow by blending outward with a chamois. Beginners tend to make every edge equally sharp; controlling edges is what makes a drawing look professional instead of flat. The same principle applies in digital work, which is why charcoal practice improves your Procreate drawing tutorial projects too.
Understanding Values: The 5-Value System
Every subject you will ever draw can be simplified into five values: highlight, light, mid-tone, shadow, and reflected light. Before touching a finished drawing, practice making a value scale from white paper to your deepest black in five even steps. Then do fifty thumbnail sketches where you block in only these five values — no details allowed.
This exercise feels tedious and works miracles. Within weeks you will start seeing the world as value shapes instead of objects, which is the exact shift that makes oil painting techniques and acrylic painting techniques click later. Color is just value plus hue; master value in charcoal and color becomes far less mysterious.
Test yourself constantly: squint at your subject and at your drawing, then compare. If the big shapes match in value, the drawing will read correctly from across the room — and that is what matters most.
Your First Charcoal Project: A Dramatic Sphere Study
This classic exercise teaches blending, edges, and values in about an hour. All you need is vine charcoal, one blending stump, a kneaded eraser, and a sheet of toned paper.
Step 1: Block In the Shape (10 Minutes)
Lightly sketch a circle with vine charcoal, then add an ellipse beneath it for the cast shadow. Squint and block in the shadow side of the sphere as one simple dark mass using the side of the charcoal. Do not draw details — just the big dark shape.
Step 2: Establish the Mid-Tones (15 Minutes)
With a chamois or your finger, pull the dark tone into the mid-tone area with smooth, directional strokes following the curve of the sphere. Leave the lightest area (facing your imaginary light source) as bare paper. The sphere should already start looking round.
Step 3: Deepen the Darks (10 Minutes)
Switch to compressed charcoal and deepen the core shadow — the darkest band where the sphere turns away from the light — and the cast shadow beneath. Keep these darks rich but leave a sliver of reflected light along the bottom edge of the sphere; that bounce of light is what sells the illusion.
Step 4: Lift the Highlights (10 Minutes)
Shape your kneaded eraser to a point and lift out the highlight. Then soften its edges by blending outward slightly. Add a crisp reflected-light edge along the shadow side. Step back: you have drawn a three-dimensional object from flat gray dust.
Step 5: Refine Edges (15 Minutes)
Sharpen the edge where the sphere meets the background on the light side; soften it on the shadow side so the sphere melts into the darkness. Spray with fixative, and sign your first finished charcoal study.
6 Mistakes Beginners Make With Charcoal (and Fixes)
1. Pressing too hard, too early. Compressed charcoal pressed hard into the paper cannot be lifted. Build darks gradually in layers — you can always go darker, but you cannot easily go lighter.
2. Over-blending everything. When every tone is perfectly smooth, the drawing looks airbrushed and lifeless. Leave some areas raw and textured; contrast between smooth and rough is what creates interest.
3. Working with dirty hands. Charcoal on your palm smudges across the paper with every touch. Keep a clean sheet of paper under your drawing hand, and wash your hands before detail work.
4. Ignoring the background. A subject floating on white paper looks unfinished. Tone the background — even a simple gradient darker behind the light side of the subject — and the drawing instantly looks professional.
5. Skipping fixative. Unfixed charcoal smudges the moment anything touches it, including the frame glass. Two light coats of workable fixative, sprayed from arm’s length, protect the drawing while still allowing rework.
6. Drawing symbols instead of seeing. Beginners draw the idea of an eye instead of the actual shapes of light and shadow. Squint, block in values, and trust what you see over what you think you know.
From Charcoal to a Complete Practice
Charcoal rewards daily short sessions more than occasional marathons. Fifteen minutes of value thumbnails or gesture sketches every morning will advance you faster than a single monthly five-hour drawing. Keep a dedicated charcoal sketchbook and date your studies — flipping back through it is the most motivating progress tracker in art.
When you are ready to expand, charcoal pairs naturally with other mediums: white charcoal or pastel on toned paper, charcoal underpaintings for oil portraits, and mixed-media pieces that combine charcoal with collage. The compositional instincts you build will also sharpen your eye for graphic design tips for beginners and for judging work at exhibitions — and a trip to visiting an art exhibition will show you how the masters used these exact techniques at full scale. Study the drawings in museums closely: the blocking, the edges, the values. They were all built with the same humble burned sticks you are holding now.


