
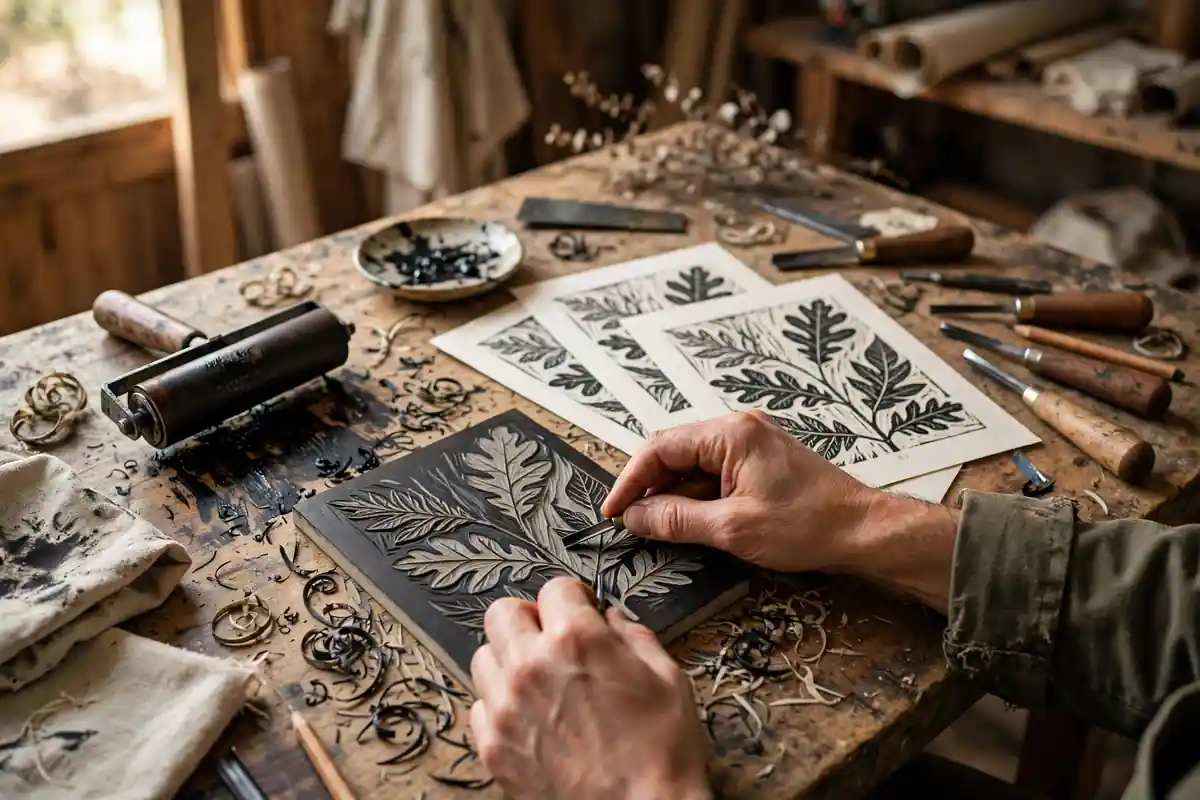
There is a special kind of magic in pulling your first print: you roll ink across a block you carved yourself, press paper onto it, peel it back, and reveal an image that exists nowhere else in the world. Linocut — carving a design into linoleum and printing it by hand — is one of the most satisfying art forms a beginner can learn, and it requires no press, no studio, and surprisingly little money. This complete guide to linocut printing for beginners covers the tools, safety essentials, carving techniques, inking and printing at home, and your first step-by-step project.
What Is Linocut Printing?
Linocut is a relief printing technique: you carve away the parts of a linoleum block you do not want to print, roll ink onto the raised surface that remains, and press paper onto it to transfer the image. Whatever you carve away stays white; whatever you leave behind prints in ink. It is the same fundamental principle behind woodblock printing, but linoleum is softer, cheaper, and far more forgiving for beginners.
The bold, graphic quality of linocut prints explains their enduring popularity — from vintage travel posters to today’s modern abstract art trends, the high-contrast look of relief printing never goes out of style. And unlike a painting, which exists as a single object, one carved block produces an entire edition of prints you can gift, sell, or trade.
Linocut Printing for Beginners: Essential Tools
The Block
Traditional artist linoleum (often called battleship gray linoleum) is the gold standard — smooth, consistent, and it holds fine detail. Beginners sometimes start with soft-cut or speedy-carve blocks, which carve like butter but crumble under fine lines. Start with real linoleum; your tools will glide and your lines will stay crisp. A 4×6 inch block is the perfect first size: big enough for a real design, small enough to finish.
Carving Tools
A basic set of five gouges covers everything: a V-gouge for outlines and fine lines, small and large U-gouges for clearing areas and carving curves, a wide flat chisel for removing large backgrounds, and a knife tool for the finest details. Keep them sharp — a sharp tool is a safe tool, because it cuts with light pressure instead of forcing. A small sharpening slip or strop keeps edges keen between sessions.
Ink, Brayer, and Paper
Water-based block printing ink is ideal for beginners: it cleans up with soap and water and dries quickly. A soft rubber brayer (roller) spreads the ink evenly across the block — roll it in several directions until you hear a soft tacky hiss. For paper, smooth printmaking paper or even sturdy mixed-media paper works; avoid heavily textured paper, which misses the fine lines. You will also need a baren (or a simple wooden spoon) for hand-burnishing the print, plus a bench hook or non-slip mat to keep the block from sliding while you carve.
Many printmakers come to linocut from neighboring crafts. If you enjoy resin art for beginners, acrylic pour painting, or pottery for beginners, you will recognize the same hands-on satisfaction — and your carved blocks can even stamp patterns into clay or fabric.
Safety First: Carving Without Injuries
Carving tools are sharp, and every printmaker has a scar story. Keep yours minor with these non-negotiable rules. Always carve away from your body and away from the hand holding the block. Keep your holding hand behind the cutting edge at all times — never in front of the direction the tool travels. Work on a stable surface with the block secured in a bench hook so it cannot slip. Take breaks: tired hands make sloppy cuts, and sloppy cuts find fingers. Cut-resistant gloves are inexpensive and worth every penny for your holding hand.
7 Core Carving Techniques for Linocut Printing Beginners
1. The Basic Push Cut
Hold the gouge like a dagger at a low angle and push it forward through the linoleum in a smooth, controlled motion. Let the tool do the work — you are guiding, not forcing. Practice straight lines first, then curves. Consistent depth and pressure produce clean, confident lines.
2. Outlining With the V-Gouge
Trace your design’s outlines with the V-gouge to create crisp defining lines. These carved-away lines will print white against your inked background, or you can leave the line itself raised to print black. Outlining first gives every design structure, much like the contour lines in calligraphy for beginners give letterforms their skeleton.
3. Clearing Backgrounds
Use the wide U-gouge or flat chisel to remove large background areas. Work in one direction with overlapping strokes, clearing down to an even depth. Shallow, uneven clearing leaves speckled gray in your whites — take the time to clear cleanly and your prints will look dramatically more professional.
4. Hatching and Texture Marks
Carve fine parallel lines (hatching) into inked areas to create tone and texture. Carved hatching prints as white lines on black — perfect for shading fur, water, clouds, and fabric. Cross-hatching builds deeper tones. This one technique separates flat beginner prints from rich, dimensional ones.
5. Stippling and Dots
Press the tip of a small gouge straight down to carve tiny dots. Clusters of carved dots create soft gradients and atmospheric effects — starry skies, mist, glowing light. It is slow work, but the results are worth it for focal areas.
6. Multi-Block and Reduction Printing
Once comfortable with single-color prints, try reduction printing: carve and print the lightest color first, then carve away more of the same block and print the next darker color on top. Each layer destroys the previous stage, so the edition is finite — which makes reduction prints special. Registration (aligning each layer) is the main challenge; use simple corner guides taped to your table.
7. Printing on Fabric and Other Surfaces
Your blocks are not limited to paper. Fabric ink turns a carved block into a stamp for tote bags, t-shirts, and tea towels — handmade gifts and sellable products from a single carving session. The graphic simplicity that makes linocut striking on paper also makes it perfect for textile patterns, connecting it to fiber crafts like embroidery stitches for beginners and the revival of old-fashioned darning.
Transferring Your Design to the Block
Draw your design on paper first, then transfer it. The simplest method: scribble soft pencil over the back of your drawing, place it face-up on the block, and trace firmly — the graphite transfers in reverse. Remember that the print is a mirror image of the block, so any text must be drawn backward on the block to read correctly in the print. For symmetrical designs this does not matter; for lettering, it matters enormously. Keep early designs bold and simple — fine detail is harder to carve and harder to print cleanly.
Your First Project: A Simple Mountain Landscape Print
Step 1: Design and Transfer (20 Minutes)
Sketch a simple composition on a 4×6 inch paper: layered mountain silhouettes, a sun or moon, and a few birds. Bold shapes, minimal detail. Transfer it to your linoleum block with the pencil-rub method. Go over the transferred lines with a marker so they stay visible while carving.
Step 2: Carve the Design (45 Minutes)
Start with the V-gouge, outlining the mountain edges and the sun. Carve away the sky area around the sun with the wide gouge so the sun prints as a white circle in a black sky — a classic striking effect. Add hatching lines in the mountains for texture. Clear the background thoroughly. Remember: carve away from your hands, take breaks, and test the sharpness of your tools on a scrap corner first.
Step 3: Ink the Block (10 Minutes)
Squeeze a ribbon of ink onto a flat inking plate (a piece of glass or acrylic works). Roll the brayer back and forth until the ink is smooth and even — you should hear a light tacky sound. Roll a thin, even layer onto the block in multiple directions. Too much ink fills in fine lines; too little gives a patchy print. The right amount looks velvety, not glossy.
Step 4: Print by Hand (10 Minutes)
Lay your paper carefully onto the inked block — once it touches, do not shift it. Rub the back firmly and evenly with the baren or the back of a wooden spoon, using circular motions and firm pressure across the entire surface. This burnishing transfers the ink. Then peel the paper back slowly from one corner. That first reveal never gets old.
Step 5: Evaluate and Edition (15 Minutes)
Examine your proof. Lines that printed gray need deeper carving; areas that should be white but printed speckled need cleaner clearing. Adjust the block, then print your edition — 10 to 20 prints is a good first run. Number and sign them in pencil below the image (edition number on the left, signature on the right), let them dry flat overnight, and store them between sheets of clean paper.
6 Beginner Mistakes in Linocut Printing (and Fixes)
1. Carving toward your hand. The most dangerous habit. Always position your holding hand behind the cutting direction, and use a bench hook.
2. Over-inking. Beginners roll on far too much ink, which fills fine lines and turns the print into a blob. Thin, even layers — you can always do a second pass.
3. Designing too small and detailed. Tiny details are hard to carve and vanish in printing. Start bold; refine as your control improves.
4. Forgetting the mirror image. Text and asymmetric designs print reversed. Always check orientation before carving lettering.
5. Uneven burnishing. Patchy prints usually mean uneven pressure, not bad carving. Burnish methodically across the whole surface with overlapping circles.
6. Rushing the clearing. Speckled whites come from shallow, rushed background clearing. Slow down and clear to an even depth.
Taking Your Prints Further
Once you have a clean single-color print, the possibilities multiply. Experiment with colored inks, gradient rolls (two colors on one brayer), and reduction printing for multi-color editions. Print on handmade paper, fabric, or wood for unique pieces. Many printmakers build entire creative businesses around their blocks — selling prints at local art fairs, on Etsy, or as custom stationery.
Linocut also deepens your design eye in ways that transfer everywhere. The discipline of thinking in bold black-and-white shapes sharpens the instincts behind graphic design tips for beginners and strengthens digital illustration work like digital art for beginners. And when your prints start piling up, you will find that handmade books and junk journal ideas are the perfect home for your test prints and proofs. One block, one brayer, one evening — and you will understand why printmakers never really stop.


