
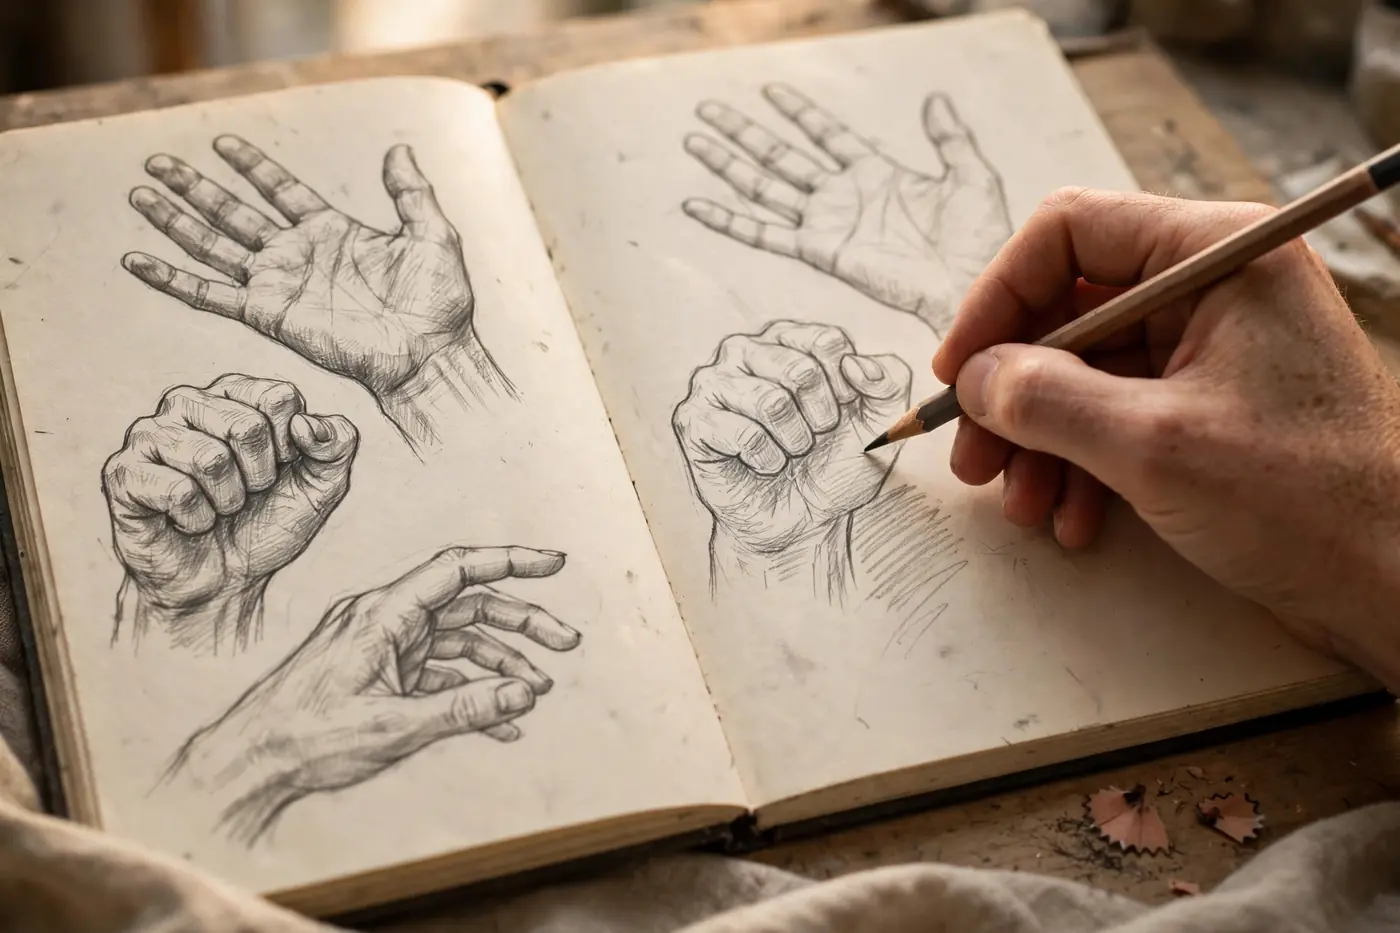
Hands are the most feared subject in all of drawing. Ask any beginner artist what scares them, and the answer is almost always the same: hands. Yet the difference between an amateur sketch and a believable one often comes down to how confidently the artist draws hands. If you can learn how to draw hands, every portrait, character, and scene you create will look instantly more professional.
The good news is that hands follow a structure, just like faces and figures do. You do not need to memorize anatomy textbooks or spend years in figure drawing classes. With the right method and a little daily practice, you can go from hiding hands behind objects to drawing them with confidence. This guide walks you through a step-by-step system for how to draw hands, from the basic bone structure to shading, plus the exact exercises that build real skill fast.
Why Learning How to Draw Hands Feels So Hard
Hands intimidate artists for a simple reason: they are complex and familiar at the same time. A hand contains 27 bones and dozens of joints, but because you see hands every day, your brain immediately spots anything wrong in a drawing. A face with slightly off proportions still looks like a face. A hand with one wrong knuckle looks broken.
Most beginners make the same mistakes: drawing what they think a hand looks like instead of what they actually see, adding tiny details like fingernails before the structure is right, and only ever drawing one pose. Once you understand the hand’s structure and practice a variety of poses, each of these problems disappears.
How to Draw Hands: Start With the Basic Structure
Before you draw a single finger, learn the architecture. The palm is roughly the shape of a rounded rectangle, wider at the knuckles and narrower at the wrist. The fingers are not separate sticks; they grow out of the palm as cylinders that taper toward the tips. Each finger has three segments, and the thumb has two, and each segment is shorter than the one before it.
A simple way to see this is to trace your own hand on paper and mark the joints. The middle finger is the longest, the index and ring fingers are close in length, and the pinky reaches only to about the middle segment of the ring finger. The thumb attaches lower, near the middle of the palm, which is why it can rotate across the whole hand.
When you begin learning how to draw hands, always block in the whole shape first. Draw the palm as a simple form, then add each finger as a tapered box or cylinder. Only after the proportions look right should you round the edges and add detail. This construction habit is the single biggest leap most beginners can make, and it applies to how to draw faces too, where structure always comes before features.
Understanding Proportions: The Key to Realistic Hands
Here is a proportion trick professionals use: the length of the middle finger is about the same as the length of the palm. The whole hand, from wrist to middle fingertip, is roughly the length of a face from chin to hairline. These measurements are not exact for every person, but they give you a reliable starting point.
Also notice the arch of the knuckles. The knuckles do not form a straight line; they curve, with the middle knuckle highest. The webbing between fingers extends about a quarter of the way up each finger, so the visible parts of the fingers are shorter than most beginners draw them. These small observations separate a convincing hand drawing from a stiff, mannequin-like one.
Step-by-Step: How to Draw Hands in an Open Palm Pose
Let us draw a simple open palm together. This is the best first pose because it shows the full structure clearly.
Step 1: Lightly sketch a rounded rectangle for the palm, slightly wider at the top. Mark a center line down the middle. This will be your construction skeleton, so keep the lines light.
Step 2: Divide the top edge of the palm into four roughly equal sections, marking where each finger begins. Draw each finger as a tapered rectangle or cylinder, making the middle finger longest and the pinky shortest. Curve the knuckle line slightly downward at the edges.
Step 3: Add the thumb. Start it from the lower third of the palm, angling it outward at about 45 degrees. The thumb should reach roughly to the middle of the index finger. Draw it in two segments, wider than the fingers.
Step 4: Round the forms. Replace the boxy fingers with gently tapered, organic shapes. Add the slight bulges at each joint, and curve the fingertips into rounded caps. Do not make fingers perfectly straight tubes; they have subtle curves even when relaxed.
Step 5: Add detail and shading. Mark the creases where fingers bend, add fingernails (about one third of the visible fingertip), and shade the palm to show its cupped shape. The inner edges between fingers need darker tones to separate the forms. This same careful build-up of light layers also helps when you practice watercolor techniques or acrylic painting techniques for beginners later.
How to Draw Hands in Common Poses
Once you can draw a flat palm, move on to the poses that actually appear in art. Each one is just the basic structure rearranged.
The Pointing Hand
Draw the palm as before, but extend the index finger fully while curling the other fingers into the palm. The curled fingers become short stacked boxes, with the knuckles forming a rounded ridge. This pose teaches you foreshortening, because the curled fingers are much shorter in the drawing than they are in life.
The Relaxed Fist
A loose fist is the palm folded inward. Draw the back of the hand as a rounded box, then stack the four finger segments as curved ridges on top, like the rows of a washboard. The thumb rests across the front of the fingers. Pay attention to the knuckle bumps; they define the whole pose.
The Hand Holding an Object
Drawing hands holding a cup, pencil, or phone is one of the most useful skills in illustration. The secret is to draw the object first, then wrap the fingers around it. Each finger will bend at two joints and drape over the shape. Study how your own hand grips a pencil right now and notice how the thumb presses from the opposite side. Digital artists practicing Procreate drawing tutorials will find this grip pose especially useful for character art.
Shading Hands So They Look Three-Dimensional
Structure gets you a hand that reads correctly; shading makes it feel alive. Start with a single light source, then shade the palm as a gently cupped surface, darker in the center where it curves away from the light.
Each finger is a cylinder, so shade it with a smooth gradation: lighter on the side facing the light, darker on the far side, with a soft highlight along the edge. The knuckles catch light and create small bright bumps; the spaces between fingers fall into shadow. Add cast shadows where one finger overlaps another. Take your time with these transitions, because smooth, believable shading is what separates a flat sketch from a drawing that looks touchable. Many of the blending principles used in oil painting techniques for beginners apply here too, even in pencil.
The 5 Best Exercises for Learning How to Draw Hands
Knowledge alone will not fix your hands; practice will. These five exercises are what art teachers actually assign, and they work.
1. The 100-hand challenge. Draw 100 hands in a month, roughly three or four a day. They do not need to be finished pieces; quick sketches count. This single exercise transforms most beginners because it forces volume and variety.
2. Trace and mark joints. Trace your own hand, then mark every joint with a dot. This builds a mental map of where fingers actually bend.
3. Negative space drawing. Draw the shapes of the gaps between your fingers instead of the fingers themselves. This trick forces you to see the real shapes rather than the symbols your brain wants to draw.
4. Contour studies. Draw your hand without lifting the pencil, following every edge in one continuous line. The drawings will look strange, but your hand-eye coordination will improve dramatically.
5. Two-minute gestures. Set a timer and draw as many hand poses as you can in two-minute bursts. Speed drawing builds the quick observation skills that finished illustrations depend on. If you enjoy digital practice, these gestures pair perfectly with a digital art beginner’s guide workflow.
Common Mistakes When Drawing Hands (and How to Fix Them)
All fingers the same length. Beginners tend to make every finger identical. Always start with the middle finger as your longest reference and scale the others against it.
Spaghetti fingers. Fingers drawn as thin, wavy noodles look broken. Keep each finger tapered but firm, with clear segments and joints.
Ignoring the thumb. The thumb is thick, short, and attaches low on the palm. Treat it as its own form, not a fifth finger.
Skipping the wrist. A hand floating without a wrist looks detached. Always connect the hand to the wrist and forearm, even in a quick sketch.
Tools That Make Learning How to Draw Hands Easier
You do not need expensive supplies. A basic sketchbook, a few graphite pencils in different hardnesses, and a kneaded eraser are enough. Soft pencils (4B to 6B) are great for shading, while harder pencils (2H) keep your construction lines clean and light.
For reference, your phone camera is your best tool. Photograph your hand in the exact pose you need and use the photo as your model. Some artists also use wooden hand mannequins, which are cheap and hold poses your own hand cannot comfortably sustain. If you draw digitally, rotating a 3D hand model gives you perfect reference from any angle. Learning to work from good reference also helps when you photograph your own work, and solid golden hour photography tips make your finished drawings look great on social media too.
A 7-Day Practice Plan to Draw Hands Confidently
Days 1-2: Trace your hand and mark all joints. Draw ten flat open palms using the construction method from this guide.
Days 3-4: Practice fists and pointing hands. Do two-minute gesture sketches of your non-dominant hand in different poses.
Days 5-6: Draw hands holding objects: a pencil, a mug, a phone. Focus on how fingers wrap and where the thumb presses.
Day 7: Draw a finished, shaded hand from a photo of your own hand. Compare it with your day-one drawings and notice the progress. Strong shaded studies like this are excellent portfolio pieces, and the blending skills transfer directly to colored pencil drawing portraits. Artists who make this a habit often find their overall work improving enough to exhibit, and reading a guide on visiting art exhibitions can give you fresh inspiration for where to take your skills next.
Conclusion: Your Hands Are Your Best Reference
Learning how to draw hands comes down to three things: understanding the structure, practicing a variety of poses, and always working from real reference. Nobody is born able to draw hands well. Every artist you admire once drew terrible hands too; they just kept drawing them until they got good.
Start your 100-hand challenge today. Photograph your own hand, block in the structure, and build each drawing from the inside out. Within weeks, your hands will look less like mittens and more like real, expressive hands. Once hands stop scaring you, no subject will. Those same drawing fundamentals also give you a head start in creative fields like graphic design for beginners. Keep drawing, keep observing, and enjoy the process.


