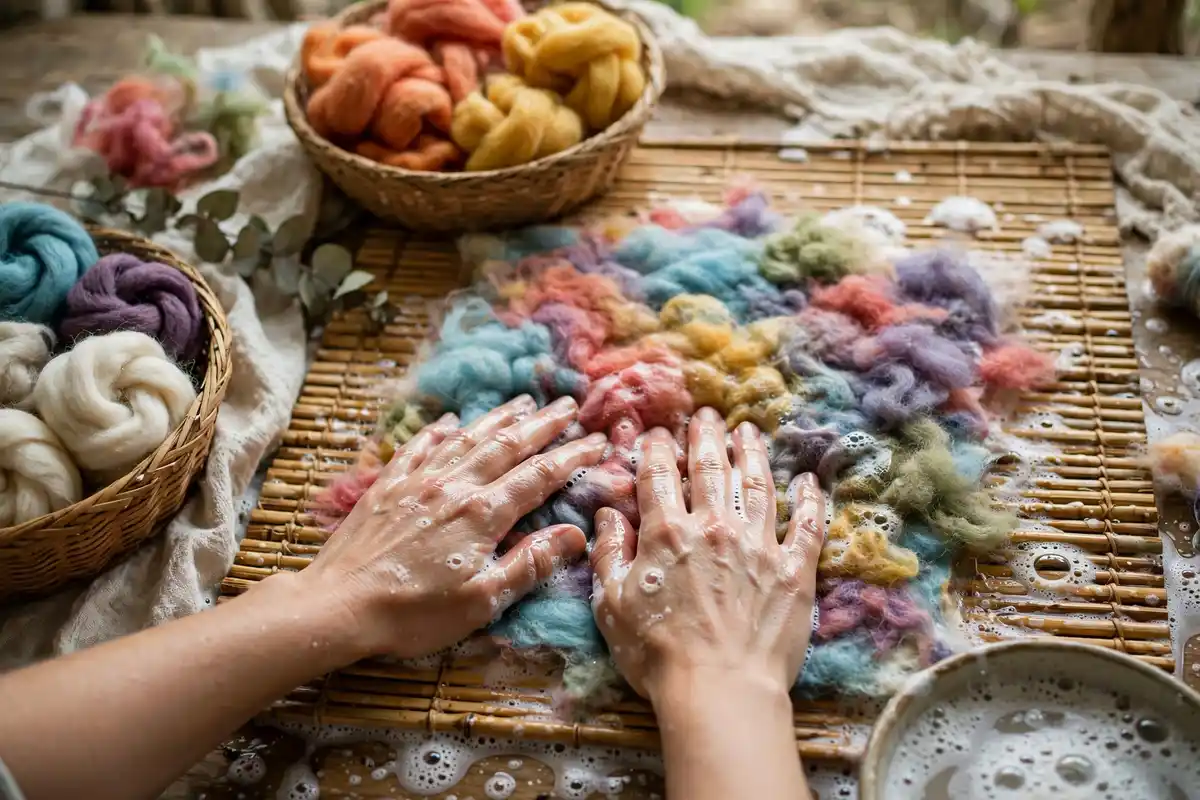
Wet felting turns loose wool into solid fabric using only warm water, soap, and your hands. You lay out fluffy wool fibers in layers, wet them, and rub them until they lock together into felt. The result can be a soft scarf, a sturdy bag, a pair of slippers, or a sculptural bowl, and the process feels wonderfully hands-on. If you love crafts that you can feel happening under your fingers, wet felting is hard to beat.
In this guide, you will learn what wet felting is, how it differs from needle felting, which wool and tools you need, and the step-by-step method for a flat piece of felt. You will also learn how to shape three-dimensional objects, fix common problems, and find project ideas that suit beginners across the United States.
What Is Wet Felting?
Wool fibers are covered in tiny scales that open up in warm, soapy water. When you rub and agitate the fibers, those scales catch on each other and lock together permanently. This process is called felting, and it is the same reason a wool sweater shrinks in a hot wash. Wet felters use that property on purpose, controlling the shrinkage to make dense, durable fabric.
Wet felting is one of the oldest textile crafts in the world, used for centuries to make tents, rugs, hats, and clothing. Today, American crafters use it for scarves, bags, wall art, slippers, and even pet beds. The method is forgiving, physical, and deeply satisfying, because you watch a pile of fluff become cloth in under an hour. If you already enjoy needle felting for beginners, wet felting will feel like its bigger, bolder cousin.
Wet Felting Versus Needle Felting
Needle felting uses a barbed needle to tangle fibers into small sculptures and details. Wet felting uses water, soap, and friction to make flat sheets and hollow shapes. Needle felting suits small, detailed work, while wet felting suits larger pieces like scarves and bags. Many artists combine both, wet felting a base shape and then needle felting details onto it.
Wet felting also works faster for large projects, since you cover a whole surface at once instead of stabbing one spot at a time. The trade-off is less fine control, so detailed faces and tiny features still belong to needle felting. For texture inspiration, compare the surfaces in weaving for beginners, where structure also comes from fiber crossing fiber.
Wet Felting Supplies for Beginners
Merino wool roving is the best starting fiber because its fine, soft strands felt quickly and evenly. Buy it in a few colors you love, and avoid superwash wool, which is treated to prevent felting and will frustrate you completely. You will also need a waterproof work surface, since wet felting is gloriously messy.
- Merino wool roving in 3 to 4 colors, about 100 grams total
- A bamboo mat, bubble wrap, or a felting mat as your work surface
- A mesh curtain or net fabric to hold fibers in place while you wet them
- Warm water, olive oil soap or dish soap, and a spray bottle
- Old towels, a rolling pin or pool noodle, and a resist template for 3D shapes
Work near a sink and wear an apron, because you will splash. A plastic tablecloth protects wooden tables, and a bucket for wringing towels saves trips to the sink. If you like working with your hands, the tactile joy here rivals macrame for beginners, another craft where the making is half the pleasure.
Step-by-Step: Your First Flat Piece of Wet Felt
Start with a small coaster or wall piece, about 8 by 8 inches finished. Remember that wool shrinks by about 30 percent during felting, so lay your fibers out larger than your target size. Lay the first layer of wool with fibers running horizontally, then a second layer vertically, then a third layer horizontally again. Crossing the layers is essential, since fibers running in one direction alone will not lock well.
Cover the wool with mesh, spray it with warm soapy water until damp but not swimming, and press gently to wet every fiber. Remove the mesh, then rub the surface in small circles with your hands, starting lightly and pressing harder as the fibers begin to catch. After ten minutes, flip the piece and rub the other side. Then roll it tightly in a bamboo mat and roll it back and forth about fifty times, unroll, rotate a quarter turn, and roll again. This rolling stage, called fulling, shrinks and hardens the felt.
When the felt feels firm and does not pull apart when pinched, rinse it in warm water, then cold water, and press it flat to dry. Your first piece may be slightly uneven, and that is normal. Evenness comes with practice, and uneven handmade felt still looks charming. The same patience applies to basket weaving for beginners, where early pieces wobble before they sing.
How to Make Three-Dimensional Wet Felted Shapes
For a bag, bowl, or slippers, you need a resist: a flat template cut from plastic or foam that marks the shape. Lay wool over both sides of the resist, wet and felt it as usual, then cut a slit, pull the resist out, and felt the shape further by hand. The felt shrinks around the opening and becomes a seamless hollow form, which feels like magic the first time you do it.
Start with a simple bowl before attempting slippers, since feet need accurate sizing and thicker felt. Add a second layer of wool for sturdiness on bags, and consider a fabric lining for a polished finish. If you plan to display felted art, the hanging ideas in bedroom wall art ideas work for textile pieces as well as framed prints.
Wet Felting Tips for Smooth, Even Fabric
Thin, even layers matter more than thick ones. It is better to lay four thin layers than two thick clumps, because thick spots felt slowly and leave lumps. Keep your water warm, not hot, since scalding water is uncomfortable and unnecessary. Use just enough soap to make the fibers slippery; too much soap makes rinsing endless.
Check your felt often during rolling, and rotate it regularly so it shrinks evenly instead of stretching in one direction. If one edge feels thinner than the rest, add a small patch of wool, wet it, and felt it in before the final fulling stage. Color planning also helps, and the guidance in color theory for beginners will keep your layered colors harmonious instead of muddy.
Common Wet Felting Problems and Fixes
If your felt falls apart, it probably needs more agitation, not more wool. Roll it longer and rub it harder until the fibers lock. If it feels stiff and papery, you may have used too little wool or fulled it too aggressively for a soft scarf. Next time, use slightly more fiber and stop rolling sooner for a drapier fabric.
Holes usually mean a thin spot in your layout, so patch them early with matching wool. Uneven shrinkage happens when you roll in one direction only, so rotate a quarter turn between rolls. If colors bleed into each other, separate bold colors with a thin layer of natural white wool, which acts as a buffer. Makers who enjoy rug tufting for beginners will recognize the same lesson: preparation decides the finish.
Wet Felting Project Ideas for Beginners
Coasters are the classic first project, followed by a table runner, a phone pouch, or a small wall hanging. A felted scarf in two or three colors makes a wonderful gift, and felted soap bars, where wool wraps a bar of soap and felts around it, are popular at American craft markets because they exfoliate gently and look beautiful in a bathroom.
More ambitious beginners can try a tote bag, a pair of baby booties, or a sculptural flower brooch. Felted flowers are especially fun, since you can shape petals while the wool is still damp. If you ever want to sell your work, how to sell art online explains how to photograph soft, textured items so buyers can see their quality.
Wet Felting for Kids and Families
Wet felting suits family crafting because it is safe, physical, and forgiving. Children can lay out wool, spray water, and roll mats with adult help, and the mess stays manageable on a covered table. Keep sessions short for young kids, since the rubbing stage needs patience, and let them choose bright colors for instant excitement.
School and homeschool groups use wet felting to teach science as well as art, since the process shows how animal fibers behave under heat and friction. It pairs naturally with nature crafts, and the outdoor themes in landscape painting for beginners can inspire felted landscapes made from dyed wool.
Wet Felted Gifts and Home Decor
Wet felted pieces make thoughtful handmade gifts because every item is unique and practical. A felted coaster set pairs beautifully with a punch needle art mug rug, while a felted wall hanging looks at home beside a cross stitch for beginners sampler in a hallway gallery. For a craft fair table, combine small felted items with a sparkling diamond painting for beginners frame to offer gifts at several price points. Wrap felted gifts in tissue paper rather than plastic, since wool needs to breathe, and include a short care note so the recipient knows to hand wash in cool water.
Conclusion: Water, Soap, and Wool Become Art
Wet felting is wonderfully simple at heart: lay wool in crossed layers, add warm soapy water, and rub until it becomes fabric. Your first piece will teach you more than any video, because your hands learn the moment fibers begin to catch. Start with a coaster this weekend, feel that transformation for yourself, and you will soon be planning scarves, bags, and bowls in every color you own.