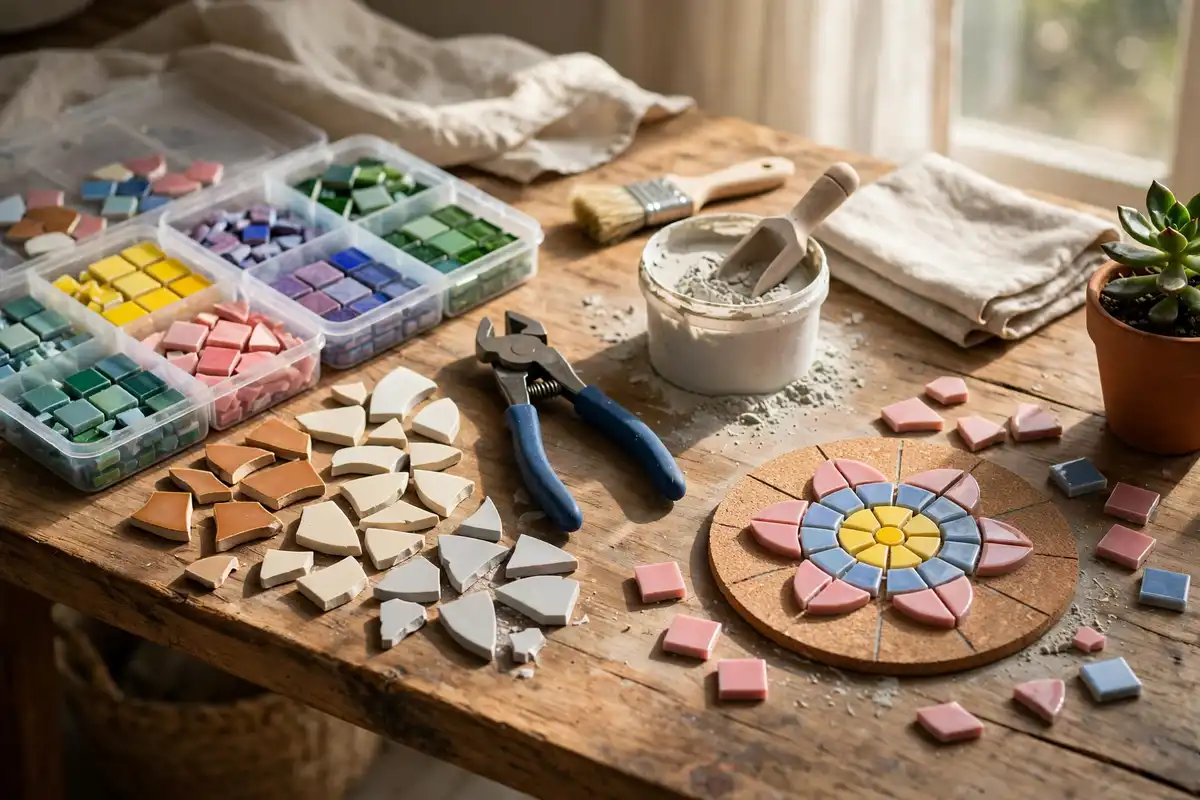
Mosaic art for beginners is one of the most forgiving and joyful crafts you can try at home. You do not need perfect drawing skills, expensive equipment, or years of training. Instead, you break beautiful materials into small pieces and fit them together like a puzzle. The result is a sparkling coaster, a garden stepping stone, a mirror frame, or a wall panel that looks far more impressive than the effort it took. If you have ever admired the tiled fountains of California, the colorful murals in New York subway stations, or the ancient floors of Roman villas, you already understand the appeal of mosaic art.
In this complete guide, you will learn exactly how to start mosaic art for beginners, step by step. We will cover the best supplies, the safest tools, simple design ideas, and a first project you can finish in a single weekend. You will also learn how to grout, seal, and display your work so it lasts for years. By the end, you will have a finished piece in your hands and the confidence to try a bigger project next.
What Is Mosaic Art?
Mosaic art is the craft of arranging small pieces of glass, ceramic, stone, or tile, called tesserae, into a picture or pattern. Artists have used this technique for thousands of years, from the mosaics of ancient Greece and Rome to the vibrant public art of modern American cities. Today, mosaic art for beginners is more accessible than ever, because craft stores sell pre-cut tiles, adhesive sheets, and ready-made bases that remove most of the guesswork.
Unlike painting, where one wrong brushstroke can ruin a picture, mosaic work is easy to fix. If a tile sits in the wrong place, you can lift it and move it before the glue dries. That freedom makes it perfect for new artists, children working with adult supervision, and anyone who wants a relaxing, hands-on hobby. Furthermore, the finished work has real texture and shine, so it catches light in a way that flat art simply cannot match.
Essential Supplies for Mosaic Art Beginners
Start with a small kit rather than buying everything at once. You will need a base, such as a wooden coaster, a plain mirror frame, or a terracotta pot. Next, choose mosaic tiles in a few colors you love. Glass tiles are bright and easy to cut, while ceramic tiles give a rustic, earthy feel. You will also need tile adhesive or a strong craft glue, a pair of wheeled tile nippers, grout, a grout float or old credit card, a sponge, and a sealant.
Safety matters from the very first session. Always wear safety glasses when you cut tiles, because small shards can fly. Keep a small brush handy to sweep fragments into a jar, and work on a tray so pieces do not scatter across your table. If you are new to working with color and composition, studying color theory for beginners will help you choose tile combinations that look balanced rather than random. A simple palette of three or four colors usually looks far better than ten competing shades.
Choosing Your First Mosaic Design
Simple designs succeed where complicated ones frustrate beginners. A flower, a sun, a heart, a fish, or a geometric border are all excellent first projects. Draw your design on paper first, at the same size as your base, and keep the shapes large and bold. Tiny details look charming in a sketch, but they are hard to fill with tiles, so save them for your third or fourth project.
Think about contrast as you plan. A dark outline around a bright shape makes the image pop from across the room. Similarly, a plain background in one calm color lets your main motif stand out. If you enjoy planning patterns on paper before you build them, pattern drawing ideas can spark layouts that translate beautifully into tile. Remember, your first mosaic does not need to be original or complex. It needs to be finished, and finishing builds the confidence to keep going.
How to Cut and Place Mosaic Tiles
Cutting tiles sounds intimidating, but it quickly becomes satisfying. Hold the tile firmly in the nippers, squeeze gently, and let the tool do the work. Aim for pieces roughly the size of a thumbnail or smaller, and try to keep them fairly even. Uneven pieces are fine, however, because the grout will fill the gaps and unify the surface. Sort your cut pieces by color into small bowls so you can reach for them without searching.
When you are ready to place tiles, spread a thin layer of adhesive on a small section of the base, not the whole surface at once. Press each tile down with a slight twist, leaving a gap of about one-eighth of an inch between pieces. That gap, called the grout joint, is essential. It gives the grout somewhere to go and makes the finished piece strong. Work from the center outward if your design has a central motif, or from one edge across if you are making a border. If you have practiced sketching for beginners, you will find that transferring a sketch onto a base feels natural and quick.
Tips for Neat, Even Spacing
Use a toothpick or a craft stick to nudge tiles into place while the glue is still soft. Step back every few minutes and look at your work from arm’s length, because spacing problems are easier to spot from a distance. Do not worry if a few tiles sit slightly higher than others. Once grouted, the surface will still look intentional and handmade, which is exactly the charm of mosaic art.
Grouting Your Mosaic Step by Step
Grouting is the moment your mosaic truly comes together. After the adhesive has dried completely, usually overnight, mix your grout according to the package directions until it reaches the consistency of thick peanut butter. Wear gloves, spread the grout over the whole surface with a float or an old card, and press it firmly into every gap. Work in all directions so no joint stays empty.
Wait about fifteen minutes, then wipe the surface gently with a damp sponge. Rinse the sponge often, and wipe diagonally across the tiles so you do not pull grout out of the joints. You may need two or three passes before the tiles shine clearly. Let the piece dry for a full day, then buff it with a soft, dry cloth to remove any remaining haze. At this stage, many beginners are surprised by how professional the result looks. The same patience that helps with pencil shading techniques pays off here too, because slow, careful finishing always beats rushing.
Sealing and Displaying Your Finished Mosaic
Sealing protects your work from moisture, dust, and everyday wear. For indoor pieces, a clear brush-on sealant is usually enough. Apply two thin coats, letting each coat dry fully before adding the next. For outdoor pieces, such as garden stones or planters, choose a sealant rated for exterior use, and reapply it once a year. Avoid sealing before the grout is completely dry, or you may trap moisture and cloud the finish.
Display your mosaic where light can reach it. Glass tiles glow beautifully near a window, while a ceramic piece looks warm and grounded on a bookshelf or mantel. If you plan to hang a heavier panel, use proper wall anchors and a sturdy wire on the back. Many American makers go on to sell art online once friends start asking where they bought a piece, and mosaics photograph wonderfully for online shops because of their texture and color.
Common Beginner Mistakes to Avoid
The most common mistake is using too much glue, which squeezes up between tiles and blocks the grout. A thin, even layer is always better. The second mistake is choosing a design that is far too detailed for a first attempt. Large shapes, bold outlines, and a limited palette will serve you much better. The third mistake is skipping the sealant, especially on items that will be handled often, like coasters.
Another frequent error is grouting too soon. If the adhesive is still soft, tiles can shift and sink unevenly. Patience is a genuine skill in mosaic art, just as it is in still life drawing for beginners, where careful observation matters more than speed. Finally, do not compare your first piece to the work of artists with twenty years of experience. Compare it to a blank base, and you will see how far you have already come.
Easy Mosaic Project Ideas to Try Next
Once you finish your first coaster, try a mirror frame, a house number plaque, or a set of garden stepping stones. A terracotta pot covered in blue and white tiles makes a lovely gift, and a small wall panel with a sun or tree design brightens any hallway. You can also combine mosaic with other crafts. For example, a wooden box with a mosaic lid pairs beautifully with skills learned in mixed media art for beginners, while a mosaic border around a painted panel connects naturally to landscape painting for beginners.
If you love paper crafts as well, the patience you build here transfers directly to paper quilling for beginners and collage art for beginners, both of which reward careful placement and color sense. Even drawing skills help, because a strong sketch makes a strong mosaic. Try perspective drawing basics if you want to design tiled scenes with depth, or explore figure drawing for beginners before attempting a mosaic portrait. For a touch of luxury, gold leaf art accents can add shimmer to a mosaic frame without much extra cost.
Conclusion
Mosaic art for beginners is proof that beautiful art does not require perfection. With a handful of tiles, a little glue, and a weekend afternoon, you can create something durable, colorful, and entirely your own. Start small, choose a simple design, cut safely, grout patiently, and seal your work well. Each finished piece will teach you something new about color, spacing, and composition.
So gather your supplies, clear a table, and make your first mosaic this week. You may discover a hobby that fills your home with color, gives you thoughtful handmade gifts for friends, and offers a calm, screen-free way to unwind. The only tile you truly need to place first is the first one, and after that, the picture builds itself, one small, shining piece at a time.