
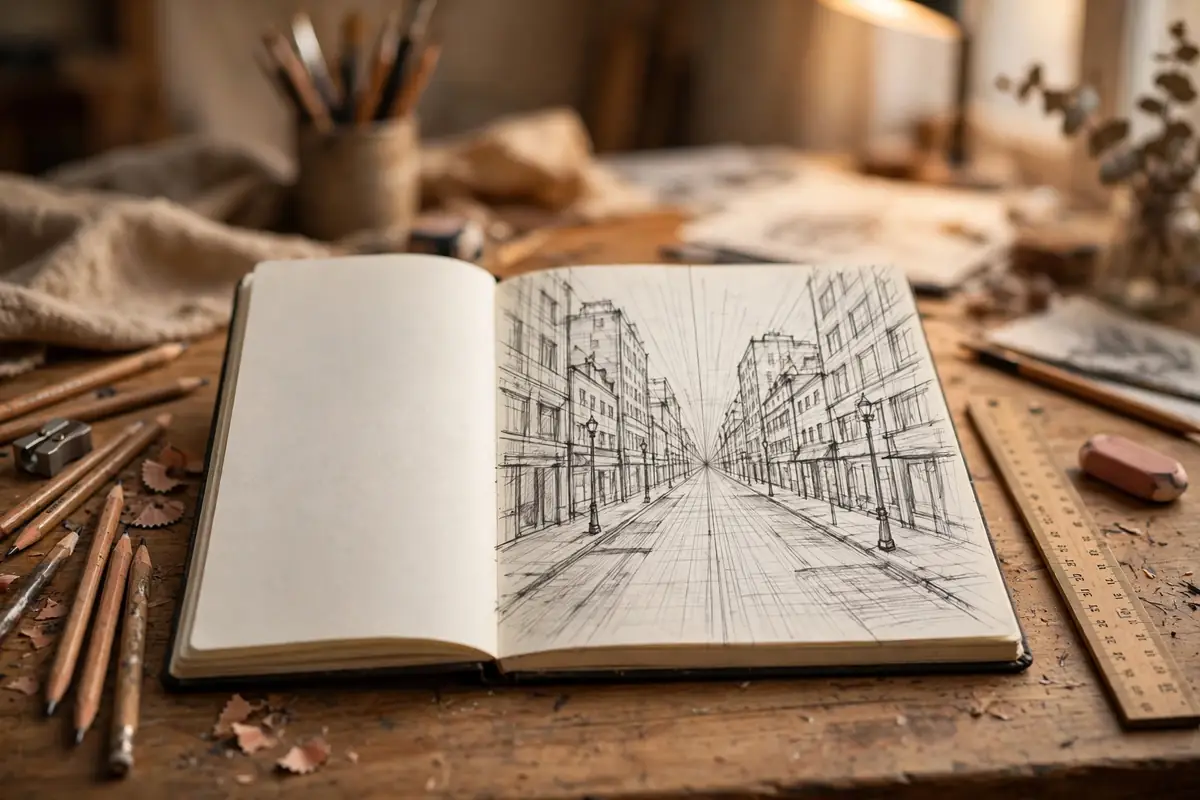
Perspective is the skill that makes a drawing feel three-dimensional, and it is much simpler than most beginners expect. When you look down a road, the edges of the road appear to meet in the distance. When you look at a building, the sides angle toward invisible points on the horizon. Perspective drawing simply records those angles honestly instead of drawing what you know to be true. Once you understand a few rules, rooms, streets, and buildings stop looking flat, and your sketches gain a sense of space that feels real.
Many beginners avoid perspective because it sounds technical, but you do not need math to use it. You need a horizon line, one or two vanishing points, and the patience to draw light guidelines before dark lines. This guide covers one-point perspective, two-point perspective, and the common mistakes that flatten a drawing. Practice with a ruler first, then try freehand. Within a few sessions, you will start seeing perspective everywhere: in hallways, on bookshelves, and in every street you walk down.
What Is Perspective in Drawing?
Perspective is a method for showing depth on a flat surface. Objects look smaller as they move farther away, and parallel lines appear to converge toward a point on the horizon. Your eyes already do this naturally. A long hallway looks narrower at the far end even though you know the walls are parallel. Drawing in perspective means copying that visual effect instead of drawing the hallway with parallel walls, which would look wrong even though it is technically accurate.
The key idea is the horizon line, which sits at your eye level. If you stand on a beach, the horizon is where the sea meets the sky. In a drawing, the horizon line marks the same eye level, and every vanishing point sits on it. When you crouch, the horizon drops. When you stand on a hill, it rises. Choosing a horizon line is really choosing where the viewer stands, and that choice shapes the whole drawing before you draw a single object.
One-Point Perspective: Start Here
One-point perspective uses a single vanishing point, and it fits any scene where you face something directly: a road, a hallway, a railway track, or a room viewed straight on. Draw a horizontal horizon line across your page, then mark one point on it. That point is your vanishing point. Every line that runs away from you in the scene must point toward it. Lines that run across the scene, like the top of a door, stay horizontal. Lines that run up and down stay vertical.
Try it with a simple road. Draw the horizon line and the vanishing point, then draw two diagonal lines from the bottom corners of the page toward the point. Those are the road edges. Add horizontal lines across the road for crosswalks or cracks, spacing them closer together as they near the vanishing point. That shrinking spacing is what sells depth. Loose sketching practice helps here, because you will draw many light guidelines before choosing the final lines, and you should not commit to dark lines too early.
Draw a Room in One-Point Perspective
A room is the best first project because it uses only rectangles. Draw the back wall as a rectangle in the middle of the page, then place the vanishing point inside it. Connect each corner of the back wall to the vanishing point with light lines. Those lines define the side walls, floor, and ceiling. Now add a door on the back wall, a window on a side wall, and a rug on the floor. Every edge that recedes must aim at the vanishing point, while edges facing you stay horizontal or vertical.
Furniture follows the same rules. A table in the room has a top edge facing you and side edges receding toward the point. Draw the front of the table first, then extend its receding edges toward the vanishing point, and close the shape with a back edge. If a line refuses to point at the vanishing point, it will look tilted or floating. Landscape painting uses the same logic outdoors: distant trees sit smaller and closer to the horizon, while near trees are larger and lower on the page.
Two-Point Perspective: Drawing Corners
Two-point perspective fits scenes where you see the corner of an object, like a building viewed from a street corner. Instead of one vanishing point, you use two, both on the horizon line, one to the left and one to the right. Start with a vertical line for the near corner of the building. From the top and bottom of that line, draw guidelines to both vanishing points. Those lines form the two visible sides of the building. Close each side with a vertical edge, and you have a believable box in space.
Windows, doors, and roof lines on each side must follow their own vanishing point. The left side follows the left point, and the right side follows the right point. Mixing them up is the most common error, and it makes buildings look twisted. Place the vanishing points far apart, ideally off the page, for a natural look. Points placed too close together create an exaggerated, fish-eye distortion that feels wrong. Figure drawing rarely needs vanishing points, but the same habit of checking angles against a reference applies to bodies as well as buildings.
Three-Point Perspective for Tall Views
Three-point perspective adds a third vanishing point above or below the horizon, and you need it when looking sharply up at a skyscraper or down from a high window. Vertical lines converge toward that third point instead of staying vertical. Beginners can skip this method at first, but it is useful to know it exists. If you draw a tall building with perfectly vertical edges while standing right beneath it, the result will feel stiff. Adding a gentle convergence in the verticals fixes that feeling immediately.
Common Perspective Mistakes
The most frequent mistake is drawing parallel lines that should converge. A road drawn with parallel edges looks like a ladder lying flat, not a road receding into distance. Another mistake is placing the vanishing point in the wrong spot. Remember that every vanishing point must sit on the horizon line. A point floating above or below the horizon breaks the scene, because it implies a different eye level for one object than for the rest.
Beginners also forget that size shrinks with distance. A distant person should be much smaller than a nearby person, and a distant tree should sit higher on the page, closer to the horizon. Drawing hands teaches a similar lesson about foreshortening: a hand pointing at the viewer looks short and wide, not long. Trust what you see over what you know, and check sizes by comparing objects against each other, just as you would in any observational drawing.
Measure Angles the Simple Way
You can check any receding angle with your pencil. Hold the pencil at arm’s length, close one eye, and tilt it until it lines up with the edge you want to draw. Then carry that angle to your paper without changing it. This trick works for rooftops, roads, and table edges, and it removes guesswork. Artists have used sighting methods like this for centuries because eyes alone are unreliable at judging angles.
Another useful check is to extend your lines mentally. If you extended the two sides of a building, would they meet on the horizon? If they meet far above it, the drawing is wrong. Charcoal drawing is a forgiving medium for perspective practice, because you can wipe away wrong guidelines and redraw them quickly. Colored pencil drawing also works well, since you can draw guidelines in a light color and build final lines over them without messy erasing.
Practice Exercises That Actually Work
First, draw your own room in one-point perspective from where you sit. Measure nothing; just place the horizon at your eye level and draw what you see. Second, photograph a street corner and draw over a printout, tracing the lines that converge. Tracing teaches your hand the angles before you attempt them freehand. Third, draw the same simple box in one-point, two-point, and three-point perspective on one page. Comparing the three versions side by side makes the differences obvious.
Fourth, draw a row of identical objects, like fence posts or streetlights, receding into the distance. Space them closer together and draw them smaller as they approach the vanishing point. This exercise isolates the single most important perspective skill: scaling with distance. Anime drawing also benefits from perspective, especially for dynamic backgrounds, and a good drawing tablet makes it easy to draw and erase guidelines digitally while you learn.
From Guidelines to Finished Drawings
Guidelines are scaffolding, not part of the finished drawing. Draw them lightly, build your scene on top of them, and erase them once the final lines are in place. Beginners often leave guidelines visible because they fear erasing a good line. Erase carefully with a kneaded eraser, which lifts graphite without tearing paper, and redraw any final line that fades. A clean drawing with confident final lines always looks better than a page full of construction marks.
When you add shading, remember that perspective affects light too. Distant objects usually look lighter and less detailed because of atmosphere, a trick painters call aerial perspective. Modern abstract art often breaks perspective rules on purpose, but breaking rules works best after you understand them. Wall art ideas can inspire how you frame and display your finished perspective drawings at home. Start with simple rooms and streets, keep your vanishing points on the horizon, and let depth do the rest.


