
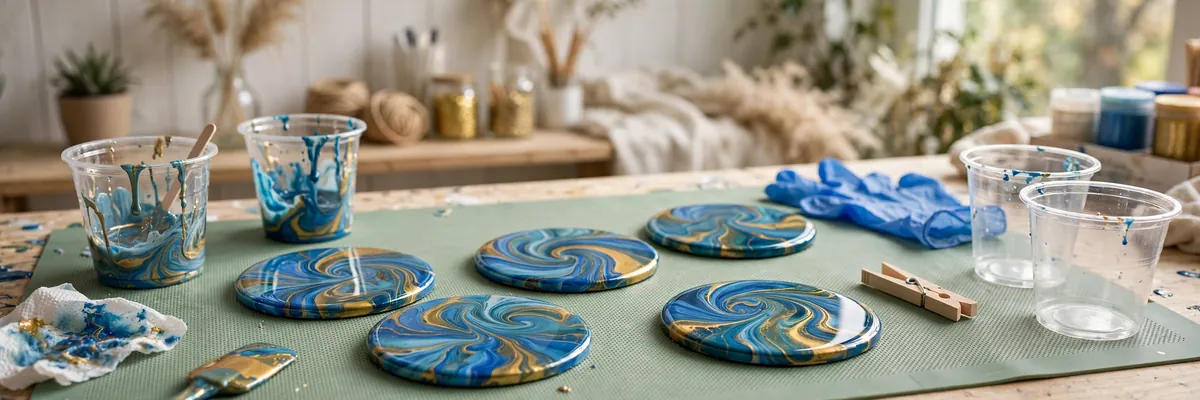
Few crafts deliver the instant wow factor of resin art. Pour a puddle of glossy liquid onto a coaster mold, swirl in some pigment, and twenty-four hours later you are holding a glass-smooth piece that looks like it came from a high-end boutique. That magic is exactly why resin art beginners keep flooding American craft studios, and it is also why the craft has a reputation for being tricky: skip the safety steps or mix your ratios wrong, and you get sticky, cloudy disappointment instead of a masterpiece. This complete guide covers everything a beginner needs — the right resin, the essential safety gear, the pour techniques that actually work, and the mistakes that ruin projects — so your first pour comes out glossy, hard, and gift-worthy.
Resin Art Beginners: What Epoxy Resin Actually Is
Art resin is a two-part epoxy system: a resin (part A) and a hardener (part B) that, when mixed in the correct ratio, trigger a chemical reaction called curing. The mixture starts as a pourable liquid with a working time of roughly 20 to 45 minutes, thickens as the reaction progresses, and hardens into a rigid, glass-clear solid over 24 to 72 hours. It is the curing chemistry that gives resin art its famous glass-like finish — no topcoat needed.
Not all epoxies are the same. Art and coating resins are formulated for thin pours (up to a quarter inch per layer), low odor, and UV resistance so your pieces do not yellow quickly in sunlight. Deep-pour or casting resins are thinner and cure more slowly, designed for river tables and thick molds. As a beginner, start with a quality art resin from a reputable brand — cheap hardware-store epoxy cures cloudy and yellows fast, which will frustrate you before you have learned anything. If you enjoy other hands-on crafts, our pottery for beginners guide pairs beautifully with resin work.
Safety First: Non-Negotiable Gear for Every Pour
Epoxy resin is safe to handle when you respect it, and genuinely unpleasant when you do not. The hardener contains sensitizing chemicals, which means repeated unprotected skin contact can develop into a permanent allergy. Treat this section as law, not suggestion.
Respirator: Wear a respirator rated for organic vapors whenever you mix, pour, or sand resin — not a dust mask, a real half-face respirator with replaceable cartridges. Work in a ventilated space: an open garage, a room with a window fan exhausting outward, or a covered patio.
Gloves and skin protection: Nitrile gloves, always. Change them if they tear. Wear long sleeves or arm covers, and keep a bottle of vinegar or baby wipes nearby — if resin touches skin, wipe it off immediately and wash with soap and water. Never use solvents like acetone on your skin.
Eye protection: Safety glasses or goggles, especially when mixing vigorously or sanding cured pieces. Keep your workspace pet-free and food-free, and store resin bottles locked away from children. These precautions sound serious because they are — but once the gear is on, resin art is pure creative joy.
Your Starter Kit: What Resin Art Beginners Actually Need
The craft-store wall of resin supplies is overwhelming, so here is the honest minimum kit that gets you pouring this weekend:
Epoxy art resin (1-gallon kit): A gallon sounds like a lot, but resin projects drink material fast — a set of four coasters uses roughly 8 to 10 ounces. Buy from art-resin brands with strong reviews, and check the mix ratio (1:1 by volume is the most beginner-friendly).
Silicone molds: Start with coaster molds — they are cheap, forgiving, and produce finished pieces people actually use. Avoid intricate molds until your technique is solid.
Pigments: Alcohol inks create those dreamy translucent swirls; mica powders give opaque, shimmery color; resin dyes offer intense transparent tints. Buy a small starter set of each rather than a huge collection of one type.
Mixing and pouring tools: Graduated silicone or plastic cups (8 oz and 16 oz), silicone stir sticks, a small kitchen torch or heat gun for popping bubbles, and a level to check your work surface. A cheap infrared thermometer is a bonus — resin cures best between 70 and 80 degrees Fahrenheit.
Protection for your space: Silicone mats, painter’s tape, and plastic sheeting. Resin drips are permanent on most surfaces, so cover everything within splatter range. For inspiration on displaying your finished pieces around the house, browse our living room makeover ideas for styling handmade decor.
How to Mix Resin: The Ratio Rule That Makes or Breaks Your Piece
Mixing is where most beginner failures happen, and the rule is beautifully simple: measure exactly, mix thoroughly, mix again. For a 1:1 resin, pour equal volumes of part A and part B into a graduated cup — eyeballing is not measuring. Stir slowly and deliberately for a full three minutes, scraping the sides and bottom of the cup, because unmixed resin clinging to the cup walls is the number one cause of sticky spots.
Here is the professional trick: after the first mix, pour the combined resin into a second clean cup and stir for another minute. This “double-pot” method leaves behind the unmixed residue clinging to the first cup’s walls and virtually guarantees a complete mix. Then let the cup sit for two to three minutes so large bubbles rise — you can pop surface bubbles with a quick pass of a kitchen torch held six inches above the resin, moving constantly so you never scorch one spot.
Temperature matters enormously. Cold resin is thick, traps bubbles, and cures slowly; warm resin (parts stored at 75–80°F) flows like honey and releases bubbles easily. In winter, warm your sealed bottles in a bowl of warm — not hot — water for fifteen minutes before mixing. Never microwave resin or heat it above 90°F; you will shorten the working time dramatically and risk an exothermic runaway where the cup overheats.
5 Beginner Resin Art Techniques That Look Stunning
1. The Dirty Pour
Layer different colored resins into one cup — white, gold, and teal is a classic — then pour the whole cup onto your mold in one continuous stream. The colors ribbon and marble together into organic, stone-like patterns. Every dirty pour is unique, which is exactly the appeal. Tilt the mold gently to spread the resin to the edges.
2. Alcohol Ink Petals
Pour a thin layer of clear or white-pigmented resin into the mold, then drop alcohol ink onto the surface in a flower pattern. Use a toothpick to drag each drop outward into petal shapes. The ink sinks and blooms into translucent, watercolor-like blossoms suspended in the resin — one of the most photographed resin effects on social media, and easier than it looks. The same color instincts that drive our watercolor techniques for beginners guide apply here: let the medium do the flowing.
3. Geode Coasters
Mimic sliced agate by pouring rings of color from the center outward: deep navy, then teal, then white, then a band of gold glitter or crushed glass for the “crystal” edge. Finish with a clear topcoat pour after the first layer cures. Geode pieces sell extremely well at craft fairs and make spectacular housewarming gifts.
4. Ocean Waves
Pour bands of deep blue, turquoise, and white resin across a rectangular mold, then use a heat gun on low to push the white resin into lacing patterns that look exactly like sea foam. A hair dryer on its cool setting works too. Ocean pieces are perennial bestsellers in coastal US markets from Florida to California.
5. Gold-Leaf Accents
Press small flakes of imitation gold leaf into tacky (partially cured) resin, then seal with a clear flood coat. The metallic fragments catch light like tiny mirrors. Use a light hand — a few well-placed flakes look luxurious, while a blizzard of gold looks gaudy. Style your finished gold-accented pieces with the tips in our bedroom wall art ideas for a cohesive handmade look.
Curing: Patience Is a Material, Not a Virtue
After the pour comes the hardest technique of all: leaving it alone. Cover your piece with a cardboard box or plastic bin to keep dust off — airborne dust settling into tacky resin is the most common cosmetic defect in beginner work. Keep the room between 70 and 80°F with stable humidity; cold rooms slow curing, and damp air can cause a cloudy “amine blush” on the surface.
Most art resins reach a tack-free state in 6 to 12 hours and full cure in 72 hours. Do not demold early: a piece that feels hard on the surface may still be soft underneath, and flexing it causes warping that never fully corrects. Mark your calendar and wait the full cure time before sanding, drilling, or using the piece. If the surface cures with a slight blush or dullness, a light sanding with 400-grit wet sandpaper followed by a thin clear flood coat restores the glass finish.
Troubleshooting: Fixing the 6 Most Common Resin Disasters
Sticky spots that never cure: Unmixed resin. Scrape it off, sand the area, and pour a thin fresh layer of properly double-potted resin over it. Prevention beats repair — always double-pot your mix.
Bubbles trapped everywhere: You poured too cold, stirred too fast, or skipped the torch pass. Warm your resin, stir slowly, and torch the surface twice: once right after pouring and again ten minutes later. A pressure pot eliminates bubbles entirely for serious crafters.
Cloudy or milky finish: Moisture contamination or cold curing. Warm the workspace, keep humidity below 60 percent, and make sure molds are completely dry before pouring.
Resin leaked under the mold: Your surface was not level or the mold warped. Always check with a level before pouring, and place molds on a rigid board rather than a flexible mat.
Colors muddied together: You overmixed or poured colors with very different densities. Pour opaque colors first and let them settle slightly before adding transparent ones, and stop swirling one stroke earlier than your instinct says.
Piece warped after demolding: Demolded too early or cured in heat. Wait the full 72 hours, and never cure pieces in direct sun or above 85°F. Studying how professional makers finish their work helps too — visiting an art exhibition trains your eye for the flawless finishes worth chasing.
Selling Your Resin Art: From Hobby to Side Income
Once your coasters cure glass-smooth, the obvious question follows: can I sell these? The honest answer is yes — resin art has one of the lowest barriers to a profitable craft side hustle in the US. A set of four geode coasters costs roughly $6 to $10 in materials and routinely sells for $35 to $60 at craft fairs and on marketplaces. Trays, cutting boards, and wall art command higher prices, while jewelry has the best material-to-price ratio of all.
Photography sells the piece before the customer touches it. Shoot in soft natural light on clean backgrounds, and capture the glossy depth that makes resin special — the same principles in our golden hour photography tips will elevate your product shots from snapshots to listings that convert. Styled lifestyle shots — think the romantic, detail-rich aesthetic of our engagement photoshoot trends — consistently outperform plain white backgrounds for handmade listings. Price for your time, not just your materials: track how long each piece takes, including curing-adjacent labor like sanding and packaging, and never undercut yourself to win a sale.
Resin art rewards the patient beginner enormously. Your first pour will teach you more than any video, your fifth will look professional, and your twentieth might pay for the hobby. Gear up safely, measure precisely, pour boldly — and join the thousands of American makers turning liquid into glass. If this taste of hands-on craft has you hooked, our old-fashioned darning guide and graphic design tips for beginners offer two very different directions to grow your maker skills, while modern abstract art trends shows where resin’s glossy aesthetic fits in today’s art world.


