
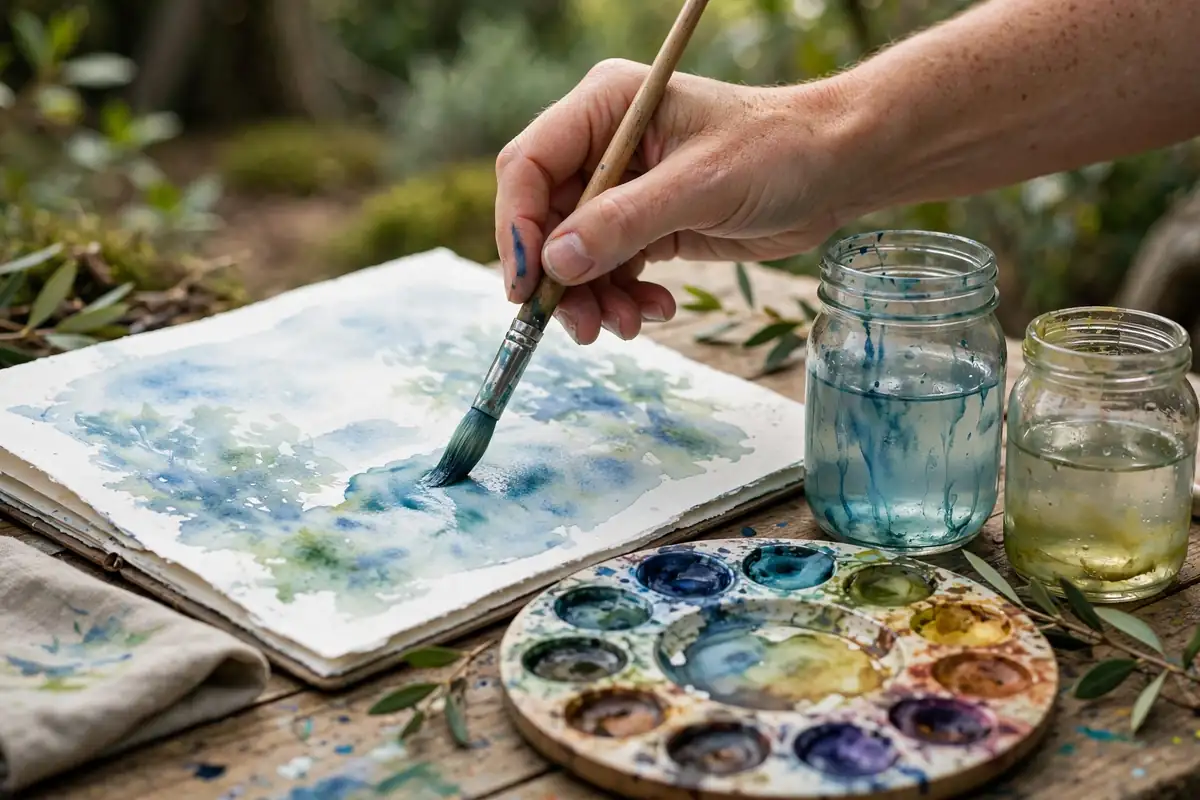
Watercolor painting looks effortless in a gallery. Those soft skies, glowing washes, and delicate details seem to appear on the paper like magic. Then you pick up a brush yourself, and the paint blooms into muddy puddles, edges bleed unexpectedly, and the whole page curls up like a potato chip. If that sounds familiar, you are in exactly the right place.
Watercolor is one of the most rewarding mediums a beginner can learn, because it teaches you to let go of total control. You cannot cover mistakes with another thick layer. Instead, you learn to plan ahead, work with the water instead of against it, and accept the happy accidents that make watercolor so alive. This guide walks you through the essential watercolor techniques for beginners, the exact supplies you need (and the ones you can skip), and the mistakes that trip up nearly every new painter.
What You Actually Need to Start Watercolor Painting
Art stores love to sell beginners entire aisles of products. You do not need most of them — a small, thoughtful setup serves you far better than a giant kit of mediocre materials.
The non-negotiables
- Watercolor paper (140 lb / 300 gsm, cold press): This is the single most important purchase. Cheap paper pills and warps when wet, which makes every technique harder. Look for 100% cotton paper if your budget allows — it holds water evenly and lets you lift paint back off.
- A basic set of artist-grade paints: Student-grade paints contain more filler and less pigment, so colors look chalky when diluted. A limited palette of warm and cool red, yellow, and blue, plus burnt sienna and ultramarine, can mix nearly any color you need.
- Two brushes to start: A round brush (size 8 or 10) handles most work — washes, details, and everything between. Add a 1-inch flat brush for large even washes.
- Two water jars: One for rinsing dirty brushes, one for clean water to mix with. This one habit instantly keeps your colors cleaner.
- A white ceramic or plastic palette: The white surface lets you judge color accurately. Many paint sets include one in the lid.
- Paper towels or a clean cotton rag: You will use these constantly to blot brushes and lift paint.
- Painter’s tape and a rigid board: Taping your paper down prevents warping and gives you crisp, clean edges.
What you can skip for now
Masking fluid, specialty mediums, dozens of brushes, and expensive easels can all wait. Master the basics first; the same minimalist approach that works for pottery beginners works here too — learn the core skills before expanding your toolkit.
Core Watercolor Techniques for Beginners: The Essential Six
Everything in watercolor is built from a handful of foundational techniques. Practice each on scrap paper before combining them, and keep a “technique journal” — a cheap sketchbook for testing every new skill — to build muscle memory fast.
1. Flat wash
The flat wash lays down an even layer of color, perfect for skies and backgrounds. Tilt your board about 10 degrees, load your flat brush generously, and pull a horizontal stroke across the top. Each stroke should slightly overlap the wet bead hanging at the bottom of the previous one. Work quickly and never go back over painted areas — that is how streaks happen.
2. Graded wash
The graded wash transitions smoothly from dark to light — think of a sunset sky fading toward the horizon. Start with full-strength paint at the top and add water to your mix with each stroke moving down. Keep moving continuously; pausing creates visible bands. You will use this wash in nearly every landscape.
3. Wet-on-wet
Wet-on-wet means applying wet paint onto wet paper, producing the soft, dreamy blooms watercolor is famous for. Pre-wet your paper with clean water, then touch your loaded brush to the surface and watch the color spread. It is ideal for clouds, distant hills, and atmospheric backgrounds. Timing matters: on very wet paper the paint explodes outward, while damp paper gives more control. Learning to read paper wetness — the sheen should look like satin, not a puddle — is one of the most valuable watercolor techniques for beginners to master.
4. Wet-on-dry
The opposite approach: wet paint on completely dry paper. This gives you crisp edges and full control, making it the technique for details, outlines, and glazing (layering transparent color over a dry layer). Always make sure the underlying layer is bone dry before glazing, or the colors will mix and turn muddy. Many beginners confuse wet-on-dry discipline with boredom — it is actually where precision lives. When you want to capture the kind of sharp detail you see in reference photos, wet-on-dry is your friend.
5. Dry brush
Load a brush with thick paint and very little water, then drag it lightly across dry, textured paper. The paint catches only the raised bumps of the paper, creating a broken, scratchy texture. Dry brush is perfect for tree bark, grass, weathered wood, and sparkling water highlights. The most common beginner error is using too much water — the brush should feel almost dry.
6. Lifting
Lifting removes paint to create highlights — sun glints on water or light edges on clouds — or to fix a mistake. While the paint is still damp, press a clean, slightly damp brush or a crumpled paper towel onto the area and blot. On good cotton paper you can lift well even after the paint dries, though staining pigments lift poorly and earth tones lift beautifully.
Color Mixing: A Simple Palette Strategy That Prevents Mud
Beginners often wonder why their mixed colors turn into lifeless brown-grey sludge. The culprit is almost always mixing too many pigments, or mixing warm and cool versions of colors together carelessly.
Start with a split-primary palette: a warm and cool version each of red, yellow, and blue. Mix warm with warm and cool with cool for clean, vibrant secondary colors. Mix warm with cool only when you deliberately want a muted, natural tone — which is exactly how you mix convincing greys and browns for landscapes.
Mix more paint than you think you need. Running out of a mixed color halfway through a wash forces a remix that will never match exactly. Mix a generous puddle, test it on scrap paper, and let it dry — watercolor dries noticeably lighter than it looks when wet.
Understanding color also deepens your appreciation when you visit an art exhibition and study how masters handle color — you will notice the limited palettes behind complex-looking paintings.
Your First Week: A Practical Practice Plan
Here is a simple seven-day plan that builds your watercolor techniques for beginners in the right order:
- Day 1: Flat and graded washes. Fill two full pages with nothing but washes until they are even.
- Day 2: Wet-on-wet skies and abstract color blooms. Focus on reading paper wetness.
- Day 3: Wet-on-dry and glazing — paint a simple sphere, then glaze a second layer over it.
- Day 4: Dry brush and lifting — paint a tree with a dry-brush trunk and lifted highlights.
- Day 5: Mix a labeled color-mixing chart of every palette combination for permanent reference.
- Day 6: Paint a simple landscape combining three techniques: wet-on-wet sky, flat wash foreground, dry-brush details.
- Day 7: Repaint the same landscape. Comparing the two shows exactly how far you have come.
Thirty focused minutes a day builds the brush control and timing instincts watercolor demands. As with learning oil painting techniques as a beginner, consistent practice matters more than marathon sessions.
7 Mistakes Every Watercolor Beginner Makes (and How to Fix Them)
These errors are practically rites of passage. Knowing them in advance saves months of frustration.
- Overworking the painting: Extra brushstrokes on a damp area lift the underlying layer and create muddy “cauliflowers.” Fix: plan in layers, and leave each layer alone until fully dry.
- Using too little water: Paint straight from the tube gives chalky, opaque results. Fix: watercolor should feel juicy — your mixes should have the consistency of tea, not paste.
- Painting on cheap paper: Bad paper makes every technique harder. Fix: invest in decent 140 lb paper before buying more paint.
- Not letting layers dry: Impatience causes unintentional bleeding. Fix: use a hair dryer on the cool setting between layers.
- Starting with the details: Tiny details get ruined by later background washes. Fix: work light to dark, large to small — backgrounds first, details last.
- Dirty water: A murky rinse jar dulls every color you mix. Fix: keep a second jar of clean water for mixing, and change both frequently.
- No value sketch: Jumping straight to color without planning light and dark areas leads to flat paintings. Fix: do a quick pencil thumbnail first, marking darkest darks and lightest lights.
Most mistakes come from impatience, not lack of talent. Watercolor rewards the painter who plans, waits, and trusts the process — the same timeless craftsmanship behind traditional handmade crafts.
Step-by-Step: Paint Your First Watercolor Landscape
This simple mountain-lake scene uses every technique you have learned, and takes about 45 minutes.
Step 1: Prepare and sketch (10 minutes)
Tape your paper to a board on all four sides. Lightly sketch a horizon line one-third of the way down, two simple mountain shapes, and a suggestion of a shoreline. Keep lines faint — heavy pencil shows through watercolor.
Step 2: Wet-on-wet sky (10 minutes)
Pre-wet the sky area with clean water. While it glistens, touch in a graded wash of cerulean blue at the top, fading toward the horizon. Drop in a touch of warm yellow near the horizon for a sunrise glow, and let the colors mingle on their own. Walk away and let it dry completely.
Step 3: Mountains with wet-on-dry (10 minutes)
Mix ultramarine with a touch of burnt sienna for a natural mountain grey-blue. Paint the mountain shapes with confident wet-on-dry strokes. While the paint is still damp, lift a few highlights along the ridgelines — these become sunlit snow or rock edges.
Step 4: Lake and foreground (10 minutes)
Lay a flat wash of blue-grey for the lake, then drag a dry brush horizontally for water texture and add darker strokes for reflections. In the foreground, use dry brush with a yellow-green mix to suggest grass and reeds.
Step 5: Details and finishing touches (5 minutes)
Once everything is bone dry, add a few birds with quick dark strokes, deepen the darkest foreground shadows, and sign your work. Your first real watercolor painting is done — using the same techniques professionals use every day.
Taking Your Watercolors Further
Once the fundamentals feel comfortable, try painting from life instead of photos, experiment with granulating pigments that separate into beautiful textures, or explore loose abstract styles inspired by current gallery trends. Learning basic graphic design principles like composition and color theory also sharpens your painting dramatically, since both disciplines share the same visual language.
Watercolors frame beautifully — hanging your own paintings as bedroom wall art is deeply satisfying, and a gallery wall of your progress pieces makes a wonderful centerpiece for a living room makeover. Some painters even turn the hobby into a small business selling prints, much like artisans who build businesses around handmade jewelry.
Conclusion: Start Today, Not Someday
Watercolor techniques for beginners are not complicated — flat wash, graded wash, wet-on-wet, wet-on-dry, dry brush, and lifting cover nearly everything you will ever paint. The medium looks intimidating only because it is honest: it shows every decision. But that honesty is also what makes it so captivating.
Your first paintings will not be masterpieces, and that is completely fine. Every watercolorist you admire once painted muddy puddles and warped paper. The difference is simple: they kept showing up with a brush in their hand. Tape down a sheet of paper, mix more water than feels comfortable, and paint your first wash today. The water will do half the work — you just have to let it.


