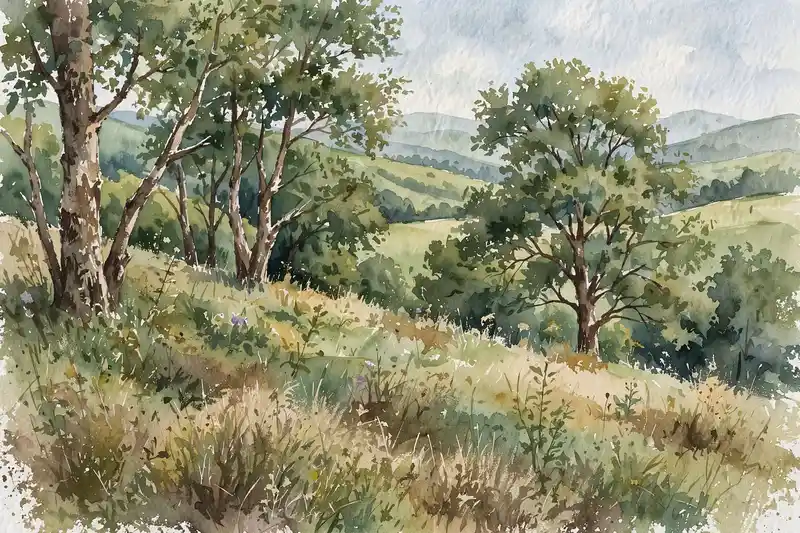
What watercolor dry brush technique Means for Artists
The watercolor dry brush technique uses a brush with very little paint and almost no water, dragged lightly across dry paper so the pigment catches only the raised texture. The result is a broken, sparkling mark that suggests grass, bark, stone, fur, or sparkling water far better than a smooth wash ever could. It is one of watercolor’s most useful finishing techniques, and it adds life to paintings that might otherwise feel flat.
Dry brush works because watercolor paper is not smooth: cold-press and rough papers have hills and valleys, and a dry brush touches only the hills. Those tiny skips of white paper read as light, texture, and air, which is why a dry-brushed tree trunk looks rough and a dry-brushed meadow looks windswept. The paper itself becomes a partner in the painting, not just a surface to cover. A related guide is watercolor techniques for beginners.
Why watercolor dry brush technique Matters
Texture matters because the eye loves variety, and a painting made only of smooth washes can feel monotonous even when its colors are beautiful. Dry brush breaks up large areas, suggests detail without painting every blade of grass, and creates a sense of light sparkling across a surface. Used sparingly, it draws attention to the focal point; used everywhere, it can overwhelm a painting, so restraint is part of the skill.
Dry brush is also a forgiving technique for beginners, since it is applied to dry paper and can be layered gradually. A light pass can be followed by a darker pass, and mistakes can often be softened with a damp brush or covered by a later glaze. It is an ideal way to finish a painting, adding texture and sparkle after the main washes have dried and the composition is already clear. For more on a nearby skill, see color theory for beginners.
Tools and Materials You Will Need
Start with a small, reliable kit rather than buying everything at once. The items below cover most early projects, and you can add specialty supplies later as your interests narrow. This pairs well with botanical illustration for beginners.
- Rough or cold-press watercolor paper, since smooth paper gives little dry brush texture
- Flat or round brushes with stiff bristles that hold their shape when dry
- Watercolor paint in tubes or pans, mixed thickly with very little water
- Paper towels for removing excess paint from the brush before each stroke
- A dry scrap sheet for testing each brushload before it touches the painting
Key Techniques to Practice
Basic dry brush stroke
Load the brush with thick paint, blot most of it off on a towel, then drag the brush lightly and quickly across dry paper. The stroke should skip and break, leaving white paper showing through, and if it paints solidly, the brush is still too wet. You may also enjoy gouache painting for beginners.
Dry brush for grass and foliage
Use the tip and side of a flat brush in quick, upward flicks to suggest grass, leaves, and distant trees. Vary the pressure and direction so the texture feels organic, and layer a few colors rather than painting every mark in one green.
Dry brush for bark and stone
Drag a dry brush horizontally across a tree trunk or rock shape, letting the paper texture create cracks and rough surfaces. Add darker dry marks in shadow areas and lighter marks on the lit side to model the form while keeping the texture. A useful companion guide is mixed media art for beginners.
Dry brush sparkle on water
Flick a nearly dry brush horizontally across a water area, leaving white paper between the strokes to suggest sparkling reflections. A few well-placed sparkles read as bright sunlight on water, while too many can make the surface look busy and confusing.
Step by Step: Your First Project
- Let the painting dry completely, since dry brush only works on dry paper and a damp surface will turn it into a wash.
- Mix paint thickly with very little water, then blot the brush on a towel until it feels almost dry. For a related approach, see sketching for beginners.
- Test each stroke on scrap paper, checking that it breaks and skips rather than painting a solid line.
- Drag the brush lightly across the target area, following the direction of the texture you want to suggest.
- Step back and judge the effect, adding more layers only where texture is needed and leaving smooth areas alone. This connects naturally with colored pencil drawing.
Common Mistakes to Avoid
- Using a brush that is too wet, which produces a normal wash instead of broken dry texture.
- Working on smooth hot-press paper, which has little texture for the brush to skip across. A helpful next read is landscape painting for beginners.
- Overdoing dry brush across the whole painting, which makes the work look scratchy and tiring to view.
- Pressing too hard, which forces paint into the paper valleys and removes the sparkling white skips.
Practical Tips That Make a Difference
- Keep a test sheet beside the painting and check every brushload before using it on the finished work. For broader context, see how to draw faces.
- Use an old or inexpensive brush for dry brush, since the technique can wear bristles faster than normal painting.
- Layer dry brush colors from light to dark, so each new layer adds depth without covering earlier texture.
- Save dry brush for the focal point and a few supporting areas, and leave quiet areas smooth for contrast. A related topic worth exploring is still life drawing for beginners.
Choosing Materials and Subjects
Paper is the most important choice for dry brush work, and rough paper gives the strongest broken texture while cold-press paper gives a finer, more versatile effect. Hot-press paper, which is smooth, is a poor choice for this technique and will frustrate beginners. For brushes, a flat brush with firm bristles is ideal, since it can be dragged on its side for broad texture or used on its edge for fine lines, and older brushes that have lost their point often make excellent dry brush tools. This builds nicely on acrylic painting techniques for beginners.
For subjects, start with a tree trunk, a rocky shoreline, or a grassy field, since each one benefits obviously from broken texture and forgives uneven strokes. A weathered wooden fence is another excellent first subject, because its grain and cracks are naturally suggested by dry marks. Avoid faces and smooth skies for dry brush practice, since those subjects need soft washes and dry texture will make them look rough and unfinished.
A Four-Week Practice Plan for watercolor dry brush technique
A short, regular practice plan will improve your watercolor dry brush technique faster than occasional long sessions, because skills consolidate between sessions and each week builds on the last. Treat the plan as a guide, not a rigid rule, and adjust the pace to fit your schedule and energy.
- Week one: focus on fundamentals. Spend three short sessions on basic exercises for watercolor dry brush technique, keeping each session under an hour and noting what felt easy and what felt difficult in a sketchbook.
- Week two: apply the fundamentals to a simple finished piece using watercolor dry brush technique, working slowly and comparing your result with your reference or your earlier exercises at each stage.
- Week three: try a slightly harder subject or a new material related to watercolor dry brush technique, and deliberately practice the part you found hardest in week one, since targeted practice improves weak areas fastest.
- Week four: complete a small project that combines everything you practiced, share it with a friend or an online art community for feedback, and choose one skill to carry into your next month of practice.
Frequently Asked Questions
What is the difference between dry brush and a normal watercolor wash?
A wash uses a wet brush and plenty of water to create a smooth, even layer of color, while dry brush uses a nearly dry brush on dry paper to create broken, textured marks. The two techniques complement each other, with washes establishing large shapes and dry brush adding surface detail.
Can I use dry brush on hot-press paper?
You can, but the effect will be much weaker, since hot-press paper is smooth and offers little texture for the brush to skip across. Cold-press or rough paper gives far better dry brush results and is the recommended choice for this technique.
How do I know if my brush is dry enough?
Test the brush on scrap paper: a correct dry brush stroke should skip, break, and leave white paper showing through. If the stroke paints a solid, even line, blot the brush again on a towel and test once more before touching the painting.
Can dry brush fix a painting that looks too flat?
Yes, dry brush is an excellent finishing step for flat paintings, because it adds texture, sparkle, and variety to large smooth areas. Apply it selectively to the focal point and supporting textures, and avoid covering the entire painting, which would replace one problem with another.
Final Thoughts
The watercolor dry brush technique is a small skill with a large effect, turning plain washes into textured, sparkling surfaces that feel alive and touchable. Keep your brush nearly dry, trust the paper’s texture, and use the technique where it serves the subject, because a few well-placed dry marks will do more for a painting than a whole page of scratchy overwork ever could. For another angle, see how to sell art online.